

In this tutorial, we'll demonstrate how to use Apostrophe Headless with Nuxt for the frontend and Nginx as a reverse-proxy, as well as optional Docker instructions for Docker users. We'll be creating an online storefront for a restaurant that will allow customers to register and place an order.
In Part 1...
In Part One, we covered the minimum steps to get started with Apostrophe and Nuxt, set our restaurant up with a few dummy menu items. In this section, we'll finish setting up the customer registration process and create an order form so we can start taking orders!
Registering Customers
On http://localhost(or http://localhost:3333 if not using Docker), choose "Register" in the admin bar to create a new user. Populate the email and password fields and save. Now click on the "Login" button and enter the credentials you have just used. A welcome message is displayed on success.
How does this work?
For the registration, in frontend/components/Register.vue, you'll see that the component calls /modules/apostrophe-users/register when submitting the form.
On the backend, this custom route is located in the apostrophe-users module in backend/lib/modules/apostrophe-users/index.js:
self.route('post', 'register', async (req, res) => { ... }
For the login, in frontend/nuxt.config.js, there is a Nuxt plugin for authentication, indicating which route to use for the login.
// frontend/nuxt.config.js
auth: {
  plugins: ['~/plugins/auth.js'],
  rewriteRedirects: true,
  fullPathRedirect: true,
  watchLoggedIn: false,
  strategies: {
    local: {
      endpoints: {
        login: { url: '/api/v1/login', method: 'post', propertyName: 'bearer' },
        logout: { url: '/api/v1/logout', method: 'post' },
        user: false,
      },
    },
  },
},
/api/v1/login is a route automatically created by Apostrophe-Headless
In frontend/components/Login.vue, the component uses the Nuxt auth plugin to trigger the login action.
// frontend/components/Login.vue
const response = await this.$auth.loginWith('local', {
  data: {
    username: this.email,
    password: this.password,
  },
})
Apostrophe replies to this action by checking the password with its saved hash and sends back a bearer token.
In backend/lib/modules/apostrophe-users/index.js, pay attention to the other custom routes.
self.route('get', 'user', async (req, res) => { ... })
The following is used during the login process in frontend/components/Login.vue:
const aposUser = await this.$axios.$get('/modules/apostrophe-users/user', {})
This backend custom route /modules/apostrophe-users/user receives a request with a bearer token (generated when the user sends his credentials). Apostrophe recognizes it as a legitimate request because it compares this token to the tokens kept in its database. Then, it sends back the _id of the current user. This way, later, when the user will order, it will be identified by its ID.
Creating an Order
Create a new folder under backend/lib/modules and name it orders. Create an index.js file in it with this content:
// backend/lib/modules
module.exports = {
  extend: 'apostrophe-pieces',
  name: 'order',
  alias: 'order',
  restApi: true,
  addFields: [
    {
      name: 'date',
      type: 'date',
      required: true,
    },
    {
      name: '_menuItems',
      type: 'joinByArray',
      withType: 'menu-item',
      required: true,
      relationship: [
        {
          name: 'quantity',
          label: 'Quantity',
          type: 'integer',
        }
      ],
    },
    {
      name: '_customer',
      type: 'joinByOne',
      withType: 'apostrophe-user',
      required: true,
    },
  ],
  arrangeFields: [
    {
      name: 'basics',
      label: 'Basics',
      fields: ['title', 'date', '_menuItems', '_customer', 'published'],
    },
  ],
  removeFields: ['slug', 'tags'],
}
In this module, there are 2 joins: one for menu items (_menuItems) and one for the customer who ordered them (_customer). You can add multiple dishes to order because it is a joinByArray but only one customer through joinByOne.
Again, this module is RESTified because of the restApi parameter.
Activate this module by adding it to backend/app.js:
// backend/app.js
module.exports = require('apostrophe')({
  ...
  modules: {
    ...
    'menu-items': {},
    orders: {},
  }
})
Now, when http://localhost/cms (or http://localhost:1337/cms if not using Docker) is reloaded, there is a new "Orders" item in the admin bar:

When a customer creates an order, their apostrophe-user account will be used to authenticate the call in the backend. The users are automatically part of the customer users group (see the register route in backend/lib/modules/apostrophe-users/index.js we mentioned earlier). Currently, this group has no editing permissions.
Add the edit-order permission to this group in backend/lib/modules/apostrophe-users/index.js:
// backend/lib/modules/apostrophe-users/index.js
module.exports = {
  groups: [
    {
      title: 'customer',
      permissions: ['edit-order'],
    },
    ...
  ]
  ...
}
Apostrophe has default permissions. When a admin-name-of-the-module permission is added to a group of users, they can manage all documents relative to this module. However, the edit-name-of-the-module permission restricts modifications to the documents they created individually. This is exactly what we need. In our case, a customer will only manage its own orders.
Let's create a Vue component to add orders in the frontend.
Start by creating a state order and a mutation in frontend/store/index.js:
// frontend/store/index.js
import Vue from 'vue'

export const state = () => ({
  order: {},
})


export const mutations = {
  addToOrder(state, payload) {
    Vue.set(state.order, payload.slug, {
      ...payload,
      quantity: state.order[payload.slug] ? state.order[payload.slug].quantity + 1 : 1,
    })
  },
}
Here, we declare an empty order, and each time addToOrder is called it adds a new item to the order. For more details on how this works, consult the Vuex documentation.
Import the mutation in frontend/pages/index.vue and add it to the methods used in this component. Do not forget to add the LoginModal component too:
// frontend/pages/index.vue
<script>
  import { mapMutations } from 'vuex'
  import LoginModal from '~/components/LoginModal'

  export default {
    components: {
      LoginModal,
    },

    async asyncData({ $axios }) {
      ...
    },

    methods: {
      ...mapMutations(['addToOrder']),
      add(itel) {
        this.addToOrder(item)
      },
    },
  }
</script>
In the same file, add 2 elements to the template part, under the img tag:
<!-- frontend/pages/index.vue -->
<v-btn v-if="$store.state.auth && $store.state.auth.loggedIn" color="primary" class="white-text" @click="add(item)">Order</v-btn>
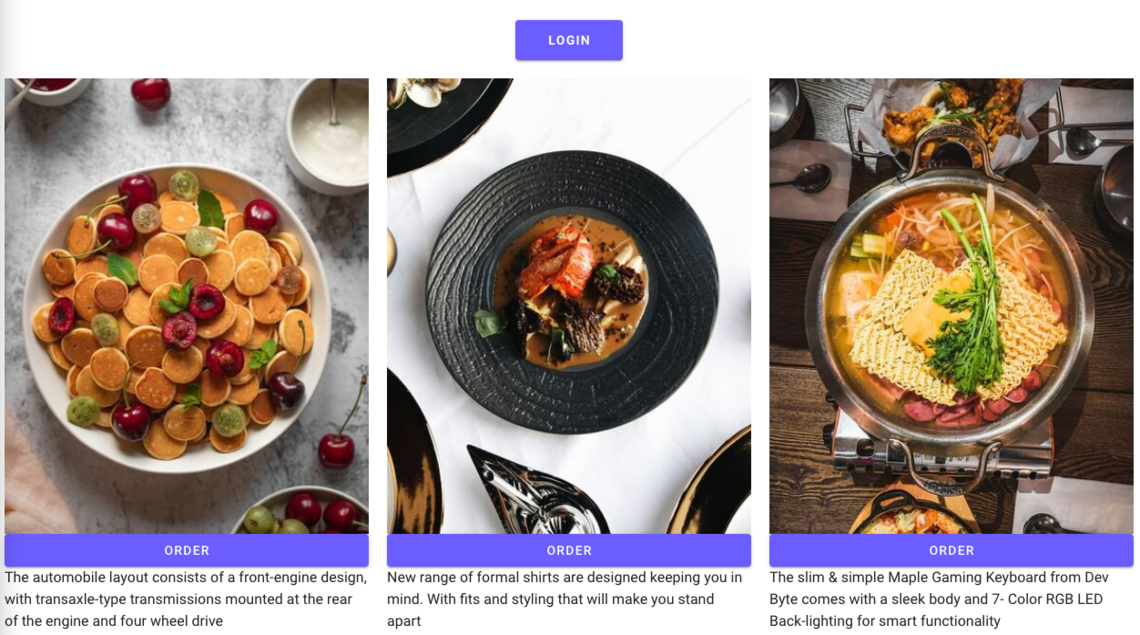
<LoginModal v-else classes="primary white-text" :block="true" :redirect-to="$route.fullPath" label="Order" />The template should look like this:
<!-- frontend/pages/index.vue -->
<template>
  <section class="home">
    <!-- eslint-disable-next-line vue/no-v-html -->
    <div v-html="content"></div>
    <div class="home-menu-items">
      <div v-for="item in menuItems" :key="item._id" class="home-menu-items__item">
        <img :src="item.picture._urls['one-third']" />
        <v-btn
          v-if="$store.state.auth && $store.state.auth.loggedIn"
          color="primary"
          class="white-text"
          @click="add(item)"
        >
          Order
        </v-btn>
        <LoginModal v-else classes="primary white-text" :block="true" :redirect-to="$route.fullPath" label="Order" />
        <span>{{ item.description }}</span>
      </div>
    </div>
  </section>
</template>
When logged in, the user will see an "Order" button under every menu item on the homepage. This button triggers the Vuex mutation addToOrder.
That is great. But the customer needs to see how many menu items they added to their order. Let's add a badge in the top bar to display a counter. For this, we will use the wonderful Vue components library added to the project: Vuetify. We already used a lot of Vuetify components in our frontend code. In fact, every v-xxx component is from Vuetify (v-toolbar, v-list, v-btn, ...). For badges, here is the documentation: https://vuetifyjs.com/en/components/badges
Add a Vuetify badge next to "My Order", in the top bar. Go to frontend/components/Nav.vue, look for the words "My Order" in the template and replace the line by the following:
<!-- frontend/components/Nav.vue -->
<v-btn text to="/order" nuxt>
  <v-badge color="green" :content="counter">My Order</v-badge>
</v-btn>
Then, modify the computed part in <script> to match:
// frontend/components/Nav.vue
computed: {
  ...mapState(['auth', 'order']),
  counter() {
    if (!Object.values(this.order).length) {
      return '0'
    }
    return Object.values(this.order).reduce((acc, cur) => (acc += cur.quantity), 0)
  },
},
Finally, add a scss rule to <style> to render the badge correctly:
// frontend/components/Nav.vue
.v-badge__badge {
  display: flex;
  align-items: center;
  justify-content: center;
  padding: 0;
}
The entire Nav.vue component should look like this:
// frontend/components/Nav.vue
<template>
  <v-app-bar app hide-on-scroll flat>
    <!-- small mobile screens only -->
    <template v-if="$vuetify.breakpoint.xsOnly">
      <v-menu offset-y>
        <template #activator="{ on }">
          <v-app-bar-nav-icon v-on="on" />
        </template>
        <v-list>
          <v-list-item>
            <v-btn class="v-btn--mobile v-btn--home" text to="/" nuxt block> Home </v-btn>
          </v-list-item>
        </v-list>
      </v-menu>
    </template>

    <!-- large smartphones, tablets and desktop view -->
    <template v-else>
      <v-toolbar-items>
        <v-btn class="v-btn--home" text to="/" nuxt> Home </v-btn>
      </v-toolbar-items>
    </template>

    <v-spacer />

    <v-toolbar-items>
      <template v-if="auth.loggedIn">
        <v-btn text to="/order" nuxt>
          <v-badge color="green" :content="counter">My Order</v-badge>
        </v-btn>
        <v-btn text @click="logout">Logout</v-btn>
      </template>
      <template v-else>
        <RegisterModal />
        <LoginModal :redirect-to="$route.fullPath" />
      </template>
    </v-toolbar-items>
  </v-app-bar>
</template>

<script>
import { mapState } from 'vuex'
import LoginModal from '~/components/LoginModal'
import RegisterModal from '~/components/RegisterModal'

export default {
  components: {
    LoginModal,
    RegisterModal,
  },

  computed: {
    ...mapState(['auth', 'order']),
    counter() {
      if (!Object.values(this.order).length) {
        return '0'
      }
      return Object.values(this.order).reduce((acc, cur) => (acc += cur.quantity), 0)
    },
  },

  methods: {
    logout() {
      this.$auth.logout()
    },
  },
}
</script>

<style lang="scss">
.v-btn--mobile:hover {
  height: 100%;
}
.v-btn--home::before {
  opacity: 0 !important;
}
.v-toolbar__content {
  padding: 0 !important;
}
.v-badge__badge {
  display: flex;
  align-items: center;
  justify-content: center;
  padding: 0;
}
</style>
You should see the badge now (be sure to be logged in as the registered customer we created in the front end earlier).
As the Vuex state is updated through the mutation addToOrder, components that listen to the order state are aware of the change. This updates the badge next to "My Order", in the top bar. Each time a dish is added to the order, the badge number increases, indicating how many items the user has in the cart.
That would be nice to have the list of dishes we put in this order. For that, create a page by adding order.vue file in frontend/pages. Nuxt is smart enough to understand it has to update its internal router and add a route when a file is added into pages. By adding an order Vue component, it will automatically create the /order route.
Copy the code below and paste it into order.vue:
// frontend/pages/order.vue
<template>
  <v-card>
    <v-list two-line>
      <v-list-item-group multiple>
        <template v-for="(item, index) in Object.values(order)">
          <v-list-item :key="item.title">
            <v-list-item-content>
              <v-list-item-title v-text="item.title"></v-list-item-title>

              <v-list-item-subtitle class="text--primary" v-text="item.description"></v-list-item-subtitle>
            </v-list-item-content>

            <div class="order-list">
              <v-text-field
                outlined
                class="order-quantity"
                :value="item.quantity"
                color="primary"
                required
                @input="changeQuantity($event, item)"
              />
              <div class="order-actions">
                <v-btn icon @click="add(item)"><v-icon>add</v-icon></v-btn>
                <v-btn icon @click="remove(item)"><v-icon>remove</v-icon></v-btn>
              </div>
            </div>
          </v-list-item>

          <v-divider v-if="index < Object.values(order).length - 1" :key="index"></v-divider>
        </template>
      </v-list-item-group>
    </v-list>
    <v-card-actions>
      <v-btn v-if="Object.values(order).length" block color="primary" :loading="loading" @click="proceed">
        Proceed
      </v-btn>
    </v-card-actions>
  </v-card>
</template>

<script>
import { mapActions, mapMutations, mapState } from 'vuex'

export default {
  data() {
    return {
      loading: false,
    }
  },

  head: {
    titleTemplate: '%s - My Order',
  },

  computed: {
    ...mapState(['auth', 'order']),
  },

  methods: {
    ...mapActions('snackbar', ['displaySnack']),
    ...mapMutations(['addToOrder', 'removeFromOrder', 'updateQuantity', 'emptyOrder']),
    changeQuantity(quantity, item) {
      this.updateQuantity({ ...item, quantity })
    },
    add(item) {
      this.addToOrder(item)
    },
    remove(item) {
      this.removeFromOrder(item)
    },
    async proceed() {
      this.loading = true
      try {
        const date = Date.now()
        const arr = Object.values(this.order)
        await this.$axios.post('/api/v1/orders', {
          title: `${this.auth.user.email} - ${date}`,
          customerId: this.auth.user._id,
          menuItemsIds: arr.map(item => item._id),
          menuItemsRelationships: arr.reduce((acc, cur) => ({ ...acc, [cur._id]: { quantity: cur.quantity } }), {}),
          date,
        })

        this.loading = false
        this.emptyOrder()
        this.$router.push('/')
        this.displaySnack({ message: 'Order received. It will be ready soon.' })
      } catch (error) {
        this.loading = false
        this.displaySnack({ message: 'Something went wrong', color: 'error' })
      }
    },
  },
}
</script>

<style lang="scss" scoped>
.order-list {
  display: flex;
  position: relative;
  top: 20px;
}

.order-quantity {
  width: 50px;
  margin-right: 40px;
}

.order-actions {
  display: flex;
  flex-direction: column;
}

.v-card__actions {
  position: absolute;
  bottom: 0;
  width: 100%;
  padding: 0;

  .v-btn {
    padding: 0;
  }
}
</style>
We used three additional mutations in this component. Add them to frontend/store/index.js:
// frontend/store/index.js
export const mutations = {
  addToOrder(state, payload) { ... },

  updateQuantity(state, payload) {
    state.order[payload.slug].quantity = payload.quantity
  },

  removeFromOrder(state, payload) {
    if (state.order[payload.slug].quantity > 0) {
      state.order[payload.slug].quantity--
    }
  },

  emptyOrder(state) {
    state.order = {}
  },
}
The order page is ready. Order food on the homepage, click multiple times on an "Order" button to add the same dish several times. Now, click on "My Order" in the top bar, you are being redirected to /order and should see a page similar to this:
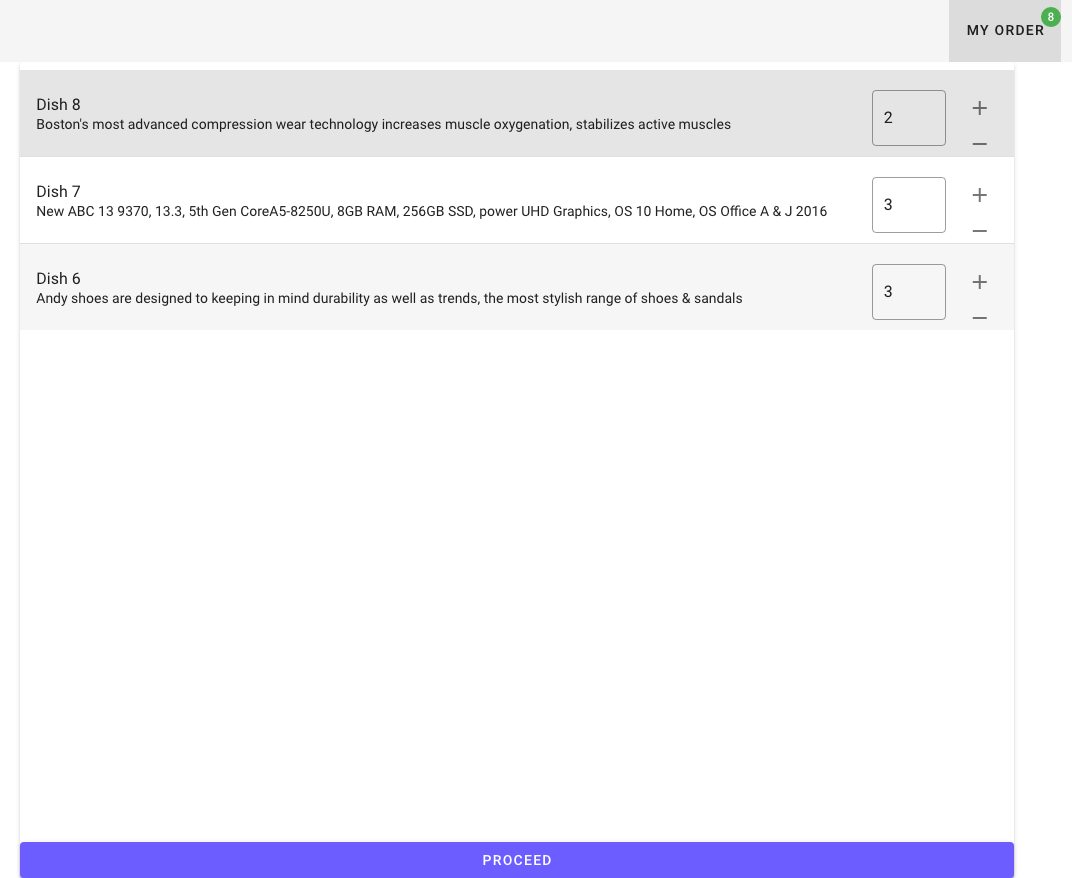
You can adjust the quantities here as well.
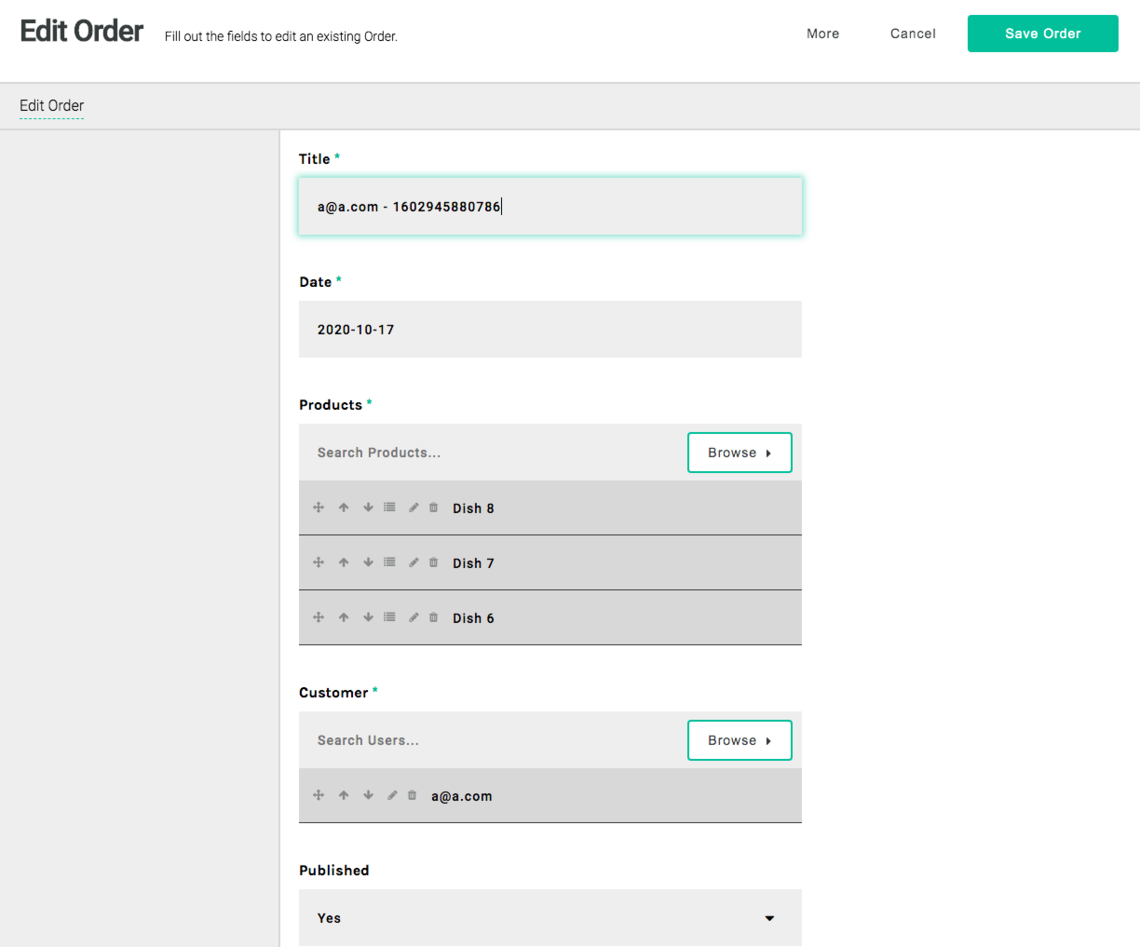
Choosing "Proceed" will generate a POST request and contact the backend REST API. Apostrophe will handle that and create the corresponding order. You can go to the backend and check that by clicking on the "Orders" button in the Apostrophe admin bar on http://localhost/cms (or http://localhost:1337/cms).
You can even click on the "Relationship" button on a joined menu item, and see the right quantity was sent.
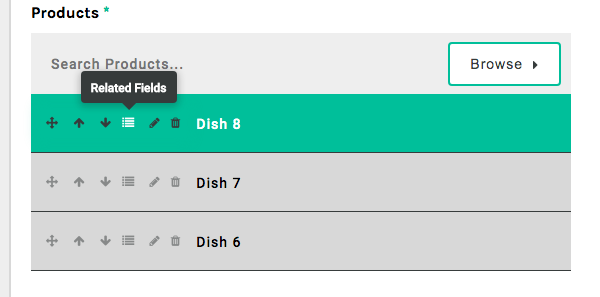
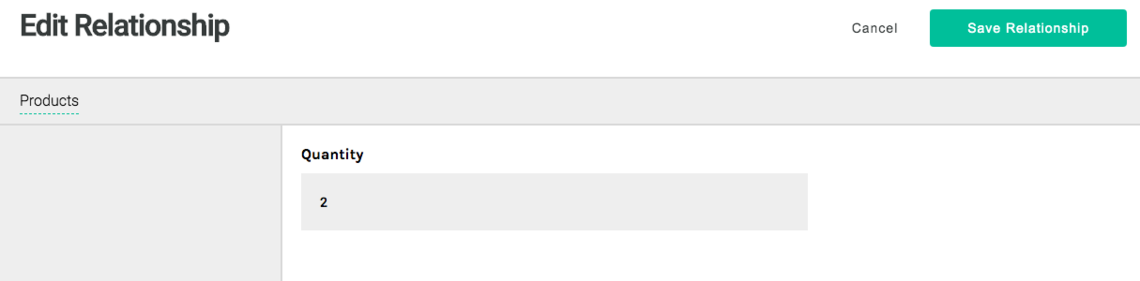
This works thanks to the "relationship" field in Apostrophe. In the frontend call we have:
menuItemsRelationships: arr.reduce((acc, cur) => ({ ... }), {})indicating to add an object menuItemsRelationships to the new order. Apostrophe understands this as a property of the joined field _menuItems as specified in the backend/order/index.js schema:
// backend/order/index.js
{
  name: '_menuItems',
  type: 'joinByArray',
  required: true,
  relationship: [
    {
      name: 'quantity',
      label: 'Quantity',
      type: 'integer',
    }
  ],
},
Success! The restaurant has all it needs to handle orders from online customers. Our goal with this tutorial was to demonstrate how nicely Apostrophe can interact with front-end frameworks such as Vue/Nuxt in a Docker environment. We'll stop here to keep it simple. You can access the project files and full tutorial on Github.
We could have added email notifications, online payments, and many options available in the numerous plugins available for Apostrophe. You can find more by browsing the online documentation, exploring plugins to extend our open-source CMS, or by joining our community channels.