
People who are interested in Apostrophe will often ask about how it plays with e-commerce solutions. The short answer is that it works well with a variety of approaches to e-commerce without leaving the website for that part of a visitor's journey. You can have the developer experience, editor experience, and tech stack of Apostrophe with equally flexible options for adding sales functionality. One such option is the drop-in e-commerce solution, Snipcart.
Note: This post discusses using Apostrophe 3, which is still in the alpha stage at the moment. The features discussed here are not likely to change, but we will update this post with corrected information if they do before the full production release.
This is also a developer tutorial, so this will involve working in your computer's command line terminal.
Apostrophe can integrate into e-commerce in several ways. For example, you could use Apostrophe's REST APIs to get landing page content, blog posts, and product details into a front-end application that uses a third-party service for the shopping cart. You could also build a front-end application that runs on top of Apostrophe and accesses a third-party e-commerce API. Both could be great options, but let's start simple.
Snipcart is an impressive e-commerce service that is so simple to implement that it doesn't seem real at first. Fortunately, it is real and I'll walk you through the necessary steps to set up shop in your Apostrophe website.
Set up a Snipcart account
Of course, the first step is to set up a Snipcart account. Go to https://app.snipcart.com/register to do that. As it says there (at the time of writing), "Snipcart is forever free in Test mode." Perfect. Once you have an account and are logged in, there isn't really a lot you have to do here (this is the unbelievable part).
They provide you with a checklist to get started, but the important things for our demo will be:
- Getting the store Javascript and style URLs
- Configuring your domain for testing.
Neither will be relevant until we have an Apostrophe site running, so we'll come back to this.
Set up the Apostrophe demo
If you are following along, set up your local dev environment to work with Apostrophe. We're going to use Apostrophe 3, currently in alpha stage, so make note of the new minimum requirements.
Download demo starter code at https://github.com/abea/demo-apos-snipcart/archive/start.zip. We want to stay focused on integrating Snipcart, so that will start us off with some initial page modules, templates, and styles so we can get right to the good stuff.
To finish getting ready, go into the project directory and install dependencies: cd /your/project/directory/demo-apos-snipcart && npm install
Create your first admin user and provide a password when prompted (this is all local and fake, so it can be simple): node app @apostrophecms/user:add myuser admin
This demo project is set up with a simple webpack build, nodemon and live reload, so it will rebuild and refresh the page as we work. Open the project in your code editor of choice, then start up the project in dev mode with npm run dev.
Once that's done building, you can go to the site running in your browser at http://localhost:3000. Visit http://localhost:3000/login and enter the myuser username and password you entered previously.
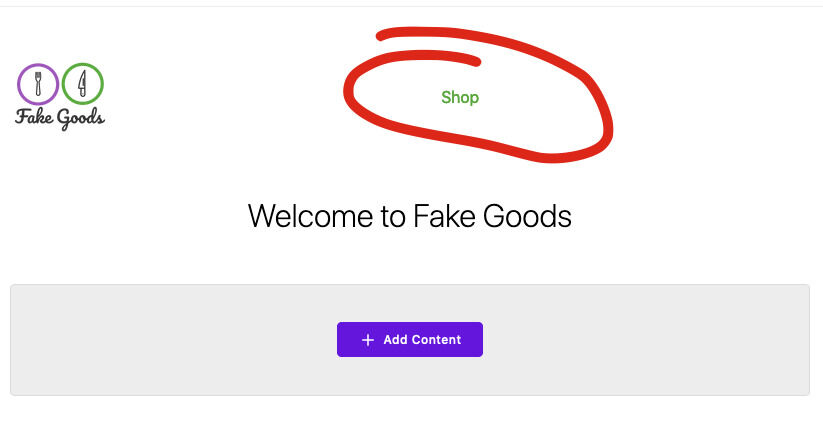
You'll be looking at the home page with nothing on it other than a headline welcoming you to the "Fake Goods" store and a "Store" link that goes nowhere.
Add a product piece type
In order to create products, we'll need to set up a product piece type (aka a "content type") with data fields that Snipcart will need. Open the project file, modules/product/index.js. Right now it's an empty module.exports = {} declaration.
Let's add the basic structure for this piece type:
// In modules/product/index.js
module.exports = {
  // All piece types need to extend '@apostrophecms/piece-type'
  // or another piece that extends that core module.
  extend: '@apostrophecms/piece-type',
  fields: {
    // We'll add our fields here.
    add: {},
    // And group them in the user interface here.
    group: {}
  }
};
Snipcart will expect some basic product properties, as described in their documentation:
- Name
- ID
- Price
- URL
There are some other basic properties that they are ready to accept, and we'll make available:
- Description
- Image
Replace that add: {}, line with:
add: {
  price: {
    type: 'float',
    required: true
  },
  sku: {
    label: 'SKU ID',
    help: 'Unique ID for identifying products',
    type: 'string',
    required: true
  },
  description: {
    label: 'Description',
    type: 'string',
    textarea: true,
    max: 250
  },
  photo: {
    label: 'Photo',
    type: 'area',
    options: {
      widgets: {
        '@apostrophecms/image': {}
      },
      max: 1
    }
  }
},
We are adding a required price field (with type: 'float' to allow decimals, as opposed to 'integer'), a required SKU field (a common sales ID), and optional description (limited to 250 characters) and photo fields.
Next, let's arrange the fields in the UI using the group option. The full field configuration will look like:
module.exports = {
  extend: '@apostrophecms/piece-type',
  fields: {
    add: {
      price: {
        type: 'float',
        required: true
      },
      sku: {
        label: 'SKU ID',
        help: 'Unique ID for identifying products',
        type: 'string',
        required: true
      },
      description: {
        label: 'Description',
        type: 'string',
        textarea: true,
        max: 250
      },
      photo: {
        label: 'Photo',
        type: 'area',
        options: {
          widgets: {
            '@apostrophecms/image': {}
          },
          max: 1
        }
      }
    },
    group: {
      basics: {
        label: 'Basics',
        fields: [
          'title',
          'price',
          'description',
          'photo',
          'sku',
          'visibility'
        ]
      }
    }
  }
};
We need to tell the Apostrophe application that this module exists. In the app.js file, look for the comment: // ADD PRODUCT MODULES BELOW ⤵️. Right below that, add product: {},.
require('apostrophe')({
  modules: {
    // ...

    // ADD PRODUCT MODULES BELOW ⤵️
    product: {},

    //...
  }
});
Once Apostrophe has restarted and refreshed the page, you should see "Products" in the admin menu at the top. Click that to open the products manager, add your first product, and save.
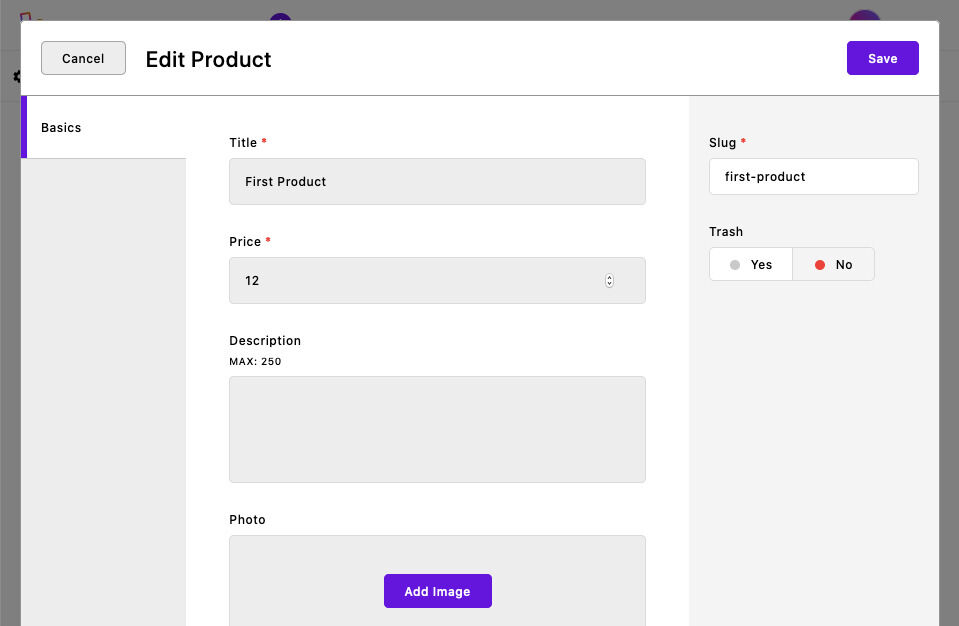
But wait... the "SKU" field is simply a string field. IDs should not have any spaces in them, but there's nothing stopping me from doing that here. Also, I might want to have Apostrophe create a unique ID for me so I don't have to come up with random ID values myself. That's easy enough with an event handler in the product module.
Our project already installed the cuid utility, which generates unique IDs. Let's require that at the top of the file.
const cuid = require('cuid');

module.exports = {
  // ...
};
Then add a handlers section to the module and an empty handler for the beforeSave event. As it suggests, this event fires on the server right before the product is saved.
const cuid = require('cuid');

module.exports = {
  // ...
  fields: {
    // ...
  },
  handlers(self, options) {
    return {
      beforeSave: {
        setSku(req, piece) {
        }
      }
    };
  }
};
This setSku function doesn't do anything yet, but we can see it accepts the req object and the piece object that you're about to save. We can examine and manipulate that piece object here as we need.
We can start with a simple check for a sku property and set it with cuid if missing. We'll also trim an existing string and replace any spaces with a dash.
const cuid = require('cuid');

module.exports = {
  // ...
  fields: {
    // ...
  },
  handlers(self, options) {
    return {
      beforeSave: {
        setSku(req, piece) {
          if (!piece.sku) {
            piece.sku = cuid();
          } else {
            piece.sku.trim();
            piece.sku.replace(/\s/g, '-');
          }
        }
      }
    };
  }
};
Great! If it's ever deleted or otherwise missing Apostrophe will generate a new SKU ID and any spaces will be converted to dashes. You can now remove the required: true property from the sku field above.
Note: This isn't really a great way to handle e-commerce product IDs. And it doesn't ensure unique IDs across products. The important thing for this demo is that the beforeSave handler could be a great place to do your more thorough checks, including calls to the database to check for duplicate IDs.
Now we have at least one product and we can add more with unique IDs, but we can't see it on the page or buy it.
Displaying products and adding to the cart
If you're following along on your machine, you have probably noticed the "Shop" link that doesn't go anywhere. Let's fix that.
The shop will be a "pieces index page" for our products. In the starter code you downloaded this module is mostly all ready for you at modules/product-page. In modules/product-page/index.js you can see that it extends the core '@apostrophecms/piece-page-type' module and has a couple of labels defined.
Just as we did with the product piece type, we'll need to tell app.js that this module exists and should be included at start-up. In app.js, right below where you added the product module, add 'product-page': {},:
require('apostrophe')({
  modules: {
  // ...

    // ADD PRODUCT MODULES BELOW ⤵️
    product: {},
    'product-page': {}
  // ...
  }
});
We'll also want to add a store page to the database. We could make this page type available to add at-will, but in this case I only want one store page and I know that it should be at the /store URL path. I can use the "parked pages" option to have Apostrophe create that page for me and make sure it never disappears.
In modules/@apostrophecms/page/index.js, we'll uncomment some code I provided for this:
module.exports = {
  options: {
    types: [
      {
        name: 'default-page',
        label: 'Default'
      },
      {
        name: '@apostrophecms/home-page',
        label: 'Home'
      }
    ],
    park: [
      // Uncomment below to add a parked shop page. ⤵️
      // {
      //   type: 'product-page',
      //   title: 'Shop',
      //   slug: '/shop',
      //   published: true,
      //   parkedId: 'shopPage'
      // }
    ]
  }
};
That's defining a page with slug /shop, title "Shop," and the type product-page. It's set to be published and given a parkedId. That last configuration is not required, but can make it easier to move this page later if we would want to do so.
Once you uncomment that block, save, and the app restarts, the http://localhost:3000/shop should show you that first product that you added. Add a few more with images if you like so this starts looking like a reasonable store page!
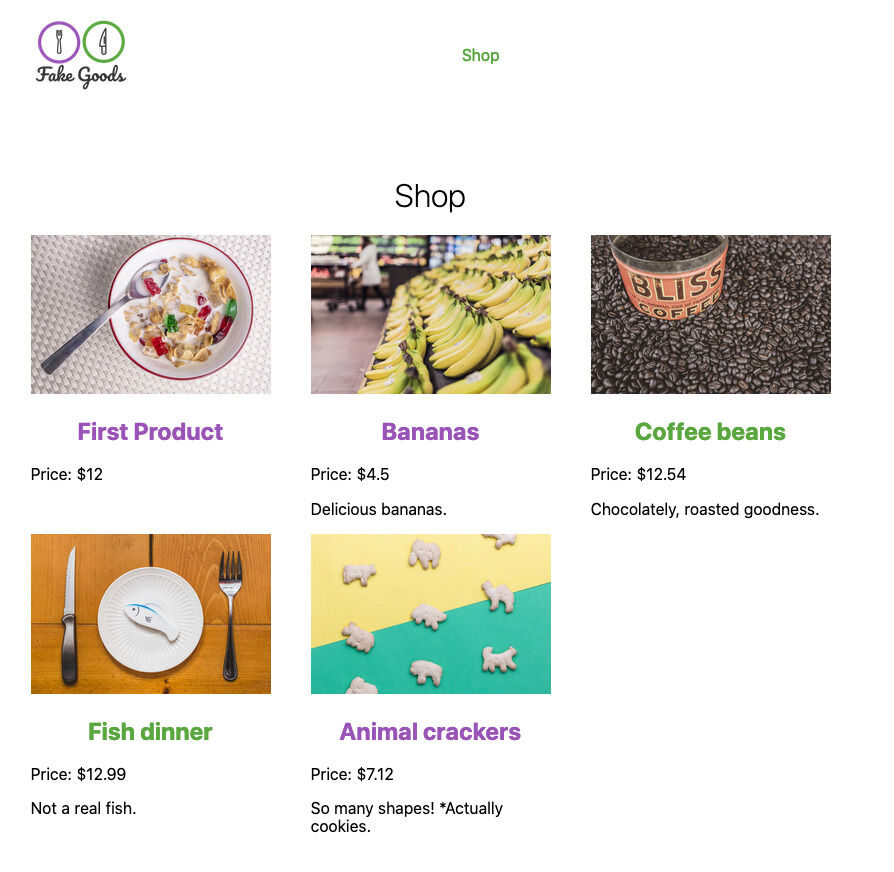
That's really all we need to do for configuration, so we can get onto updating the templates. First, the index page. As shown in the image above, we don't have buy buttons, so we'll need to add those.
Our index page template (modules/product-page/views/index.html) extends the main layout.html template in standard Nunjucks fashion. The specifics of this page will be injected into the main block.
<!-- Loop over each product -->
{% for product in data.pieces %}
  <div class="fg-products__item">
    <!-- Get the image to display -->
    {% set image = apos.image.first(product.photo) %}
    {% set imgUrl = apos.attachment.url(image, { size: 'one-third' }) %}
    {% if imgUrl %}
      <img
        class="fg-products__thumbnail"
        src="{{ imgUrl }}" alt="{{ product.photo.items[0].alt or '' }}"
      />
    {% endif %}
    <h2>
      <a href="{{ product._url }}">{{ product.title }}</a>
    </h2>
    <p>
      Price: ${{ product.price }}
    </p>
    {% if product.description %}
      <p>
        {{ product.description }}
      </p>
    {% endif %}
    <!-- Swap in the Snipcart button here. -->
  </div>
{% endfor %}
We're displaying item information and linking to an individual product page, but no button yet. This is where things get real with Snipcart... Here's what we'll add in place of the comment near the end there:
<button
  class="snipcart-add-item fg-button"
  data-item-id="{{ product.sku }}"
  data-item-name="{{ product.title }}"
  data-item-price="{{ product.price }}"
  data-item-url="{{ product._url }}"
  data-item-description="{{ product.description or '' }}"
  data-item-image="{{ imgUrl }}"
>Add to Cart</button>
What are we doing here? This is a button element with a class and several data attributes that Snipcart will use to identify product information. Snipcart will look for the snipcart-add-item class to add its click event listener. Then each data attribute is a piece of information we're providing:
data-item-id: The unique SKU ID for each product.data-item-name: The product name.data-item-price: The product price.data-item-url: The URL for the product. This is important, as Snipcart will use this URL to confirm product info during check out.data-item-descriptionanddata-item-image: A description and image URL for Snipcart to use. These could certainly be different from what we're displaying on the page if we wanted to do that.- The
fg-buttonis simply for our project styles, so we can ignore that bit.
You should have this button at the end of the product div:
{% for product in data.pieces %}
  <div class="fg-products__item">
    ...
    <button
      class="snipcart-add-item fg-button"
      data-item-id="{{ product.sku }}"
      data-item-name="{{ product.title }}"
      data-item-price="{{ product.price }}"
      data-item-url="{{ product._url }}"
      data-item-description="{{ product.description or '' }}"
      data-item-image="{{ imgUrl }}"
    >Add to Cart</button>
  </div>
{% endfor %}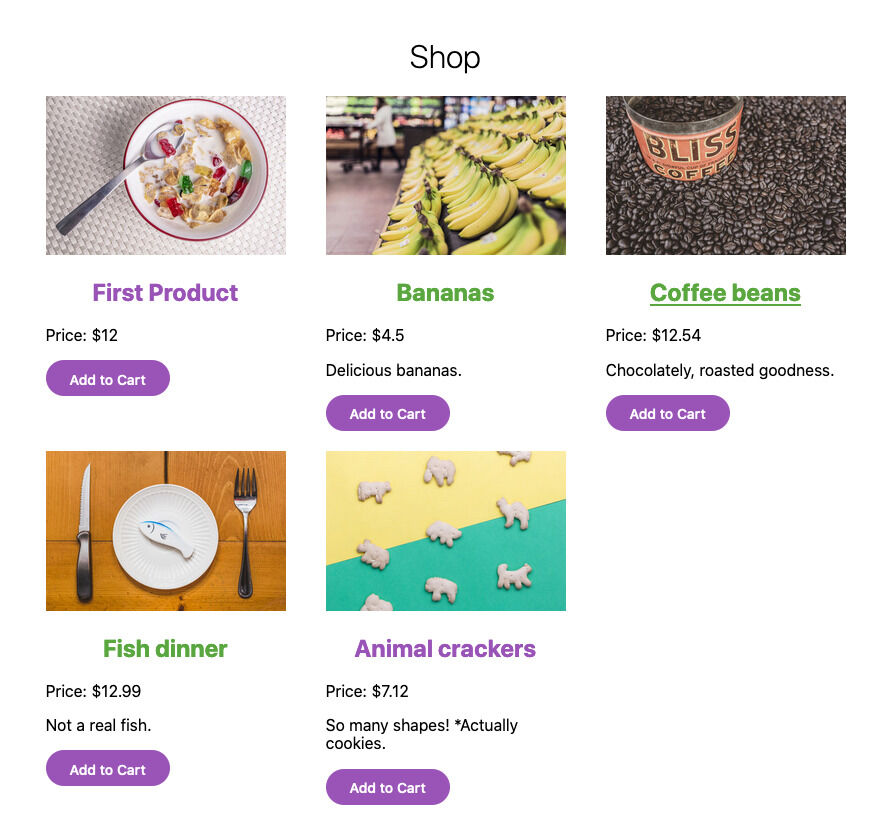
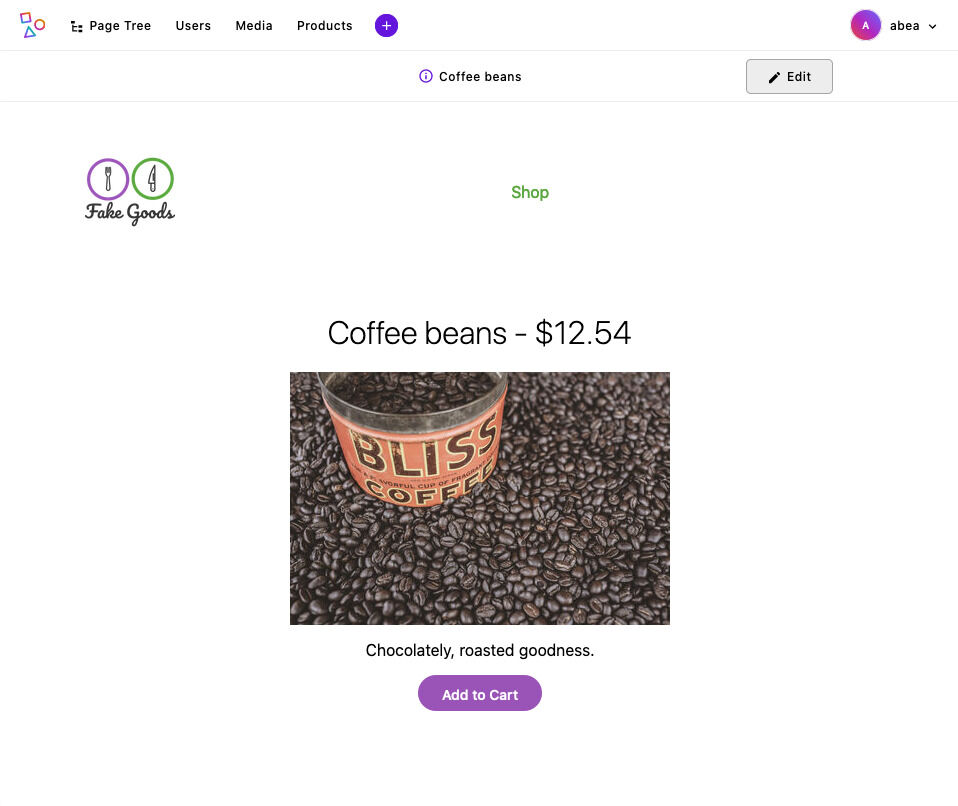
Jump over to modules/product-page/views/show.html for the individual product page template. You'll see another comment, <!-- Swap in the Snipcart button here. -->. We can drop in the exact same button code, ending up with:
<!-- In modules/product-page/views/show.html -->
{% extends "layout.html" %}
{% set product = data.piece %}

{% block main %}
  <section class="fg-product-page">
    <header>
      <h1>{{ product.title }} - ${{ product.price }}</h1>
    </header>
    {% set image = apos.image.first(product.photo) %}
    {% set imgUrl = apos.attachment.url(image, { size: 'one-third' }) %}
    {% if imgUrl %}
      <img
        class="fg-products__thumbnail"
        src="{{ imgUrl }}" alt="{{ product.photo.items[0].alt or '' }}"
      />
    {% endif %}
    {% if product.description %}
    <p>
      {{ product.description }}
    </p>
    <button
      class="snipcart-add-item fg-button"
      data-item-id="{{ product.sku }}"
      data-item-name="{{ product.title }}"
      data-item-price="{{ product.price }}"
      data-item-url="{{ product._url }}"
      data-item-description="{{ product.description or '' }}"
      data-item-image="{{ imgUrl }}"
    >Add to Cart</button>
    {% endif %}
  </section>
{% endblock %}
Click a product link in the listing and you should see a page looking like this:
Activate Snipcart!
We have great, fancy buttons. We have a product listing. We have individual product pages. The last step is... activate the Snipcart shopping cart and check out! If it seems weird that such major functionality is part of the last wrap-up stage, you're not alone. But that's the beauty of Snipcart. A CMS, such as Apostrophe, can let you create and manage products, then Snipcart will simply be ready to take it from there.
Go back to your Snipcart account. In the Account menu, find API Keys. That should provide code that looks something like:
<link rel="stylesheet" href="https://cdn.snipcart.com/themes/v3.0.26/default/snipcart.css" />
<script async src="https://cdn.snipcart.com/themes/v3.0.26/default/snipcart.js"></script>
<div id="snipcart" data-api-key="YOUR_API_KEY" hidden></div>
This is a Snipcart stylesheet, client-side JS, and a placeholder div with your API key that Snipcart will use. Open views/layout.html in your code editor, and copy that code snippet.
The extraBody template block near the end of the file is one that Apostrophe makes available by default to put code right before the closing </body> tag. Paste in your Snipcart code, to get:
{% block extraBody %}
  <link rel="stylesheet" href="https://cdn.snipcart.com/themes/v3.0.26/default/snipcart.css" />
  <script async src="https://cdn.snipcart.com/themes/v3.0.26/default/snipcart.js"></script>
  <div id="snipcart" data-api-key="YOUR_API_KEY" hidden></div>
{% endblock %}
Our very last step is to add a shopping cart button in the main site navigation. Still in the views/layout.html file, in the beforeMain template block, see the comment, <!-- Swap in the Snipcart checkout code here. -->. There's another special button to add from Snipcart:
<button class="snipcart-checkout fg-button">
  Check out (<span class="snipcart-total-price">$0.00</span>)
</button>
Similar to the product buttons, the snipcart-checkout class identifies this as the button to complete your shopping. The snipcart-total-price class identifies that tag so Snipcart can replace the value inside with the actual shopping cart total.
Once the app restarts, you're ready to test and... ship? Probably not, but certainly ready to test.
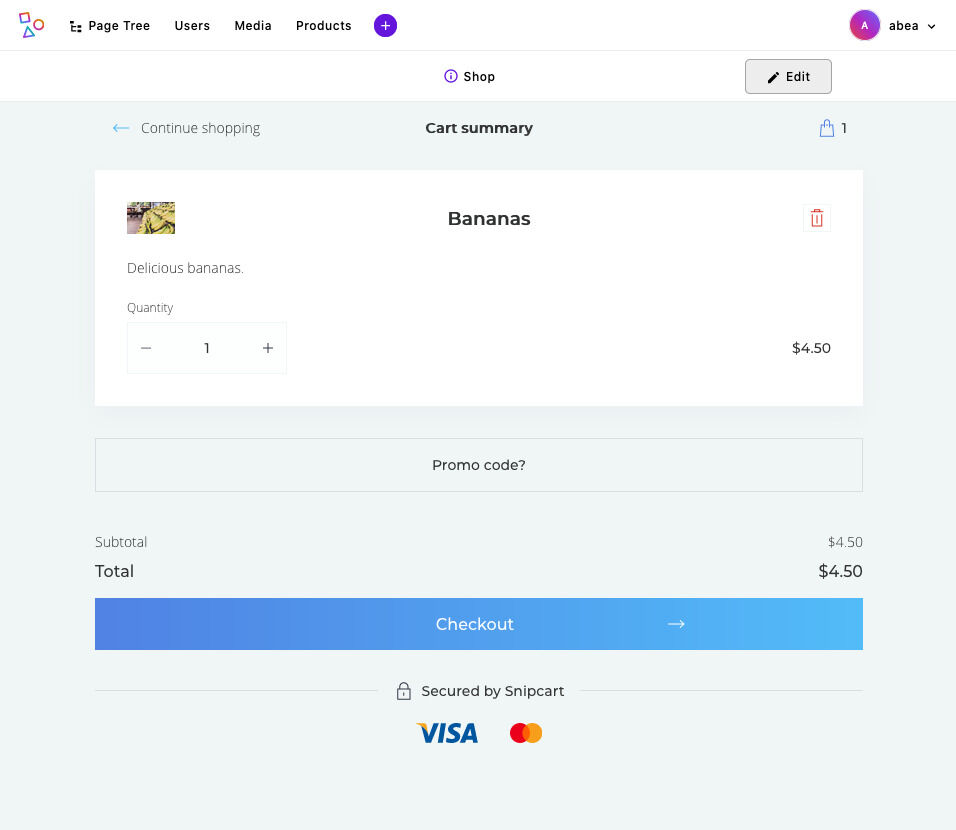
Test a purchase
You can go right ahead adding things to the cart and clicking the checkout button to view the full list of items you've added. Amazing, right?
If you want to fully test, Snipcart will want to reference a URL that's live on the internet. We can use the ngrok utility to make that easy. Since we're already using Node the easiest way to install is probably through npm. Run npm install ngrok -g in your terminal to install globally. Then confirm it's installed with which ngrok. Snipcart has a full post on this for more information.
With the app still running on port 3000, open a new terminal window and run ngrok http 3000. The output should look something like:
ngrok by @inconshreveable (Ctrl+C to quit)
Session Status online
Session Expires 7 hours, 59 minutes
Version 2.3.35
Region United States (us)
Web Interface http://127.0.0.1:4040
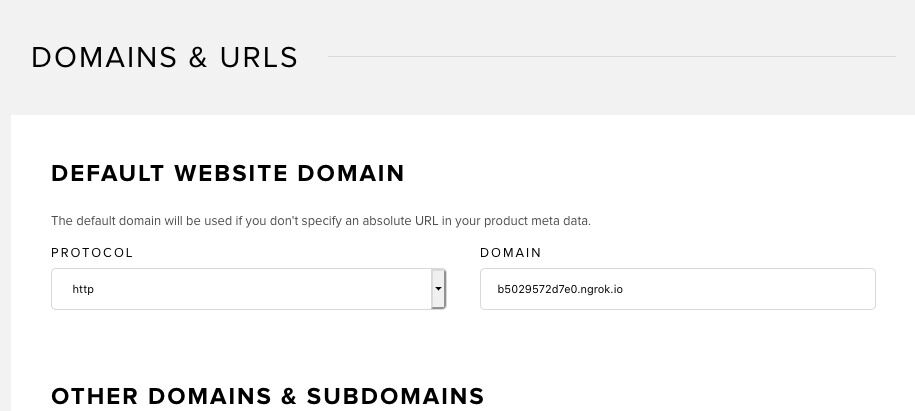
Forwarding http://b5029572d7e0.ngrok.io -> http://localhost:30
Forwarding https://b5029572d7e0.ngrok.io -> http://localhost:3
Connections ttl opn rt1 rt5 p50 p90
0 0 0.00 0.00 0.00 0.00ngrok output, including session expiration, the randomized URL, and connection information.
In your Snipcart account Domains & URLs section, enter the ngrok domain as the default domain (it will be different from the one here) and save.
Open your app at that ngrok domain, go to the shop page, and add some items to the cart. When you check out and get to the Payment screen, you should see a message, "This is a test payment form – no payment will be taken. You can use the test card 4242 4242 4242 4242 with CVV 123 and any valid date." Following those instructions, use that test credit card number, security code, and a month in the future for the expiration (e.g., "12/25").
Wrap up
Excellent! You've just finishing a basic e-commerce app that is ready to sell whatever products you add to the website (you can also download the finished code here). The beauty and power of this is not only that you have an e-commerce site. There are countless ways to set up an online store these days. With this, you also have the editing experience, flexibility, and power of a full-featured content management system that can grow and adjust with your business.
We'll be featuring more ways to combine Apostrophe with e-commerce solutions in the future. Please reach out to us in the Apostrophe Discord chat server or Twitter and let us know what you think of Snipcart as an e-commerce option with Apostrophe. Are there other ways you are using Apostrophe for e-commerce already? We'd love to hear from you.
Credit to Gratisography for the images used in the demo screenshots