
In this tutorial, we'll demonstrate how to use Apostrophe Headless with Nuxt for the frontend and Nginx as a reverse-proxy, as well as optional Docker instructions for Docker users. We'll be creating an online storefront for a restaurant that will allow customers to register and place an order. Let's dive in.
Prerequisites
If not using Docker, the following packages and applications are prerequisites for this tutorial, which has been written with macOS users in mind. If you're starting fresh, we strongly recommend using Homebrew.
- Git:
brew install git - Node / npm:
brew install node - MongoDB:
brew tap mongodb/brew && brew install mongodb-community && brew services start mongodb-community - ImageMagick:
brew install imagemagick
Getting Started
Start by cloning the project into your preferred directory using the terminal.
git clone git@github.com:falkodev/apos-nuxt-demo.git && cd apos-nuxt-demo
Next, we'll walk through the process of running the application, with and without Docker.
Without Docker
- In your terminal, run
npm run install-appto install the application. - Next, run
cd backend && node app fixtures:all && cd ..install the project fixtures. - When complete, run
npm run devto start the developer environment.
The application will run at http://localhost:3333 and http://localhost:1337/cms for the front-end and back-end respectively. If you run into any issues, be sure to check that you have the prerequisites covered above installed correctly.
💡If you prefer having separate logs for the front-end and back-end, you can do so by running the following commands for front-end and back-end respectively in separate terminal windows.
cd frontend && npm run dev
cd backend && npm run dev
With Docker
- In your terminal, run
make. - Run
docker-compose exec demo-backend node app fixtures:allto install the project fixtures. - When launched, the front-end will run at http://localhost and the back-end will run at http://localhost/cms.
If you prefer having separate logs for the front-end and back-end, run make logs-back and make logs-front in separate terminal windows.
Docker-Compose
The docker-compose.yml file describes the various containers and how they are organized:
demo-dbcontainer for the MongoDB image.demo-backendcontainer for Apostrophe, using MongoDB.demo-frontendcontainer for Nuxt, contacting the backend onhttp://demo-backend:1337/cms.demo-reverse-proxycontainer for Nginx.
Reverse-Proxy
The reverse-proxy/local.conf declares how requests are dispatched:
listen 80;
server_name localhost;
root /usr/share/nginx/frontend;
location / {
proxy_pass http://demo-frontend:3333;
}
location /cms/ {
proxy_pass http://demo-backend:1337;
}Everything on port localhost:80 will be redirected to Nuxt, except for urls pointing to /cms, which are redirected to Apostrophe.
In its configuration, Apostrophe has a matching prefix:
// in backend/app.js
prefix: '/cms',
This way, with Docker, you can access the frontend on http://localhost and the backend on http://localhost/cms.
Setting up Shop
Now that we're successfully running the application with the fixtures installed, let's take a look at the rendered project in the browser.
💡You can navigate to backend/lib/modules/fixtures/index.js to explore how Apostrophe fetches and inserts documents into MongoDB.
Back-End
- If you're using Docker, navigate to http://localhost/cms/login in your browser. Otherwise, navigate to http://localhost:1337/cms/login.
- The credentials for both user and password are
admin.

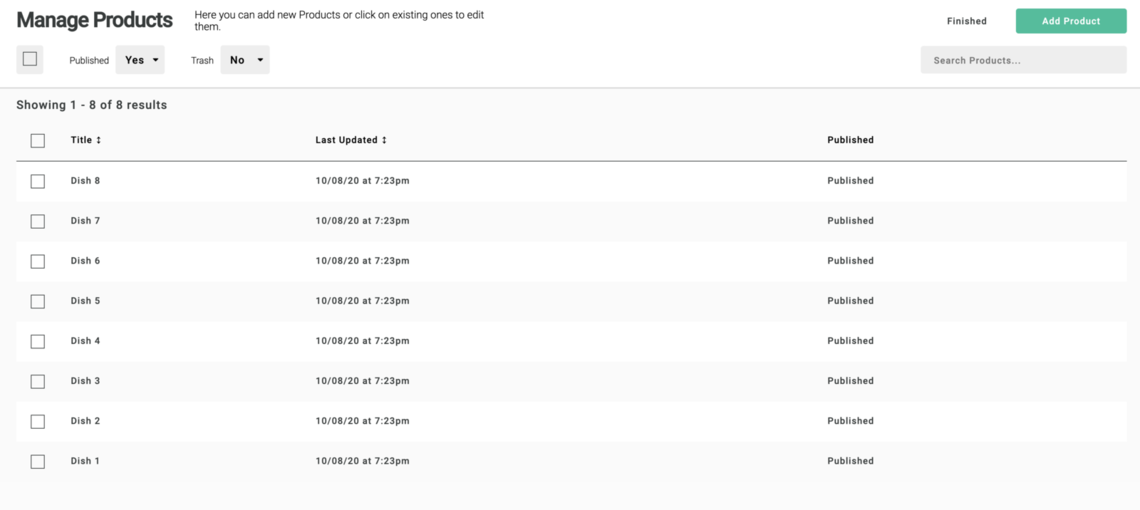
You can click on "Menu Items" to look at the generated products by the "fixtures" step.
Front-End
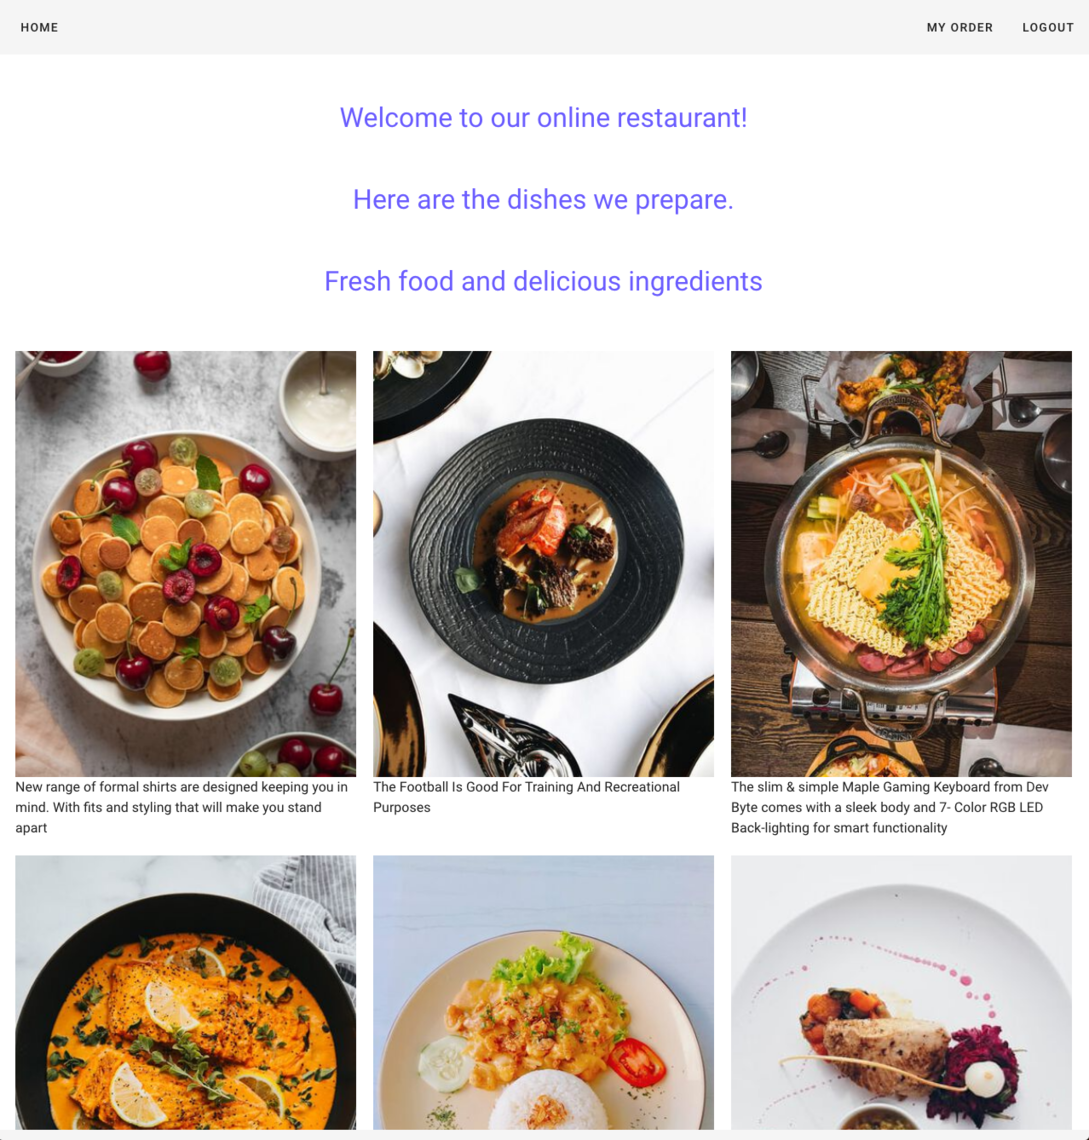
If you're using Docker, navigate to http://localhost in your browser. Otherwise, navigate to http://localhost:3333. If you follow the steps above, you should see an index of Menu Items.
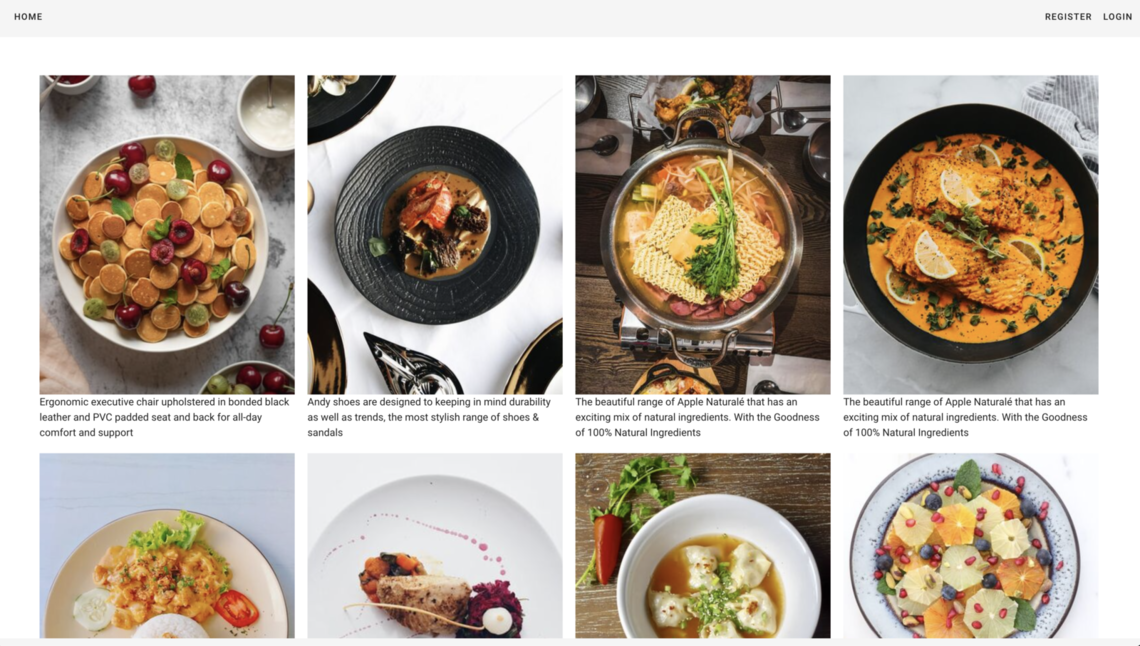
Looks delicious, but how does this work?
The Menu Item Schema
On the back-end, apostrophe-headless has been installed, and the menu-item module has been declared as a headless module with the restApi option set to true, automatically exposing a REST route at /api/v1/menu-items.
// backend/lib/modules/menu-items/index.js
module.exports = {
  extend: 'apostrophe-pieces',
  name: 'menu-item',
  alias: 'menuItem',
  restApi: true, // /api/v1/menu-items
  ...
}
Fetching the Menu
On the front-end, the index page fetches the menu items on this route, and Nuxt declares pages in the pages folder. In the asyncData method in this component, the following GET request is made:
// frontend/pages/index.vue
const { results } = await $axios.$get('/api/v1/menu-items')Component Template
The menu items are displayed in the component's template section with a standard v-for loop. As you can see, Apostrophe is automatically processing the images in the one-third format.
// frontend/pages/index.vue
<template>
<section class="home">
<div class="home-menu-items">
<div v-for="item in menuItems" :key="item._id" class="home-menu-items__item">
<img :src="item.image._urls['one-third']" />
<h3>{{ item.title }}</h3>
<span>{{ item.description }}</span>
</div>
</div>
</section>
</template>Customizing the Home Page
While everything above is a great starting point, we'll want customize to the home page to facilitate our brand messages or provide customers with additional information. You could edit the Vue component to add some additional static text, but this is a CMS, so let's use it to add an area of CMS managed content to keep content editors happy. For that task, the fixtures have already configured the page type "home" in the apostrophe-pages module:
// backend/lib/modules/apostrophe-pages/index.js
module.exports = {
restApi: true,
apiTemplates: ['front-home'],
types: [
{
name: 'front-home',
label: 'Front Home',
},
],
...
}The restApi option is set to true, and we define a single page type for an Apostrophe editor to create: front-home. With apiTemplates: ['front-home'] we indicate to expose the rendered template.
Let's create a home page by navigating to the admin in our browser and selecting "Pages" in the Apostrophe admin bar. From there, we can select "New Page" and begin filling out the requisite fields.
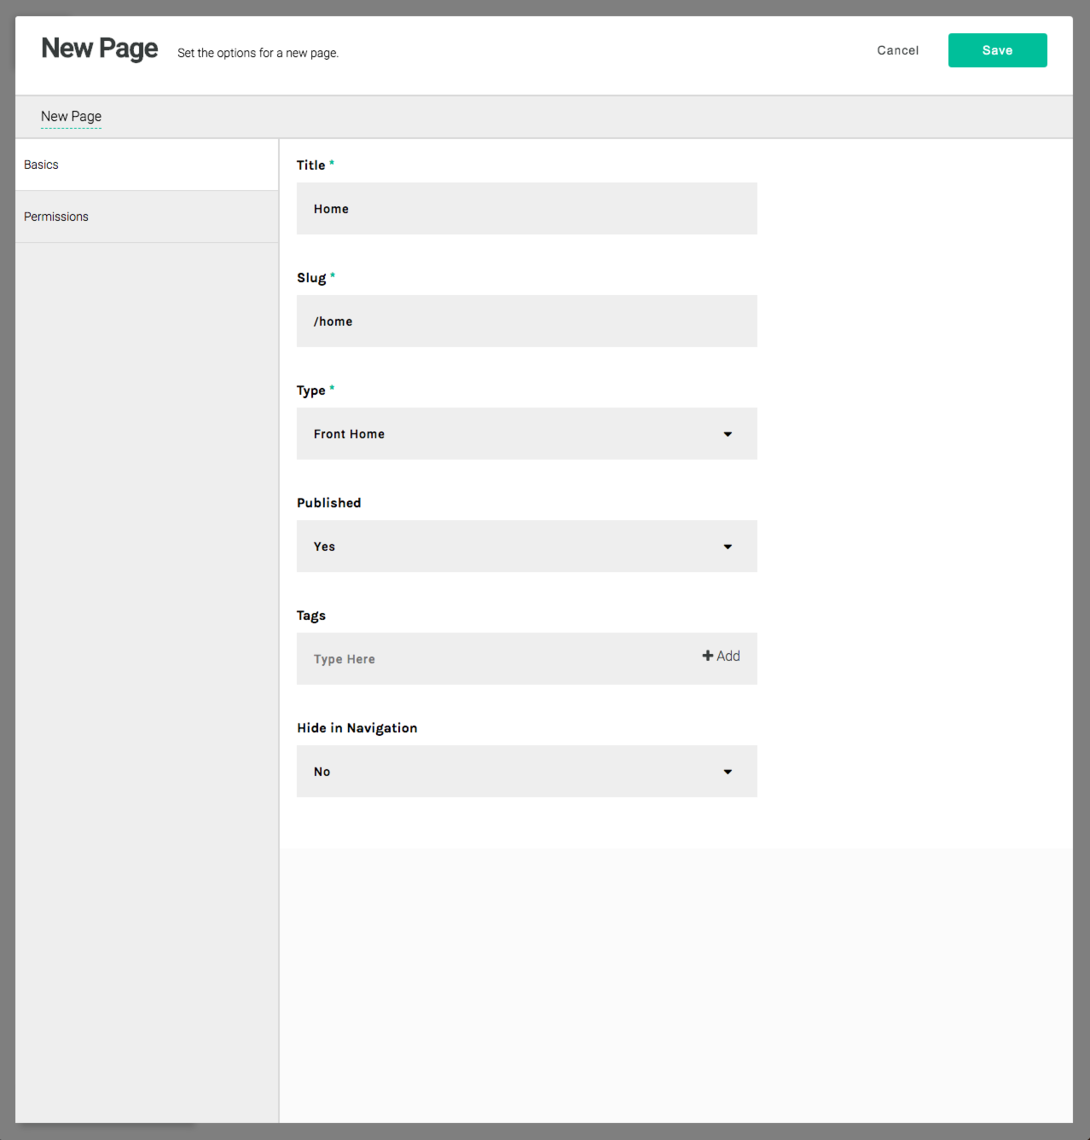
For our purposes, we're only focused on the type field: "Front Home". Choose "Save", and Apostrophe will redirect you to the newly created page. You can close the admin bar by clicking the Apostrophe logo on the far-left.
Adding Content
Now that we've added a home page, we're ready to start customizing. Let's start by adding Rich Text, to give our Menu a quick introduction. When hovering over the page, you should now see a small "+" button. Clicking this will display the available Widgets for the page. Select "Rich Text".

You'll be presented with a rich text editor. Type anything you want, for example "Fresh food and delicious ingredients" and click out of the area. Now you can go to the front-end and reload the page (http://localhost on Docker, http://localhost:3333 otherwise) to see the changes.
How does this work?
In our index.vue component in frontend/pages/, the asyncData method fetches the pages exposed by Apostrophe and finds the home page we created.
Adding a Login
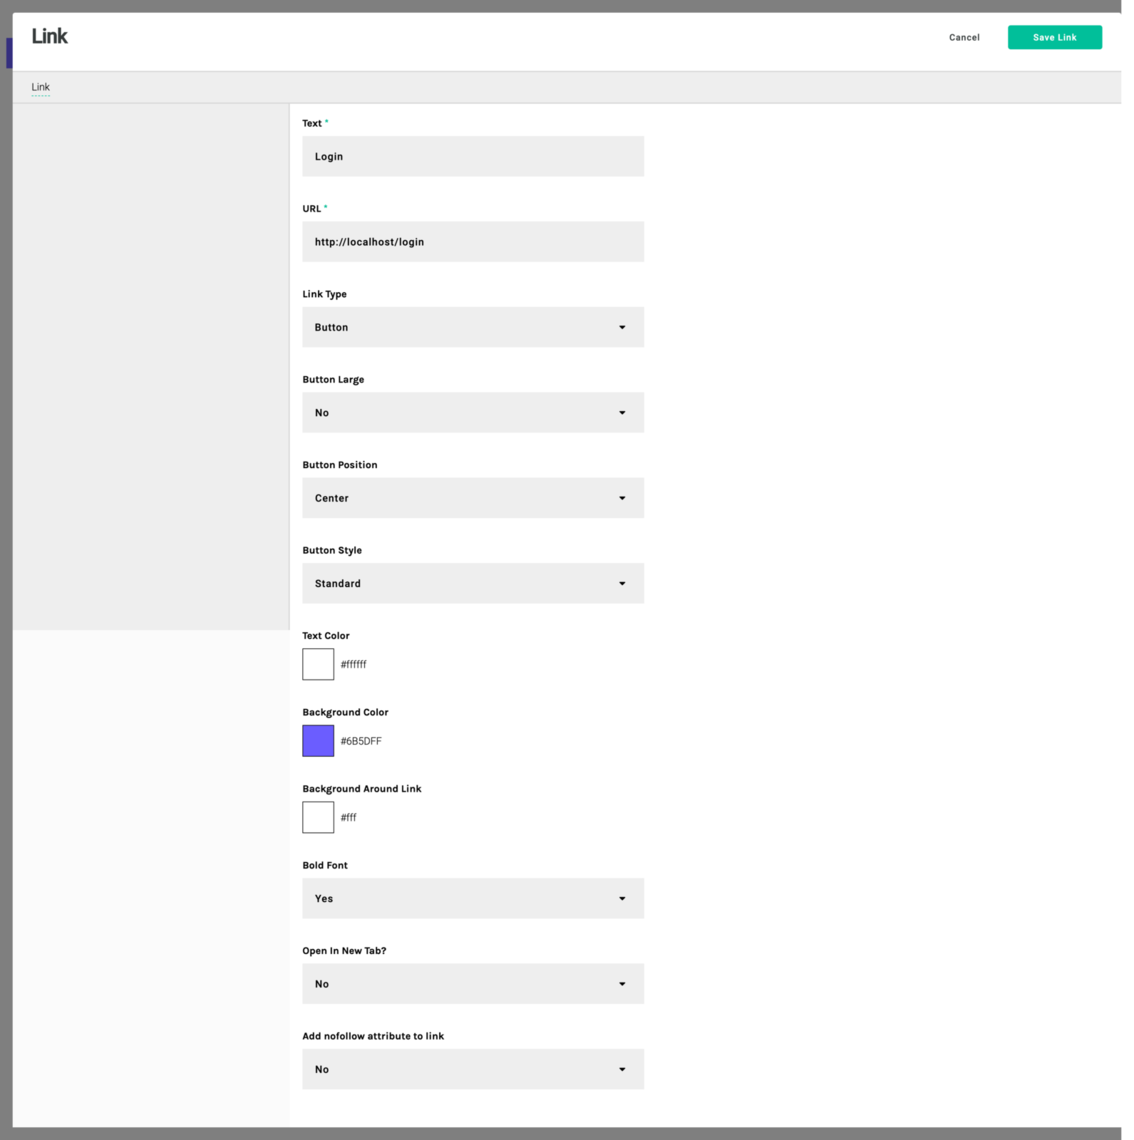
On the back-end, hovering just below the rich text area, a green bar will appear and you can add another widget. This time, choose "Link". Below are suggested settings (if you are not using Docker, be sure to type http://localhost:3333/login in the url field):
The button is visible on the front-end after a refresh.
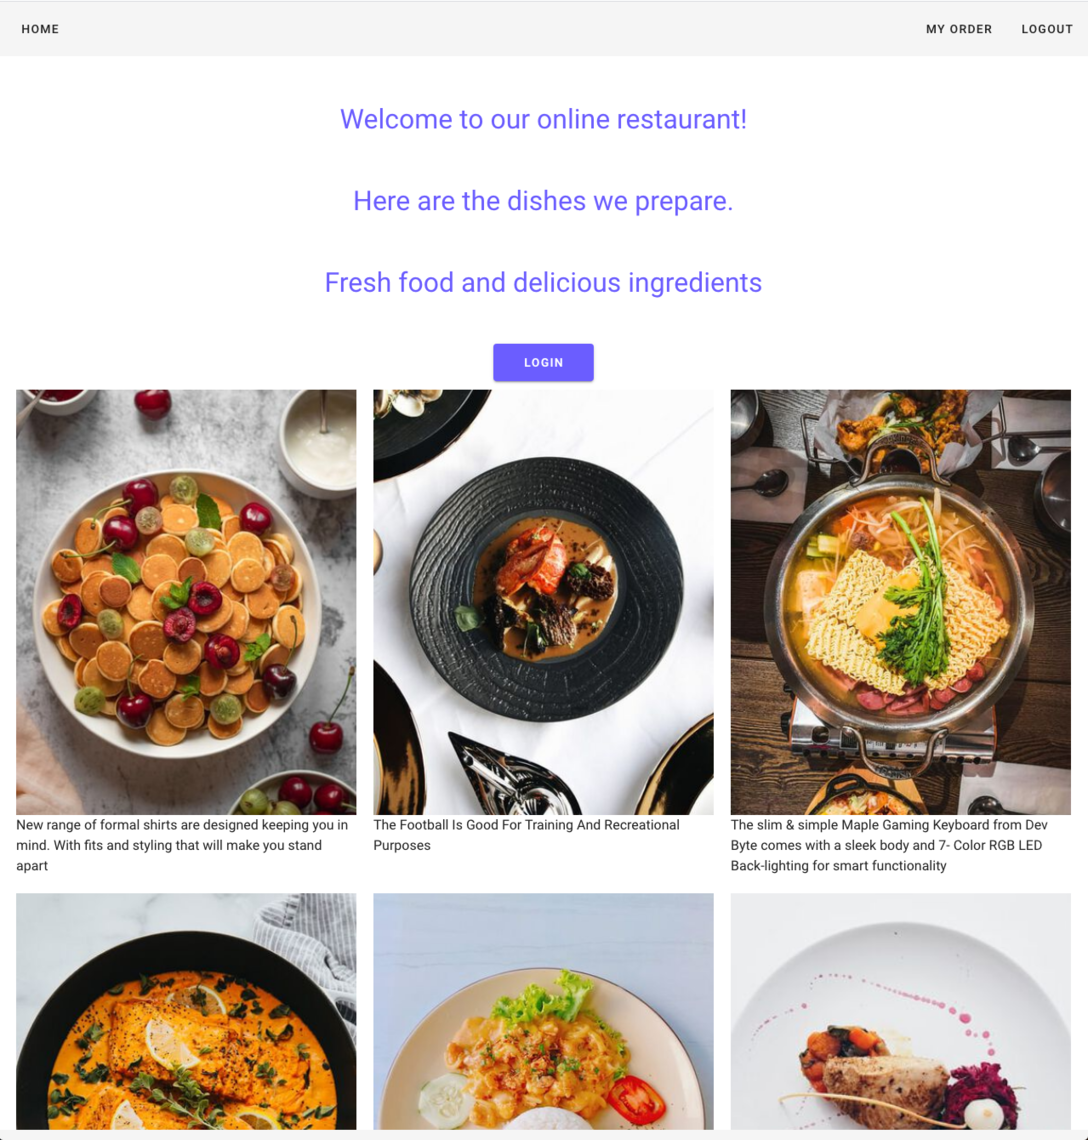
You can click the "Login" button and it will lead you to the login page.
Next Steps
In Part 2 of this tutorial, we'll create a customer and order some food! We'll be releasing this next week, but if you can't wait to dig in, see the complete documentation on Github. Looking for additional guidance or want to show off your application of Apostrophe Headless? Join the discussion in Discord and read our full documentation.
We are continually inspired by the work of our community, and we can't wait to see what you build next.