
Apostrophe is an open-source website builder and CMS built with modern technologies like Vue.js and Node.js. Apostrophe comes with plenty of features and can also be expanded via extensions, JavaScript modules that add new functionality to Apostrophe, such as new content types, widgets, page types, and more.
One of the most popular extensions available for Apostrophe is the Blog module, which allows you to effortlessly add blogging capabilities to an Apostrophe site. Here you will learn what the Apostrophe Blog module is, what benefits it can bring to your site, and how to use it to build a blog!
Let’s start blogging with Apostrophe!
What Is the Apostrophe Blog Module?
The Apostrophe Blog module is one of several extensions available for Apostrophe. As the name suggests, it is designed to add blogging functionality to an Apostrophe website. Apostrophe Blog gives editors the ability to create and manage blog posts in the content management dashboard, while developers can customize the blog template pages to display content as desired. By integrating Apostrophe Blog into your site, end users will have access to blog pages and date-based filtering features to find the content they are looking for.
The main goal of the Apostrophe Blog module is to provide a simple and easy-to-use solution for adding a blog with filtering functionality to an Apostrophe website. In other words, Apostrophe Blog does not turn your entire website into a blog but adds the ability to introduce a new blog section to it.
Benefits of Apostrophe Blog
The Apostrophe Blog module can bring several benefits to your website, the three most relevant being:
- Easy Content Management: Apostrophe Blog offers a simple and intuitive interface for creating and managing blog posts. Editors can easily create blog posts, update them in real time with contextual editing, and add images and videos.
- Customizable Layouts: The module comes with three built-in templates for displaying and filtering blog posts, but developers can also create their own custom layouts using the powerful Apostrophe template engine. This allows developers to create unique and visually stunning blog pages.
- Advanced Blog Post Filters: The Apostrophe Blog module streamlines the process of adding a blog section to your site from scratch. Instead of manually configuring everything required, you can take advantage of the pages and pieces provided by the module to set up a blog in minutes. In particular, the module is equipped with date-based filtering functionality that allows users to select blog posts by year, month, and date.
Now that you know what the Apostrophe Blog module is and why it is such a great tool, all that remains is to see how to integrate it into your website. Let's dive in!
Set Up a Blog with the Apostrophe Blog Module
Here, you will learn how to integrate Apostrophe Blog into your site. You will start from an Apostrophe boilerplate site and see all the steps necessary to set up the Apostrophe Blog module.
If you are eager to take a look at the code of the final codebase, clone the GitHub repository supporting with article with:
git clone https://github.com/Tonel/apostrophe-blogPrerequisites
If you are a Windows user, you first need to set up WSL (Windows Subsystem for Linux) as explained in the official docs. To follow this tutorial, you need to meet the Apostrophe 3+ prerequisites below:
- Node.js 16.x+: Any LTS version of Node.js greater than or equal to 16 will do.
- MongoDB 4.2+: Follow the link and install the right MongoDB Community Edition app according to your OS. If you are a Windows user, consider setting up MongoDB as a service.
Verify that Node.js is working by launching the following command in your terminal:
npm node -vThis should return the version of Node.js currently installed on your machine, as follows:
v18.14.0Similarly, verify that MongoDB is installed with:
mongod --versionThis should print something similar to:
db version v6.0.3
Build Info: {
    "version": "6.0.3",
    "gitVersion": "f803681c3ae19817d31958965850193de067c516",
    "modules": [],
    "allocator": "tcmalloc",
    "environment": {
        "distmod": "windows",
        "distarch": "x86_64",
        "target_arch": "x86_64"
    }
}
You can now install the Apostrophe CLI with:
npm install -g @apostrophecms/cliThis command will install the @apostrophecms/cli package globally, giving you access to the apos command. With apos, you can quickly set up and manage an Apostrophe project. Even though the Apostrophe CLI is not strictly required to deal with an Apostrophe project, it makes everything easier.
You are now ready to set up an Apostrophe 3+ project. Let’s learn how!
Initialize an Apostrophe Project
First, make sure that MongoDB is running locally by following the official guide for your OS.
Then, enter the folder where you want to create your Apostrophe project and run in the terminal:
apos create my-apostrophe-blogThis command will initialize an Apostrophe project called my-apostrophe-blog. During the process, you will be asked to enter the password for the admin user. Type in a secure password and then store it in a safe place.
The my-apostrophe-blog folder should now contain a JavaScript project. Explore it to see what an Apostrophe project looks like.
Enter the my-apostrophe-blog folder in the terminal with:
cd my-apostrophe-blogThen, start your Apostrophe app with:
npm run devYou will see the following warning message:
WARNING: No session secret provided, please set the `secret` property of the `session` property of the @apostrophecms/express module in app.jsLearn more on how to fix this here.
Your Apostrophe starter project is now running! Visit the http://localhost:3000/login page in your browser.
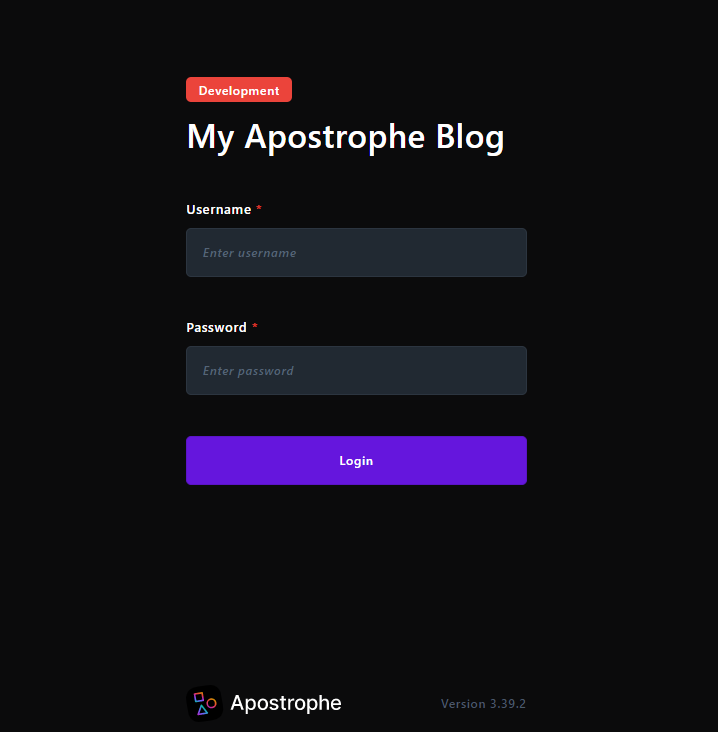
Log in with "admin" as the username and the password specified during the initialization process.
You should now be seeing the Apostrophe dashboard that follows:
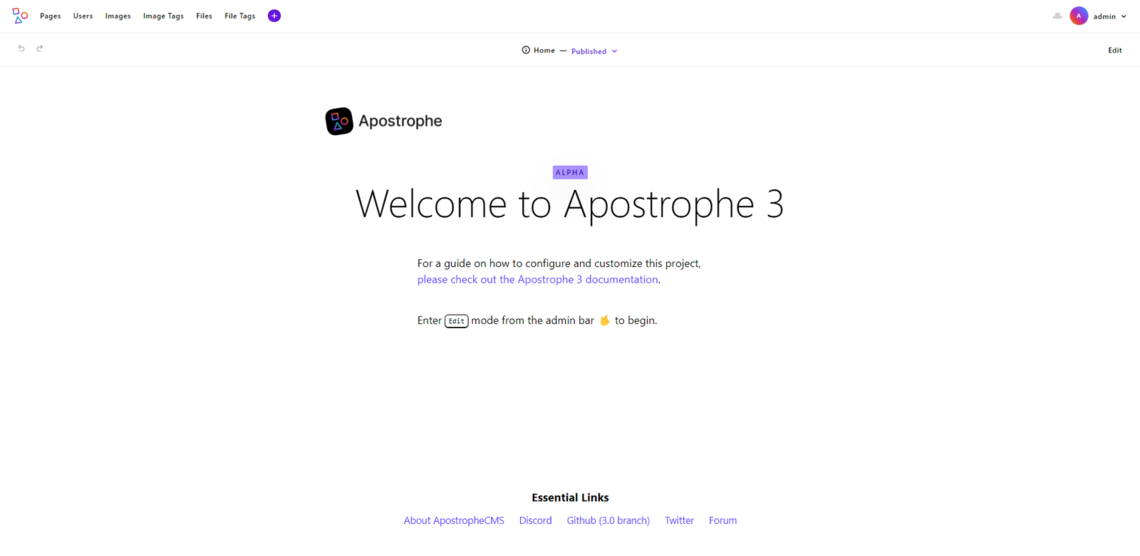
Here, you have access to all the great features offered by ApostropheCMS, including website-building capabilities, an intuitive UI for content management, a drafting system, and in-context editing.
You now have an Apostrophe app in place. Let’s learn how to turn it into a blog with the Blog module!
Integrate the Blog Module
Enter the my-apostrophe-blog folder in the terminal and run the command below to install the Blog module:
npm install @apostrophecms/blogThis will add the @apostrophe/blog package to your project’s dependencies.
As with any other Apostrophe module, you must first enable it in the app.js file. To configure the Blog module in your Apostrophe project, make sure app.js contains the following lines:
// app.js
require('apostrophe')({
shortName: 'my-apostrophe-blog',
modules: {
// initial configurations ...
// add the blog piece to your site
'@apostrophecms/blog': {},
// add the blog page type to your site
'@apostrophecms/blog-page': {}
},
// activate the Blog bundle
bundles: [ '@apostrophecms/blog' ]
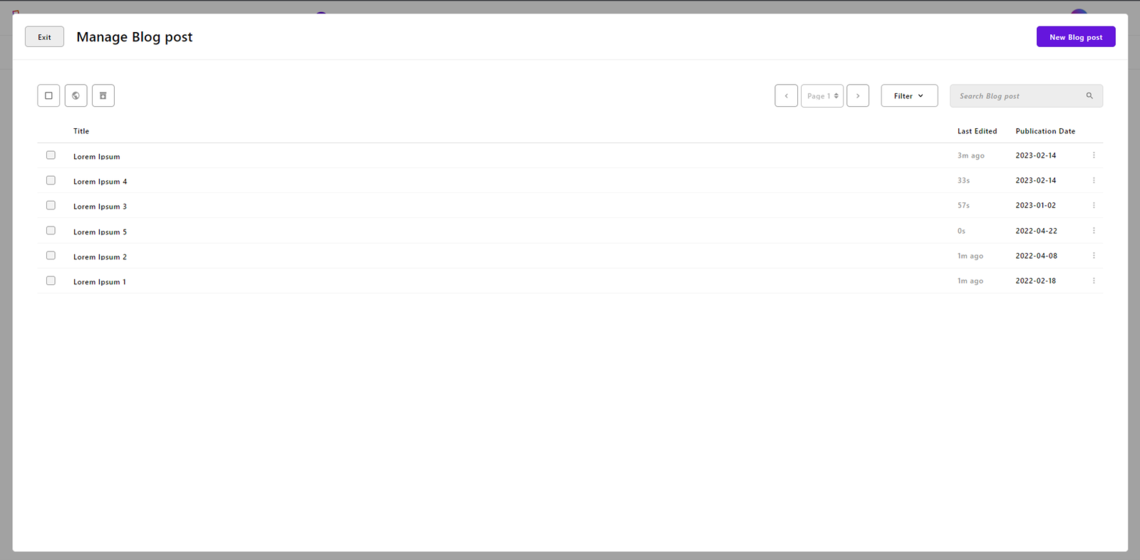
});In your Apostrophe dashboard, you will now have access to the “Blog Post” voice menu. Click on it to access the blog post management view below:
Here, you can add, update, and delete blog posts. Do not worry, you will learn how to do that in the next step.
If you access the “Pages > New Page” view in Apostrophe, you will notice that the “Type” selector only contains the “Default” and “Home” values. In other terms, you cannot create a blog post page from the general view to add new pages.
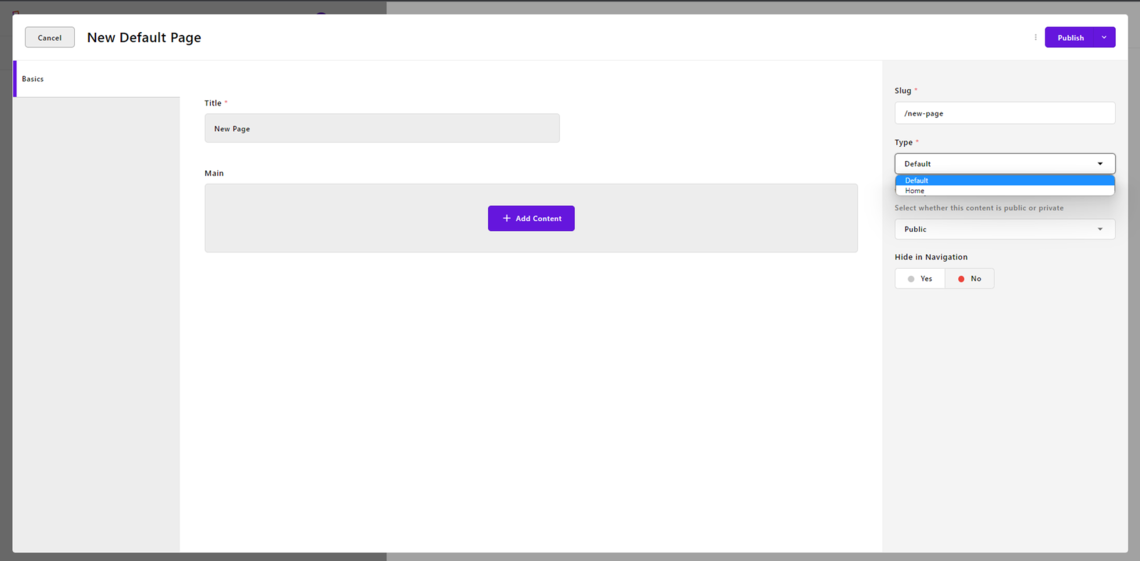
Time to fix this!
The types of pages available in the selector above are defined in the modules/@apostrophecms/page/index.js file. Make sure to add the @apostrophecms/blog-page type page to the types field as follows:
module.exports = {
  options: {
    types: [
      // original types...

      // register the blog page type
      {
        name: '@apostrophecms/blog-page',
         label: 'Blog Page'
      }
    ]
  }
};
The “Type” selector will now include the “Blog Page” type:
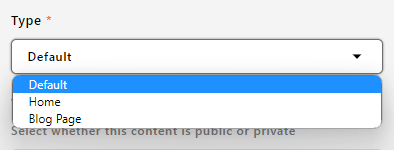
Let’s now look into a crucial aspect of the Blog module!
By default, the @apostrophecms/blog piece only has the default title, slug, and visibility fields and a custom publishedAt field. Since an Apostrophe piece defines the schema associated with a content entity, a blog post instance will only have the information mentioned before. You want to extend this behavior.
Keep in mind that almost everything in Apostrophe is extensible. In particular, you can extend/improve/override features and behaviors of modules by adding specific files in the modules folder of your project. When it comes to the main modules and official extensions, you typically have to extend them in the modules/@apostrophecms folder. Since the Apostrophe Blog npm package starts with @apostrophecms, modules/@apostrophecms is where the extension files should be.
To extend the blog post schema with new fields, you will need to define an index.js file inside modules/@apostrophecms/blog. In Apostrophe, the index.js file within a module folder specifies the fields available in the content management editor. Any fields defined your local index.js file will be added to the fields in the original index.js blog extension file. Note that you can also overwrite fields, although this is not common.
Add a content field of type area to the @apostrophecms/blog schema by creating an index.js in the modules/@apostrophecms/blog folder as follows:
// modules/@apostrophecms/blog/index.js

module.exports = {
  fields: {
    // add tge content field to the
    // "@apostrophe/blog" piece definition
    add: {
      content: {
        type: 'area',
        options: {
          widgets: {
            // add support for the rich-text editor
            '@apostrophecms/rich-text': {},
            // add support to multimedia fields in
            // the blog post content
            '@apostrophecms/image': {},
            '@apostrophecms/video': {}
          }
        }
      }
    },
    // add the "content" fields to the
    // "Basics" fields
    group: {
      basics: {
        label: 'Basics',
        fields: [
          'content'
        ]
      }
    }
  }
};
Your editors can now start working on some engaging blog posts. Similarly, you can add other useful fields to your blog post schema, such as tags, a featured image, and author info.
Time to populate your blog with some content!
Populate Your Blog with Some Posts
First, you need to add a blog section to your site. To do this, create a new page of “Blog Page” type. Click on “Pages > New Page” and initialize your blog home page as follows:
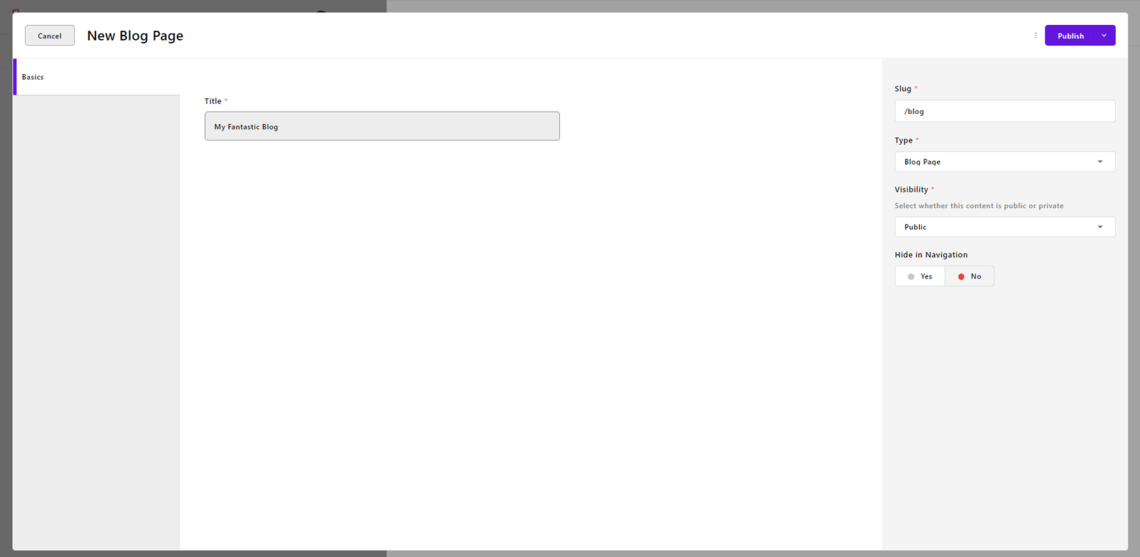
Give your blog home page a title, slug, and then click the “Publish” button. If you define your slug as “/blog,” all your blog posts will appear under the “/blog” path.
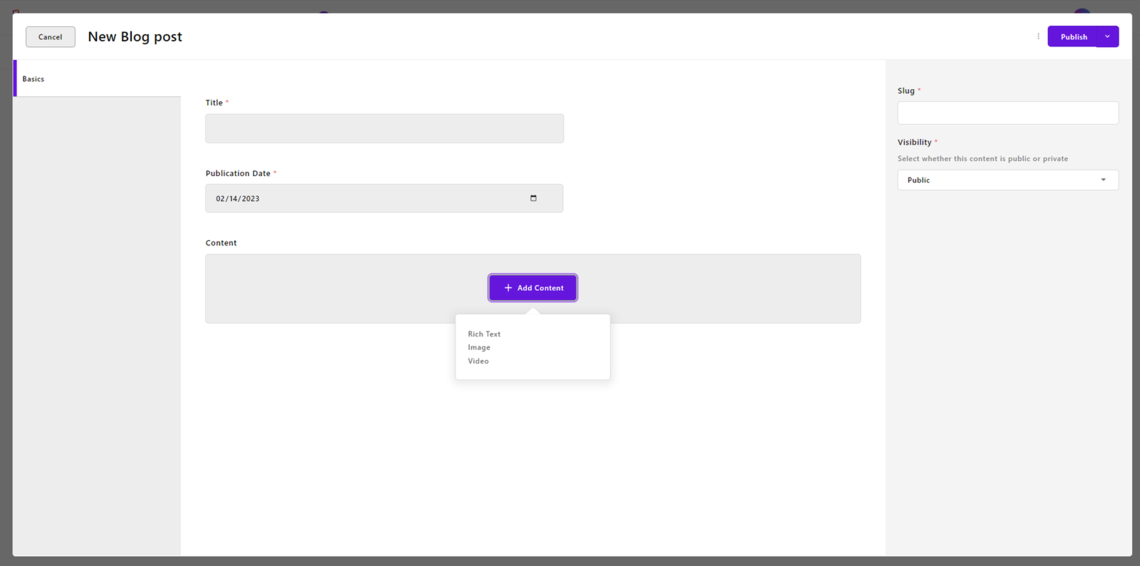
Now, add some content to your blog. Click on the “Blog posts” option, click “New Blog post,” and define a new blog post as below:
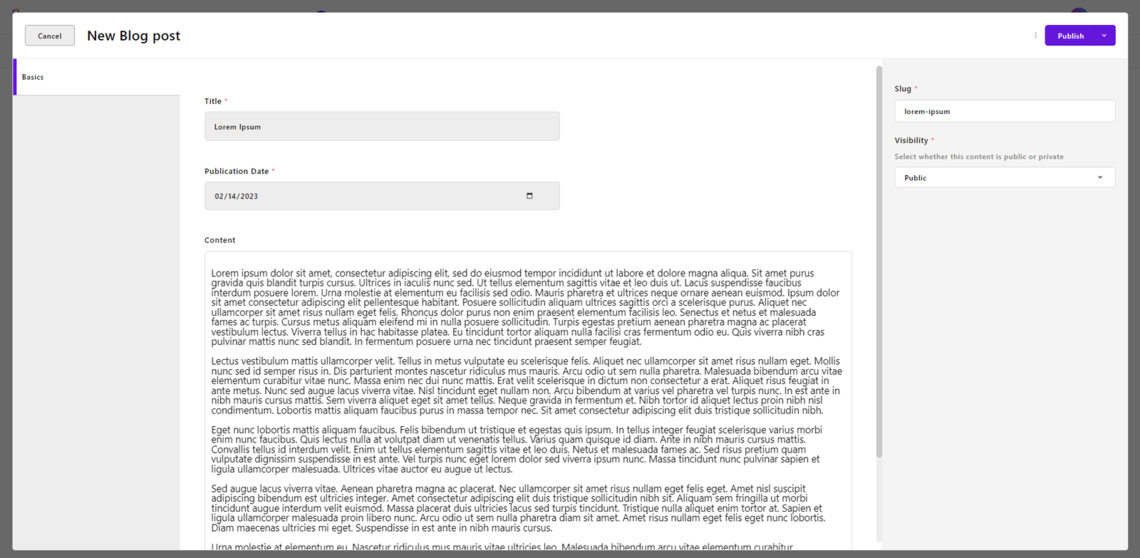
Click “Publish,” and your article will now be available at /blog/lorem-ipsum.
You can use the Lorem Ipsum generator to automatically produce sample content for your blogs. Create several articles and assign them different publication dates. Keep in mind that only articles released in the past will be accessible to the users.
Visit the http://localhost:3000/blog/lorem-ipsum page to see what the lorem-ipsum blog post defined above looks like:
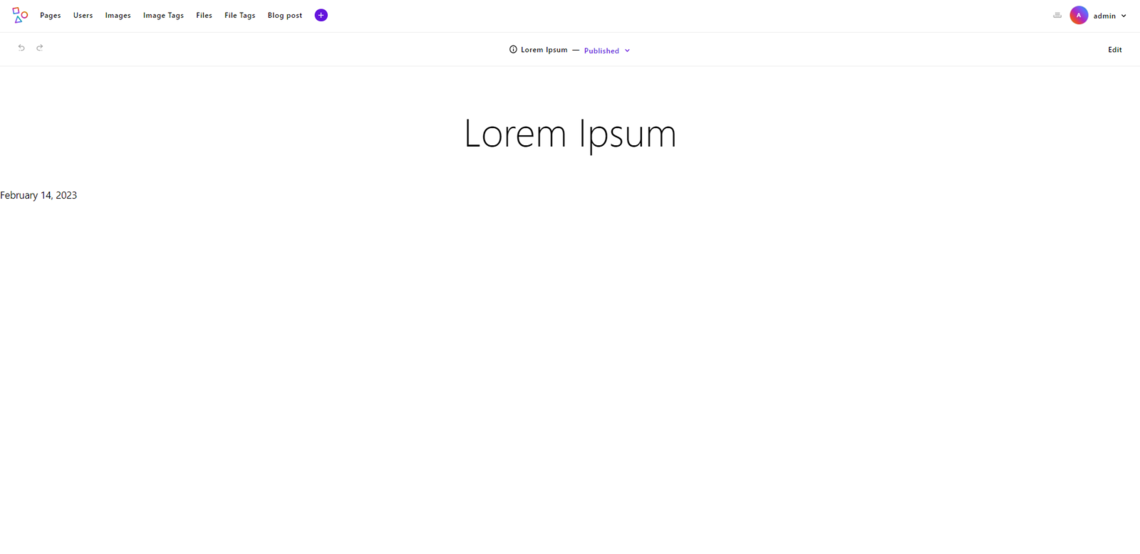
As you can see the blog post page is not very appealing and does not include any content. Let’s see how to address this!
Update Blog Page Templates
Just as you extended the @apostrophe/blog piece earlier, you can also extend the @apostrophe/blog piece page type. In detail, an Apostrophe piece page type generally consists of the following two template files:
index.html: Template that defines the index page where to list several instances of a specific piece.show.html: Template that defines the show page where to display a single instance of a specific piece.
Since you previously updated the @apostrophe/blog piece definition, you need to update the @apostrophe/blog piece page type templates accordingly. This is what the original show.html template file looks like:
{% extends data.outerLayout %}
{% block title %}{{ data.piece.title }}{% endblock %}

{% block main %}
    <h1>{{ data.piece.title }}</h1>
    <p>
    {{ data.piece.publishedAt | date('MMMM D, YYYY') }}
    </p>
{% endblock %}
As you can see, this template file only shows the title and publishedAt blog post info. Note that Apostrophe works with Nunjucks template files. Learn more on this templating engine in the official docs.
Since you also want to show the newly added content field in the blog post page, overwrite the original show.html file with a new template. To achieve this, add a show.html file in the modules/@apostrophe/blog-page folder as follows:
<!-- modules/@apostrophe/blog-page/show.html -->

{% extends data.outerLayout %}
{% block title %}{{ data.piece.title }}{% endblock %}

{% block main %}
    <h1>{{ data.piece.title }}</h1>
    <div>
        <p>
            {{ data.piece.publishedAt | date('MMMM D, YYYY') }}
        </p>
        <!-- show the blog post content -->
        {% area data.piece, 'content' %}
    </div>
{% endblock %}
This template that involves the content field of type area will replace the original show.html file. Find out more about how to display area fields in templates.
Now, visit the http://localhost:300/blog/lorem-ipsum page again.
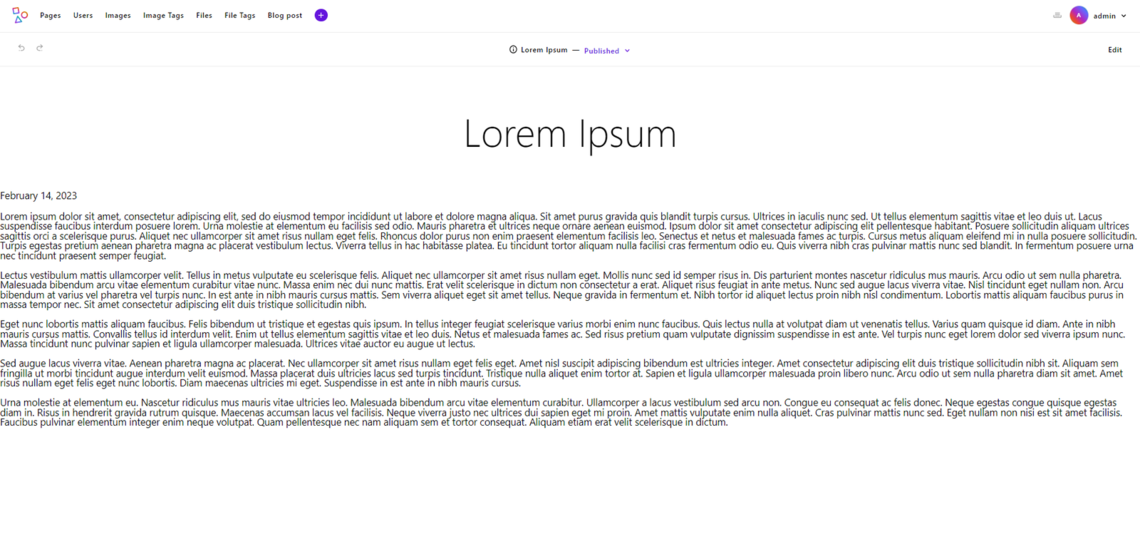
The blog post page now displays the content of the article as expected.
Similarly, you can overwrite the index.html template file. This represents the home page of the blog and appears as follows:
As you can see, the page involves some filtering features. If you take a look at index.html on GitHub, you will notice that it depends on the filters.html file. filters.html contains the HTML elements to filter blog posts by year, month, and day. The filtering logic is based on some queries defined in the queries.js file imported in the @apostrophe/blog/index.js original file. As explained in the Filtering section of the Blog module page, you can also employ these filters in server-side queries and in REST APIs when using Apostrophe as a headless CMS.
You can test the filters by clicking on the “2022” link. You will be redirected to http://localhost:3000/blog?year=2022, whose list of blog posts will contain only articles released in 2022:

By writing very few lines of code, you now have a blog with filtering functionality. This is the true power of the Apostrophe Blog module! Yet, the blog section of your site is still a bit bland visually. Time to make the UI of the blog fresher!
Customize the UI of the Blog
Apostrophe allows you to customize the UI of your templates. Specifically, the modules/asset/ui module contains all SCSS files that take care of styling your website. By default, apos create initializes your Apostrophe project with some basic .scss files. You can remove, overwrite, or ignore them and add new SCSS files.
Let’s learn how to add some style to your Apostrophe blog!
In the modules/asset/ui/src/scss folder, define a new _blog.scss file as follows:
// modules/asset/ui/src/scss/_blog.scss

    .bg-container {
      padding-right: 15px;
      padding-left: 15px;
      margin-right: auto;
      margin-left: auto;

      @media (min-width: 576px) {
          width: 540px;
      }

      @media (min-width: 768px) {
          width: 720px;
      }

      @media (min-width: 992px) {
          width: 960px;
      }

      @media (min-width: 1200px) {
          width: 1140px;
      }
    }

    .bg-h1 {
      text-align: center;
      margin: 0 0 20px;
    }

    .bg-publication-date {
      text-align: center;
      font-style: italic;
      color: #505050;
      font-size: 14px;
      margin-bottom: 25px;
    }

    .bg-content {
      font-size: 16px;

      p {
        margin-bottom: 30px;
        line-height: 30px;
      }
    }
This is just an example, but you can place all your CSS classes here for your blog.
Now, add the following line to the modules/asset/ui/src/index.scss:
@import './scss/_blog';This will import the _blog.scss file defined earlier in the global index.scss file, and it will make the CSS classes defined in _blog.scss available in the project.
You can add some CSS to the show.html file as shown below:
<!-- modules/@apostrophe/blog-page/show.html -->

{% extends data.outerLayout %}
{% block title %}{{ data.piece.title }}{% endblock %}

{% block main %}
<div class="bg-container">
    <h1 class="bg-h1">{{ data.piece.title }}</h1>
    <div class="bg-publication-date">
        {{ data.piece.publishedAt | date('MMMM D, YYYY') }}
    </div>
    <div class="bg-content">
        <!-- show the blog post content -->
        {% area data.piece, 'content' %}
    </div>
</div>
{% endblock %}
Note that the template file involves the same CSS classes defined in _blog.scss.
Here is what the http://localhost:300/blog/lorem-ipsum page now looks like:

Much better, don’t you think?
With just a few lines of SCSS code, you have improved the visual appearance of the blog page significantly. Similarly, you can also style the home page of your blog by adding new CSS classes and updating the index.html template file accordingly.
The tutorial ends here, but before wrapping up check out the final version of the blog in the GitHub repo behind this tutorial. Now you know how use the Apostrophe Blog module to create a blog, customize it, style it, and manage its content!
Conclusion
In this article, you learned what the Apostrophe Blog module is, how to use it to build a blog, and what benefits it can bring to your site. In detail, the Apostrophe Blog module is a quick and easy way to create a powerful and comprehensive blog with several features. Thanks to the extensible nature of Apostrophe, you can also easily customize your blog.
By following this step-by-step tutorial, you saw how to initialize an Apostrophe project, integrate the Blog module, and customize your blog to meet your specific needs and goals. This is all you need to build a blog to engage and inform your audience with great content.
Thanks for reading! We hope this article helped clear your mind. Feel free to reach out to us on Twitter with any comments, questions, or suggestions!