Extensions & Integrations
Data Set


Data Set
![]()


Transform spreadsheets into dynamic website content with CSV import capabilities and flexible data display options. Perfect for pricing tables, product catalogs, directory listings, and any structured data that needs regular updates.
Why Data Set?
- 📊 Spreadsheet to Website: Import CSV files directly into your CMS with zero technical complexity
- ⚡ No Code Required: Content editors can update data without developer involvement
- 🎨 Flexible Display: A built-in table template plus custom presentation options
- 🔄 Easy Updates: Replace datasets instantly while preserving widget configurations
- 📈 Business Ready: Perfect for pricing tables, directories, reports, and data-driven content
- 🛠️ Developer Friendly: Extensible parser system for custom data formats
Installation
Note: This module requires an ApostropheCMS Pro license. Create an account on Apostrophe Workspaces or contact us to access Pro extensions.
To install the module, use the command line to run this command in an Apostrophe project's root directory:
npm install @apostrophecms-pro/data-set
Configure the Data Set module in the app.js file:
import apostrophe from 'apostrophe';

apostrophe({
  root: import.meta,
  shortName: 'my-project',
  modules: {
    '@apostrophecms-pro/data-set': {},
    '@apostrophecms-pro/data-set-widget': {}
  }
});
How It Works
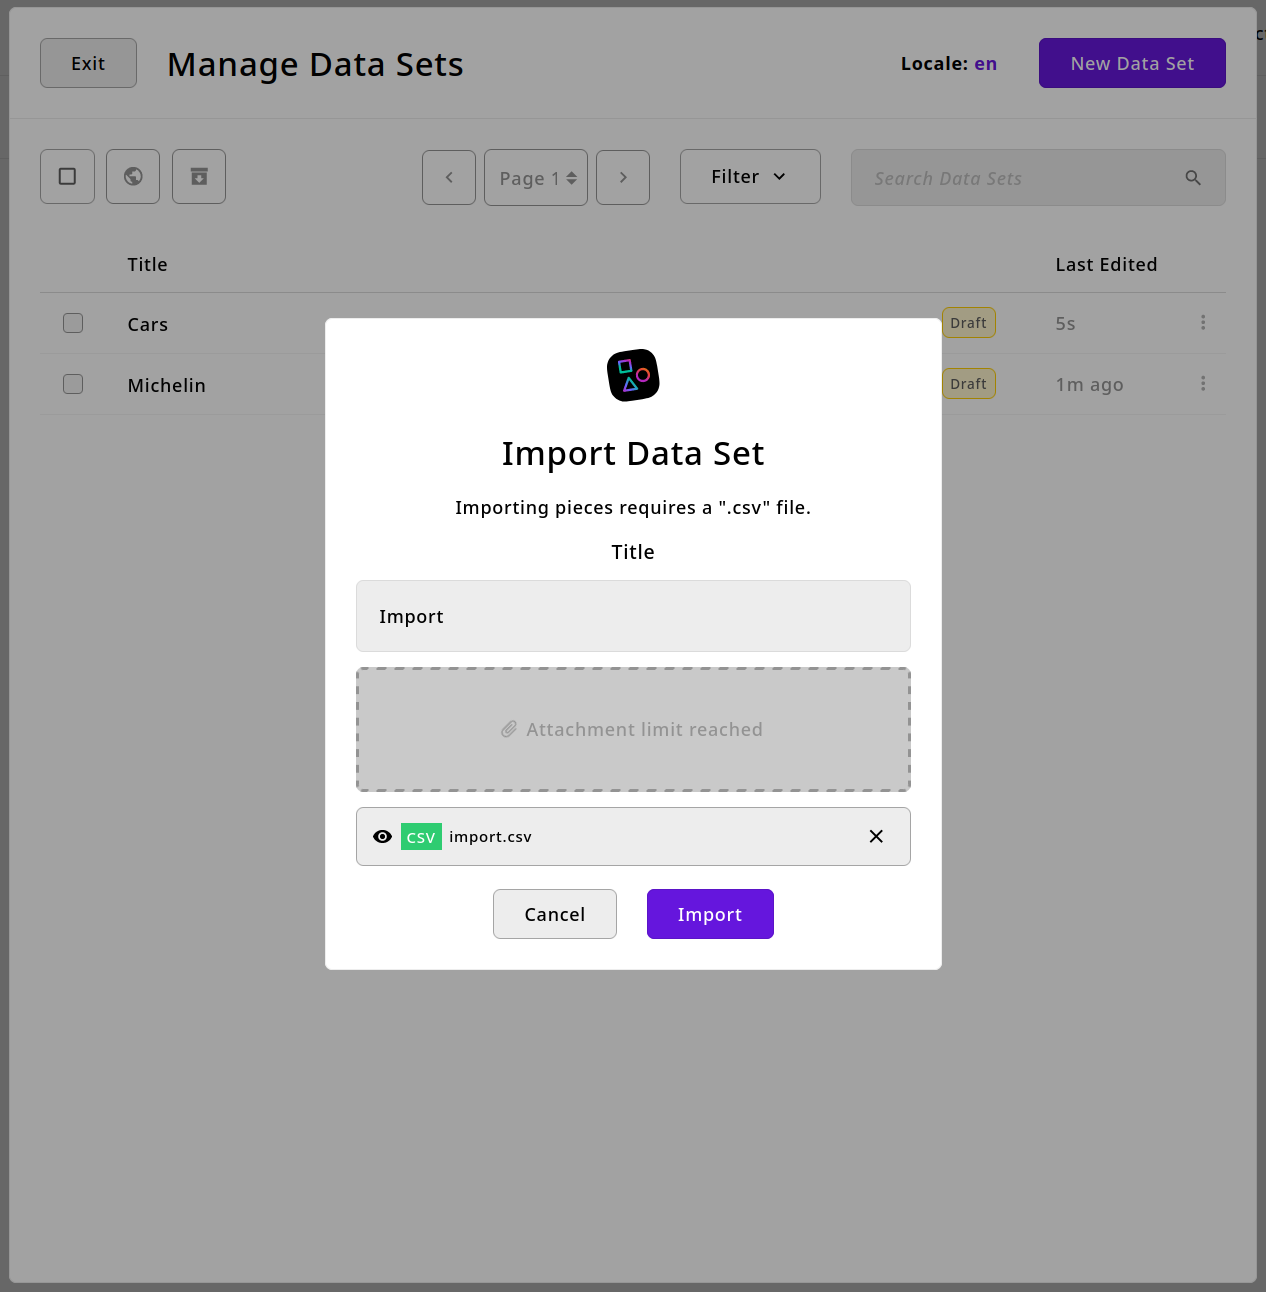
1. Import Your Data
Upload CSV files through the intuitive Data Set Manager:

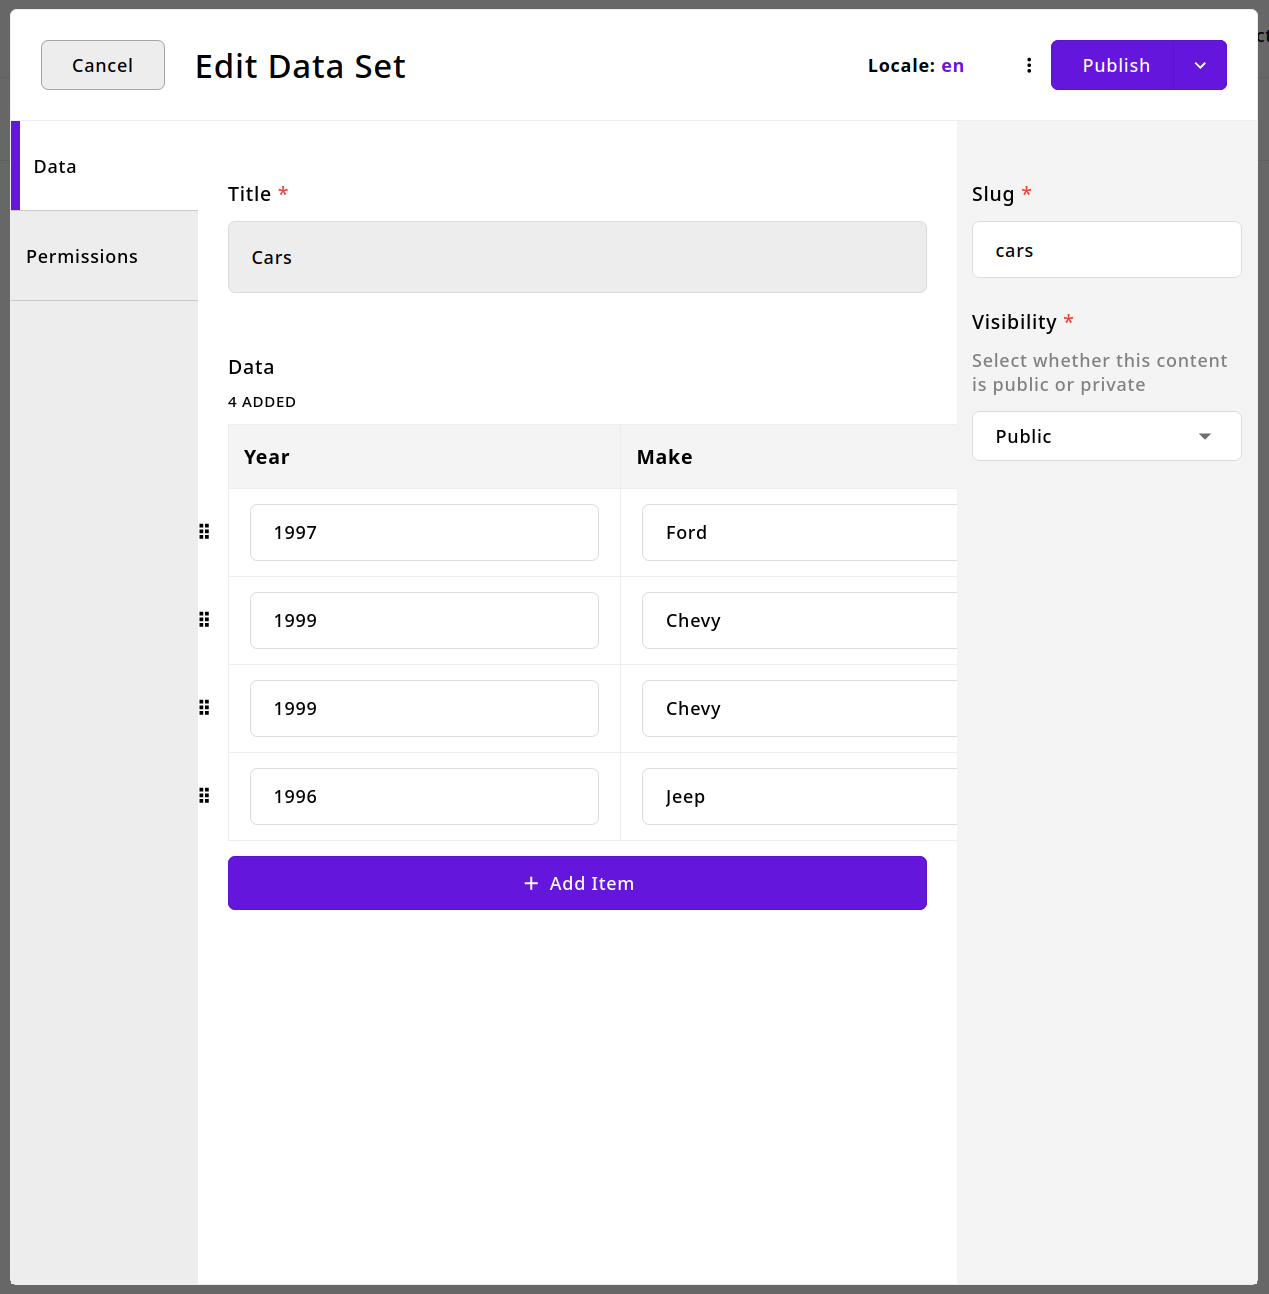
2. Configure Your Dataset
Review, edit, and organize your imported data:
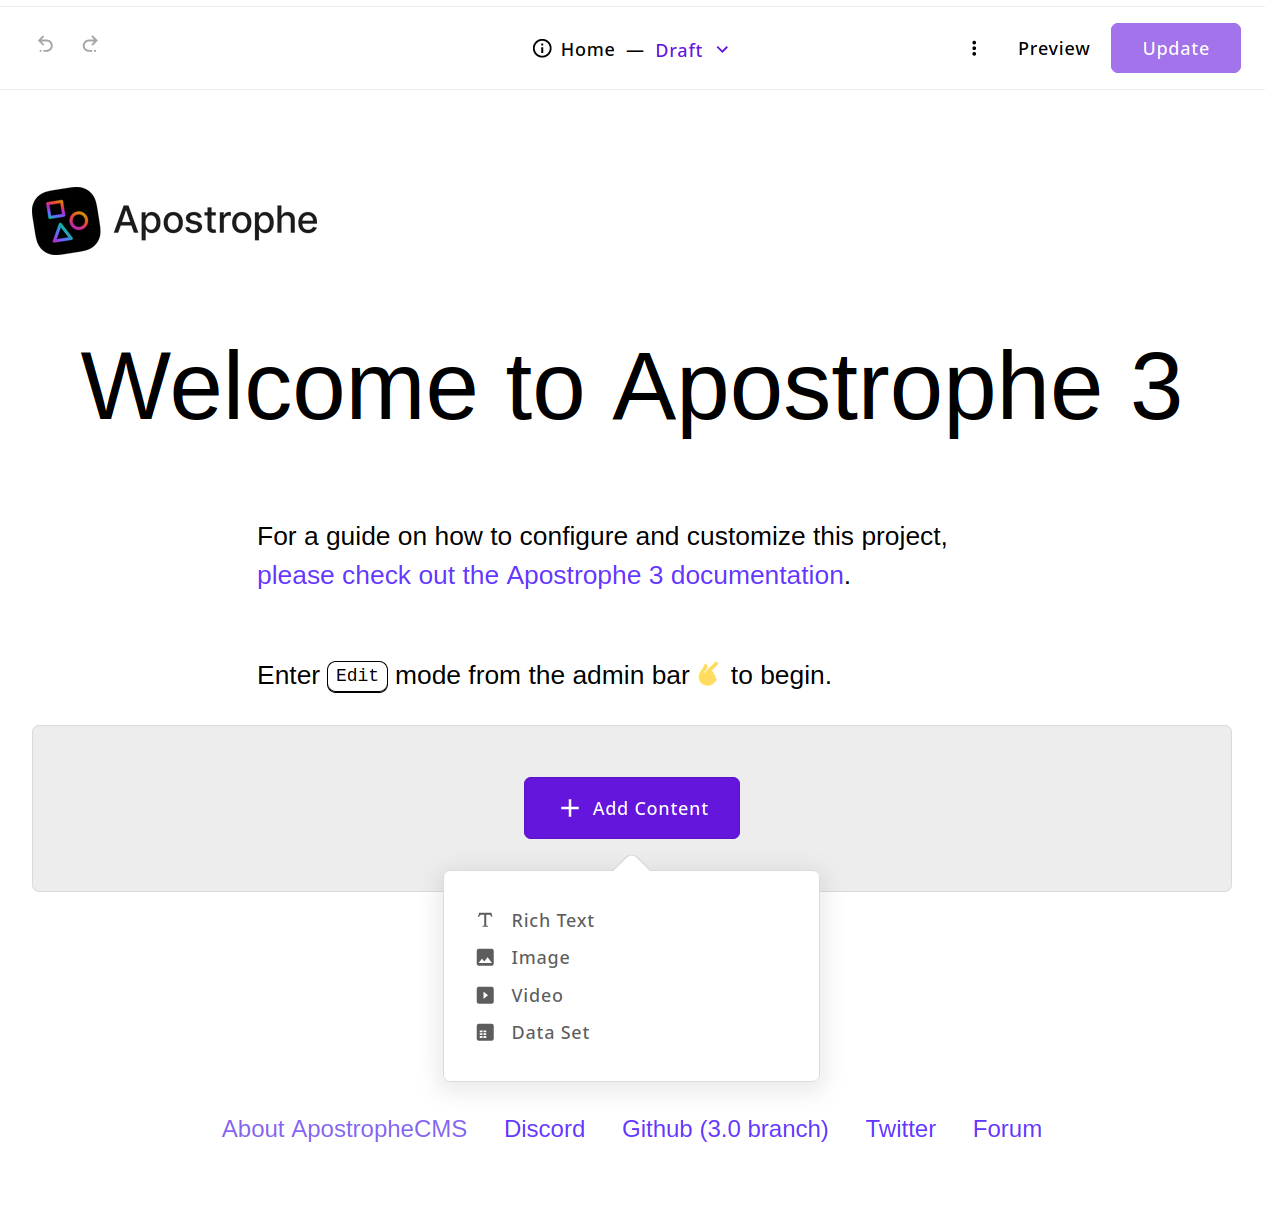
3. Add to Your Pages
Insert Data Set widgets anywhere on your site:
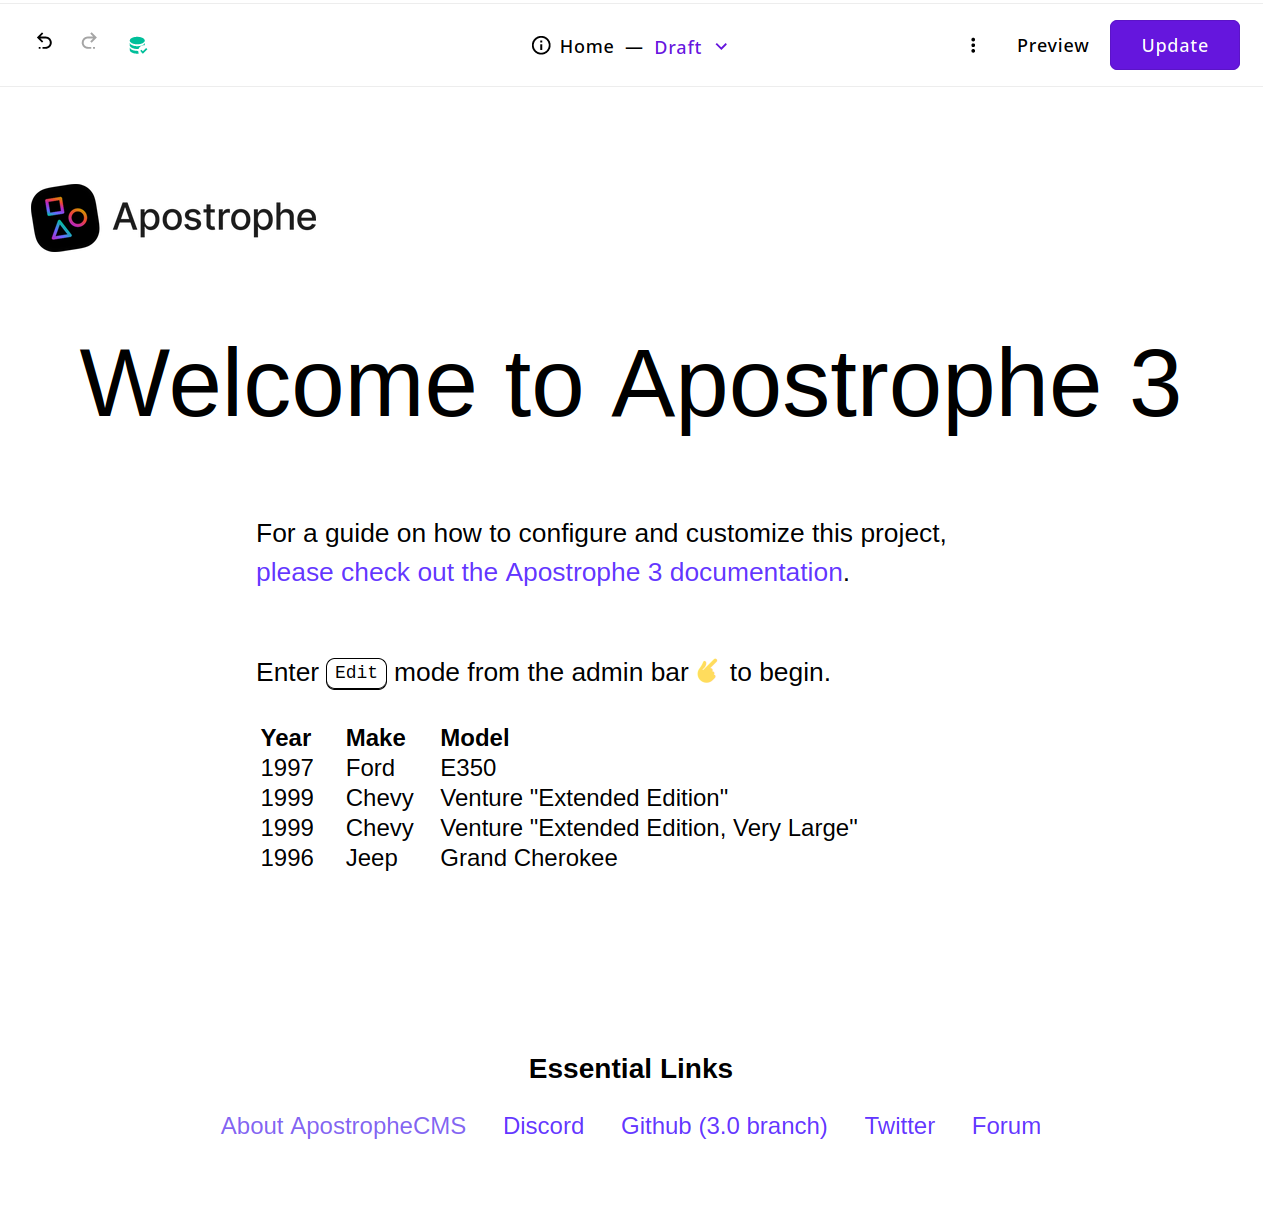
4. Customize Display Options
Choose how your data appears to visitors:

Advanced Configuration
Custom Parsers
Extend beyond CSV by creating custom parsers for other data formats.
note: The
parserCsvis provided by default indefaultParsers, it is shown here as an example
// modules/@apostrophecms-pro/data-set/index.js
import parserCsv from './lib/parsers/csv.js';

export default {
  options: {
    parsers: {
      csv: parserCsv
    }
  }
};
A parser exposes these properties:
name: Parser identifierlabel: Human-readable descriptionallowedExtensions: File types accepted (e.g.,.csv,.json). Use as theacceptattribute for thefilefield (please refer to MDN Limiting accepted file typesparse: Asynchronous function used to return the data and the columns. Receives{ filePath, reporting }and returns{ data, columns }getTotal: Asynchronous function used to return the total number of records for the Data Set. ReceivesfilePathand returns an integer
Example CSV Parser
import fs from 'fs';
import readline from 'readline';
import { parse as csvParse } from 'csv-parse';

export default {
  name: 'csv',
  label: 'CSV (comma-separated values)',
  allowedExtensions: '.csv',
  async parse({ filePath, reporting }) {
    const piece = {
      columns: [],
      data: []
    };

    const parser = fs
      .createReadStream(filePath)
      .pipe(csvParse({
        columns: headers => {
          piece.columns = headers;
          return headers;
        }
      }));

    for await (const record of parser) {
      piece.data.push(record);
      reporting.success();
    }

    return piece;
  },
  async getTotal(filePath) {
    return new Promise((resolve, reject) => {
      let linesCount = -1;
      const rl = readline.createInterface({
        input: fs.createReadStream(filePath),
        output: process.stdout,
        terminal: false
      });
      rl.on('line', (line) => {
        linesCount++;
      });
      rl.on('close', () => {
        resolve(linesCount + 1);
      });
    });
  }
};
Parser Methods
parse({ filePath, reporting })
filePath: Path to uploaded filereporting: a function that exposes asuccessmethod that you can call to update the frontend progress bar. IfgetTotalreturns10, you can callreporting.success()10times to reach100%. You can also callreporting.end()if you want to complete the progress bar immediately.Returns: --
data: an array of objects --columns: an array containing the keys from thedataproperty. It will be used as a "dynamic" schema by setting all fields as a string.
getTotal(filePath)
filePath: Path to uploaded file- Returns: Integer count of total records
Widget Customization
Configure widget display options:
// modules/@apostrophecms-pro/data-set-widget/index.js
export default {
  options: {
    icon: 'table-icon',
    className: 'my-data-table',
    placeholder: true,
    placeholderClass: 'data-set-placeholder',
    widgetTemplates: [
      { value: 'table', label: 'apostropheDataSet:table' },
      { value: 'cards', label: 'Card Layout' },
      { value: 'list', label: 'List View' }
    ]
  }
};
Widget Options:
icon: Widget icon in the admin interface. Please refer to the module options icons section.className: CSS class applied to widget wrapper. Please refer to Setting a CSS class on core widgets.placeholder: Enable/disable placeholder content. Please refer to how to add placeholders to custom widgetsplaceholderClass: CSS class for placeholder stylingwidgetTemplates: Array of display template names. Defaults to[ { value: 'table', label: 'apostropheDataSet:table' } ]. The editor will be given the opportunity to choose the template they want each time they add the widget. Templates are located inmodules/@apostrophecms-pro/data-set-widget/views/. Fortableyou'll havetable.html. Please refer to the existingmodules/@apostrophecms-pro/data-set-widget/views/table.htmlas reference. You can use this feature to define additional presentation choices beyond tables using your own markup.
Custom Templates
Create custom presentation templates in modules/@apostrophecms-pro/data-set-widget/views/. The template structure should follow the same pattern as the built-in table.html template:
{% if data.widget.aposPlaceholder and data.widget._dataSet.length === 0 %}
  <div
    data-apos-data-set-widget
    class="{{ data.manager.options.placeholderClass }}"
  >
  </div>
{% else %}
  {% set className = data.options.className or data.manager.options.className %}

  {% if data.widget._dataSet %}
    {% set dataSet = data.widget._dataSet[0] %}
    {% set columns = data.widget.columns %}
    <div
      {% if className %} class="{{ className }}"{% endif %}
      data-apos-data-set-widget
      data-apos-data-set-id={{ dataSet._id }}
    >
      <table>
        <thead>
          <tr>
            {% for column in columns %}
              <th>{{ column }}</th>
            {% endfor %}
          <tr>
        </thead>
        <tbody>
          {% for row in dataSet.data.data %}
            <tr>
              {% for column in columns %}
                <td>{{ row[column] }}</td>
              {% endfor %}
            </tr>
          {% endfor %}
        </tbody>
      </table>
    </div>
  {% elif data.user %}
    <p {% if className %} class="{{ className }} {{ className }}--error"{% endif %}>
      {{ __t('apostropheDataSet:notSelected') }}
    </p>
  {% endif %}
{% endif %}
Key points about the data structure:
- The data set is accessed as
data.widget._dataSet[0](relationship array) - Actual table data is at
dataSet.data.data(nested data property) - Columns come from
data.widget.columns(can be filtered/reordered by users) - Include proper placeholder and error handling like the table template
The module does not provide any CSS for templates in order to use the default styling from your project.
Made with ❤️ by the ApostropheCMS team. Found this useful? Give us a star on GitHub! ⭐