Extensions & Integrations
Multisite
Multisite
![]()

@apostrophecms-pro/multisite
For Apostrophe 4.x. This is a private npm module, please contact ApostropheCMS for an enterprise license.
What does it do?
This module lets you have many ApostropheCMS websites running on a single codebase in a single Node.js process. Each has its own database, users, media uploads, etc. Sites can be created and managed via a dashboard site provided by the @apostrophecms/multisite-dashboard extension. Both of these extensions should be installed together.
Those using this module are strongly advised to join our Apostrophe Enterprise Support program. Create an account on our website and navigate to the support tab. We will work with you to make sure your customers receive the high availability and durability this module is designed to provide.
Note: you do not need this module in most Apostrophe projects. It is designed to support projects that require many independently edited sites with the same source code and configuration.
Requirements (Node 18 or better)
You must have a release of Node.js which is under LTS support and supported by Apostrophe 4.x, currently Node 18.x or better. We recommend for new projects you use Node 20.x.
The minimum version of Apostrophe to be used in a project is 4.0.0.
Installation
This software is released as an npm private package. Here are the steps to install it.
First, create an npm account if you do not have one.
Second, provide your npm account username to your Apostrophe Technologies representative, requesting access to install the cloud tools. You may receive a confirmation email from npm.
Third, log into npm with the npm login command if you have not already done so.
Now you will be able to install the package normally. However, you will also need an access token in your CI/CD or other deployment system. See "npm private package deployment" below.
# You must be logged into an npm account that has been granted membership
# in our apostrophecms-pro npm organization
npm login
npm install @apostrophecms-pro/multisite
npm install @apostrophecms-pro/multisite-dashboard
npm install apostrophe
Sample app.js
const multi = require('@apostrophecms-pro/multisite')({

  // Port to listen on, or set the `PORT` env var (which Heroku will do for you)
  port: 3000,

  // Change to a fallback prefix more appropriate so you can have multiple unrelated
  // multisite projects
  shortNamePrefix: process.env.SHORTNAME_PREFIX || 'multisite-',

  // Database URI for connection. If you have multiple physical
  // servers then you MUST configure this to a SHARED server (a MongoDB
  // replica set, a managed PostgreSQL cluster, etc). Can be set via
  // the DB_URI env var.
  //
  // MongoDB, PostgreSQL and SQLite are all supported. For PostgreSQL
  // in a multisite project you should almost always use the
  // `multipostgres://` scheme rather than `postgres://`, see below.
  //
  // Examples (each one points at the dashboard database — see
  // "Choosing a database backend" below for why this matters):
  //   mongodb://localhost:27017/multisite-dashboard
  //   multipostgres://user:pass@host:5432/multisite-dashboard
  //   sqlite:///var/lib/apostrophe/multisite-dashboard.db
  //
  // The legacy `mongodbUrl` option and `MONGODB_URL` env var are still
  // accepted for backwards compatibility but are deprecated.
  dbUri: 'mongodb://localhost:27017/multisite-dashboard',

  // Session secret. Please use a unique string.
  sessionSecret: 'thisismadeup',

  // This is our default HTTP Keep-Alive time, in ms, for reuse of
  // connections. Should be longer than that of the reverse proxy
  // (nginx: 75 seconds, AWS ELB: 60 seconds, etc)
  keepAliveTimeout: 100 * 1000,

  // Set to true to proactively initialize all site instances during startup,
  // before the server begins listening for traffic. Can also be an array
  // of site IDs or shortNames to prewarm only specific sites.
  // Reduces initial request latency for prewarmed sites. Defaults to false.
  prewarmSites: false,

  // Grace period (in milliseconds) before destroying an old site instance
  // after a zero-downtime reload completes. Defaults to 60000 (1 minute).
  oldInstanceGracePeriod: 60000,

  // Apostrophe configuration for your hosted sites.
  // Just one config for all of them; per-site config could be
  // user editable settings in apostrophe-global.
  // You can also do much more in `sites/lib/modules`,
  // following Apostrophe's usual patterns

  sites: {
    modules: {
      '@apostrophecms/page': {
        choices: [
          {
            label: 'Home',
            name: '@apostrophecms/home-page'
          },
          {
            label: 'Default',
            name: 'default-page'
          }
        ]
      }
    }
  },

  // Apostrophe configuration for the dashboard site.
  // The multisite-dashboard extension with site
  // and site-page modules is required
  // The `site` module is a piece type that represents
  // each of the individual sites beyond
  // the dashboard.
  //
  // You can also do much more in `dashboard/lib/modules`,
  // following Apostrophe's usual patterns
  //
  dashboard: {
    modules: {
      '@apostrophecms-pro/multisite-dashboard': {},
      // The site module must be activated either here or
      // in the `dashboard/index.js` file
      // The site module requires the baseUrlDomains option
      site: {
        options: {
          baseUrlDomains: {
            dev: 'localhost:3000',
            staging: 'test.dev',
            prod: 'test.com'
          }
        }
      },
      // The site-page module must be activated here or
      // in the `dashboard/index.js` file
      'site-page': {}
    }
  }
}).then(function(result) {
  // There is no top level await so we catch this here.
  // At this point either the task has run or the site is up.
}).catch(function(err) {
  console.error(err);
  process.exit(1);
});
This is a minimal example. The code seen here for the
sitesproperty is more often factored out to asites/index.jsfile, as seen in starter kits such as starter-kit-assembly-essentials. The same is true for thedashboardproperty, which is typically refactored todashboard/index.js. See the starter kit for a more detailed example.
Choosing a database backend
Multisite uses @apostrophecms/db-connect, which supports MongoDB, PostgreSQL, and SQLite. The connection is configured via the dbUri option or the DB_URI environment variable.
# MongoDB (the original backend)
DB_URI=mongodb://localhost:27017/multisite-dashboard

# PostgreSQL — see the important note below about multipostgres://
DB_URI=multipostgres://user:pass@host:5432/multisite-dashboard

# SQLite (single-machine only; fine for dev, not recommended for
# production multisite under load — see note below)
DB_URI=sqlite:///var/lib/apostrophe/multisite-dashboard.db
DB_URI takes precedence over the legacy MONGODB_URL variable, and dbUri takes precedence over the legacy mongodbUrl option. Both legacy names still work but emit a deprecation warning; new projects should use dbUri / DB_URI.
Database naming and shortNamePrefix
Whatever backend you choose, multisite always addresses its databases as <shortNamePrefix><siteId> for hosted sites and <shortNamePrefix>dashboard for the dashboard. So shortNamePrefix is what determines the names you'll see in the cluster, on disk, or in the schema list. The examples above all point at the dashboard database (multisite-dashboard) because that is the one database guaranteed to exist in any multisite project, which makes it a useful "is the connection alive" target and keeps URIs visually consistent.
The strength of that requirement varies by backend:
- MongoDB — the database segment in the URI is just a default and is never read by multisite (every call passes an explicit name). You can point it anywhere, but pointing it at
<shortNamePrefix>dashboardmakes the convention obvious. Just make sure the connecting user is allowed to access databases matching yourshortNamePrefix. multipostgres://— the URI must encode the real PostgreSQL database name and the constraint is enforced by the adapter (see below). The realdb portion of the path must equalshortNamePrefixwith the trailing hyphen removed.- SQLite — multisite opens sibling files in the directory of the URI's file. The basename of that file must be
<shortNamePrefix>dashboard(see "A note on SQLite" below).
If you change shortNamePrefix from the default, change all three examples accordingly (e.g. myapp- → myapp-dashboard).
Use multipostgres://, not postgres://, for PostgreSQL
If you choose PostgreSQL, you should almost always use the multipostgres:// scheme rather than plain postgres:// in a multisite project.
Multisite gives every site its own logical database — the dashboard plus one per hosted site. With MongoDB that is cheap: a single MongoDB cluster cheerfully hosts hundreds of databases. With PostgreSQL it isn't: most managed PostgreSQL services (RDS, Cloud SQL, Neon, Supabase, etc.) bill, provision, and limit you per database, and creating a fresh database per tenant from application code is usually either slow, restricted, or outright forbidden.
The multipostgres:// scheme solves this by giving each site its own PostgreSQL schema within a single physical database. Schemas provide the same isolation guarantees you'd want from separate databases (no cross-tenant data leakage) while sharing one connection pool and one billable database. Each schema is created on first use and dropped cleanly when its site is removed.
The URL takes the form:
multipostgres://user:pass@host:5432/<realdb>-<schema>
Multisite splits this at the last hyphen: everything before is the real PostgreSQL database name, everything after is a schema name. The crucial constraint is that <realdb> must equal your shortNamePrefix with the trailing hyphen removed, because multisite addresses each per-site schema as <shortNamePrefix><siteId> (the dashboard uses <shortNamePrefix>dashboard). The simplest correct suffix is therefore dashboard — that schema always exists in a multisite project. With the default shortNamePrefix: 'multisite-' a working URI is:
multipostgres://user:pass@host:5432/multisite-dashboard
This will store all of your data, for both individual sites and the dashboard, in separate schemas within the Postgres database multisite.
Plain postgres:// is supported for single-tenant Apostrophe projects but is not appropriate for multisite and does not support it.
A note on SQLite
The SQLite adapter opens databases in WAL mode with a 5-second busy timeout, so multiple Node processes on the same machine can safely share a database file. SQLite is, however, single-machine only: WAL relies on a shared-memory file (-shm) that is not safe over NFS, EFS, or most network filesystems — so SQLite cannot back a horizontally scaled deployment. Even on a single machine, every writer across every site contends for one write lock per database file, which becomes a bottleneck for a busy multisite project. SQLite is excellent for development, demos, and small single-host installs; reach for PostgreSQL or MongoDB for production multisite under any real write load.
As with multipostgres://, the URI you pass must align with shortNamePrefix. Each site gets its own .db file, named after <shortNamePrefix><siteId>, alongside <shortNamePrefix>dashboard.db for the dashboard. The convention is to point dbUri at the dashboard file: with the default shortNamePrefix: 'multisite-' use sqlite:///var/lib/apostrophe/multisite-dashboard.db. If you change shortNamePrefix, change the filename basename to match (e.g. myapp- → myapp-dashboard.db).
Setting baseUrl and naming environments
The baseUrlDomains option of the site module is required. As shown above, it maps all of your sites to subdomains of certain working domains, one per environment. For example, you might have one domain for local testing (dev), one domain for testing code on a cloud that is not the production environment (staging), and one domain for production (prod).
Each site needs to have a shortname field in its configuration. That name will be prepended to the appropriate domain in each environment. For instance, in the above configuration, if a site's shortname is set to products then the dev, staging and prod hostnames will be http://products.localhost:3000, https://products.test.dev, and https://products.test.com.
The first environment does not have to be named dev, but Apostrophe does assume the first environment is for local testing on developer workstations. So it is essential to add the port number you plan to test with to the first entry in baseUrlDomains, as shown above (usually 3000), and keep in mind that test URLs will use http://. All other environments assume https://.
localhost:3000is a popular choice fordevbecause if you test in Chrome, subdomains oflocalhostautomatically resolve to your computer. Very rarely in other modern browsers you might need to edit your/etc/hostsfile.
The environment name prod is special. Only this environment will attempt to serve a site based on its prodHostname field setting.
Starting up Apostrophe in a specific environment
To let @apostrophecms/multisite know what environment it is currently running in set an environment variable when starting your app:
ENV=prod node app.js
It is also possible to do it by adding the property env to your server's data/local.js file:
module.exports = {
  env: 'prod'
}
npm private package deployment
To install this private package in your CI / CD or other deployment system, you will need to generate an npm access token, and configure your project to use it.
First, on your workstation where you have already logged into npm, generate the token:
npm token create --read-only
Second, add a .npmrc file to the root of your project, exactly as shown. Do not paste the actual token here.
//registry.npmjs.org/:_authToken=${NPM_TOKEN}
Third, add your token as a "secret" in your CI/CD environment, such that it becomes the value of the NPM_TOKEN environment variable.
For more information and examples, see using npm private packages in a CI/CD workflow.
Running in production: server-specific settings
Sometimes you'll need to change certain options for production use.
You can use a data/local.js file, like this. It merges automatically with your configuration, do not require the file yourself:
module.exports = {
  dbUri: 'mongodb://somewhere-else:27017/multisite-dashboard',
  dashboardHostname: [ 'dashboard-prod.myservice.com' ]
};
You should exclude this file from deployment to allow it to differ on staging and production servers, as opposed to local dev environments.
Your hosted sites share
sites/data/local.js, and your dashboard site can havedashboard/data/local.js. They do not read the top-leveldata/local.js, it is exclusively for the multisite module. All three folders should be excluded from deployment.
Or, you can use environment variables as enumerated above in the example configuration. This is the only way to go with a host like Heroku that does not offer persistent storage on the local drive.
If you simply use a load balancer to point to several processes or servers running
@apostrophecms-pro/multisite, you will eventually haveaposobjects live for every site that is accessed in each process. This is fine, generally speaking, but if you have hundreds of sites it would make more sense to configure your load balancer to only send site X to servers A, B, and C (to provide some redundancy), and so forth. However, that is a load balancer configuration task outside the scope of this module.
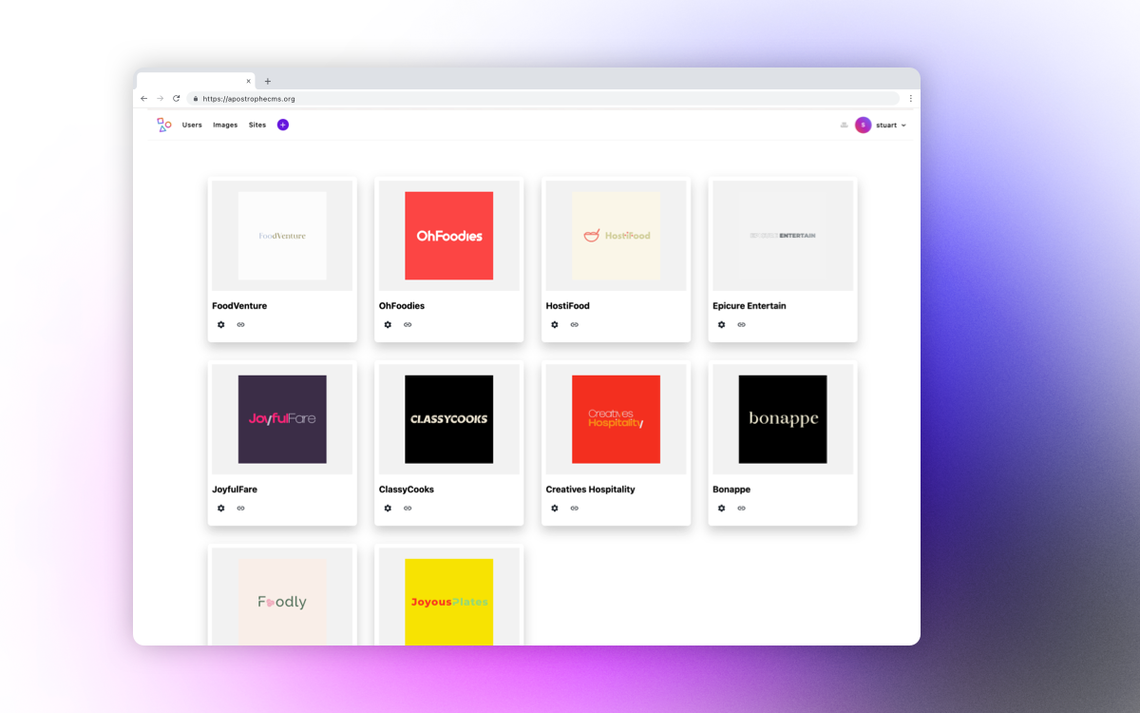
Creating sites via the dashboard
First you need to be able to log into the dashboard:
node app @apostrophecms/user:add admin --site=dashboard
Now log into http://dashboard.localhost:3000 or http://dashboard:3000 if you have edited your etc/hosts file.
Then, go to the admin bar, pick "Sites", and add a site. Next, give it a shortname. If your browser doesn't automatically resolve localhost, make sure the shortname matches one of the hostnames you added to /etc/hosts. You will also have to select an admin password that can either match the one you are using for your dashboard credentials or is site specific. Let's say the hostname is one.
Remember that you'll need to add staging and production hostnames here too at some point.
Now you can access the new site from the dashboard to either login as an admin by clicking the 'Admin Login' link in the 'Links' column to the right of the site name, or by navigating to:
http:one.localhost:3000 or http://one:3000 if you have edited your etc/hosts file.
But, you still don't have any users for one. So make a user from the command line:
node app @apostrophecms/user:add admin --site=one
You can also log in as an admin user and create users from the User menu in the individual site.
The multisite-dashboard also adds a search functionality to your dashboard page. This is useful when you get a number of sites larger than what fits on a single page.
Under the 'Links' column there is also a link to navigate directly to the site home-page rather than the login page.
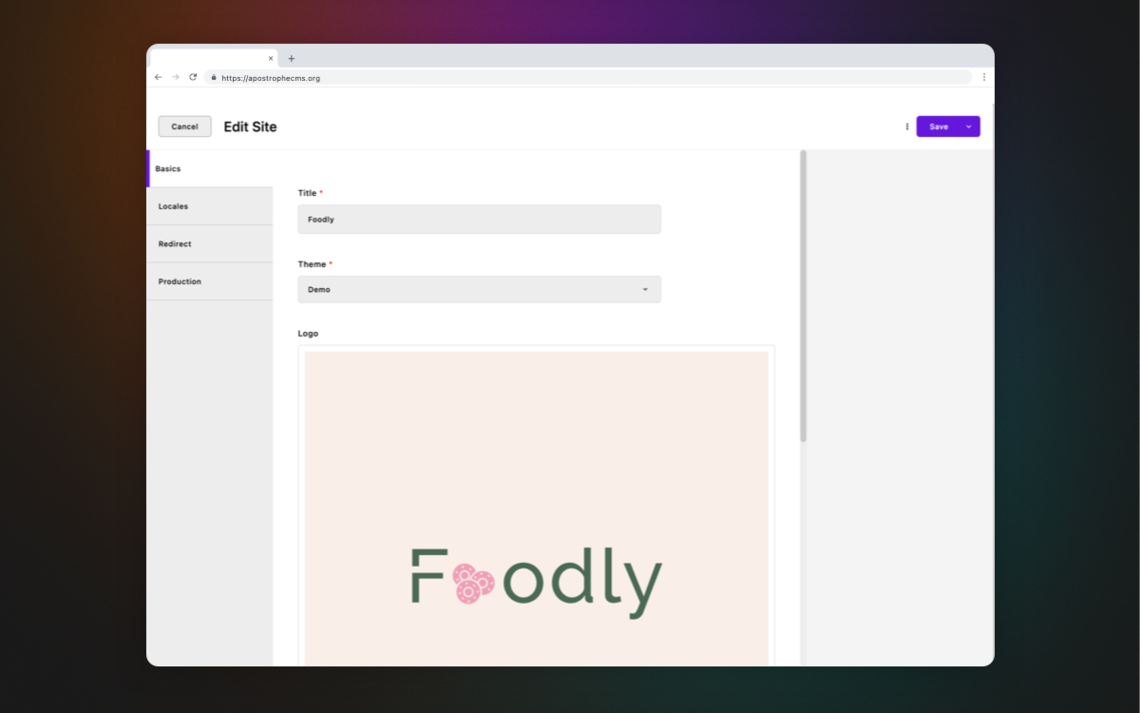
The multisite-dashboard extension also adds the "Templates" tab to the site creation modal. When creating or editing a site you can toggle the "Template" control in the basics tab. This will move the site to the template tab, but will not impact its functionality. This is a convenience for creating new sites that have a similar set of fields like locales and themes. To create a new site from a template, select "Duplicate" from the context menu to the right of the selected site.
How to run tasks
To run a task for the dashboard site:
node app @apostrophecms/migration:migrate --site=dashboard
To run a task for an individual site, by its hostname or _id:
node app @apostrophecms/migration:migrate --site=example.com
To run a task for all hosted sites (not the dashboard):
node app @apostrophecms/migration:migrate --all-sites
To run that task without forking a new process for each invocation, which works only with well-behaved tasks that don't try to exit the process on their own:
node app @apostrophecms/migration:migrate --all-sites --without-forking --concurrency=3
This significantly improves performance. The appropriate level of concurrency depends on your task; you may leave this argument off.
We do fork just a little. To combat any memory leaks, if there are more than ten sites to run the task for, sub-processes will be forked to process them sequentially in groups of 10 using the
--sitesoption. The end result is the same, andconcurrencystill applies within each group.
Note that
--all-sitesdo not work for interactive tasks that prompt for information, like@apostrophecms/user:change-password, or otherwise read from standard input. Currently, these options print all output at the end.
If the site objects in your dashboard have a theme schema field (typically of type select), then you may generate assets for each theme:
node app @apostrophecms/asset:build --theme=theme-one
node app @apostrophecms/asset:build --theme=theme-two
For a complete solution to generate per-theme assets you will also need to override the
getNamespacemethod of@apostrophecms/assetas shown here.
Running scheduled tasks just once across a cluster
You may have multiple application servers or workers which could potentially run each task, and need them to run, for instance, only once per hour. They need to run only once even if you have many servers.
You can do that by configuring cron jobs like this across all servers. These cron jobs don't call out the specific tasks, they just provide a point of entry:
0 0 * * * ( cd /opt/stagecoach/apps/my-app/current && node app tasks --frequency=daily )
0 * * * * ( cd /opt/stagecoach/apps/my-app/current && node app tasks --frequency=hourly )
Now configure the top-level tasks option, which is a peer of sites and dashboard, it is not nested within them:
tasks: {
  // These tasks are run for all sites, i.e. like the `--all-sites` option
  'all-sites': {
    hourly: [
      // Run this task hourly but only on the server that
      // happens to grab the lock first
      'products:sync'
    ],
    daily: [ ... also supported ]
  },
  // These tasks are run for the dashboard site, i.e. like `--site=dashboard`
  dashboard: {
    hourly: [
      'some-module-name:some-task-name'
    ],
    daily: [ ... also supported ]
  }
}
This way your crontab file doesn't have to contain any custom state. It just contains these standard entries and your configuration in app.js determines what tasks are run, leveraging cron only as a way to begin invocation at the right time.
Apostrophe will use locks and check the most recent start time to avoid redundancy.
Code and templates for the hosted sites
These live in sites/lib/modules of your project.
Code and templates for the dashboard site
These live in dashboard/lib/modules of your project. Be aware that there is already a pieces module called site, which powers the proxy that routes traffic to the individual sites. You can extend that module with more fields.
"But where do I configure the individual sites?"
The entire point of this module is to share all the code between sites. If we didn't want that, we'd build and deploy separate sites and we wouldn't need this module.
So if you are using this approach, then all configuration that varies between sites must take place via the user interface.
For instance, you might use the @apostrophecms-pro/palette module, or just use @apostrophecms/global preferences for high level choices like site-wide styles or Google Analytics IDs, as documented on the Apostrophe website.
Is there a way to customize per-site configuration as if they had their own app.js?
Yes. If the sites option is a function rather than an object, it is invoked with the site object, and must return an object.
This function may be an async function and will be awaited.
This allows you to take the properties of the dashboard’s site object into account when the site “spins up.”
In addition, any time a site piece is saved in the dashboard, all existing apos objects for that site are invalidated, meaning that they will be created anew on the next web request. This allows the options.sites function to take the new properties of site into account.
This can be used to achieve effects such as passing a new list of locales to apostrophe-workflow based on user input in the dashboard.
Note that this means the site object should not be updated frequently or for trivial reasons via Apostrophe’s update method — only when significant configuration changes occur. However, it is never a good idea in any case to implement a hit counter via Apostrophe’s model layer methods. As always, use a direct MongoDB update with $inc for such purposes.
There is one catch however: each theme produces just one asset bundle, which has certain impacts when you wish to selectively enable and disable modules on a per-site basis. See below for a workaround.
Separate asset namespaces for themes
Projects with multiple themes have separate asset bundles, allowing each theme to have a separate set of enabled modules.
To produce a different asset bundle for each theme, you must override the getNamespace method of the @apostrophecms/asset module for your sites. This is standard in our assembly starter kits, such as starter-kit-assembly-essentials. You only need to worry about it yourself if you are creating a multisite project entirely from scratch.
This function must return the theme name associated with your site.
Here is a working example:
// Typically in sites/index.js
module.exports = site => {
  return {
    // Pass the theme name in as a global option to the apos object. If you
    // add support for themes later in your project, make sure you provide
    // a default theme name for old sites
    theme: site.theme || 'default',
    modules: {
      // Other configuration here. Include various modules, or not,
      // based on `site.theme`
    }
  };
}

// in sites/modules/@apostrophecms/asset/index.js
module.exports = {
  methods(self, options) {
    return {
      getNamespace() {
        return self.apos.options.theme;
      }
    };
  }
};
In order to speed up your development build, you may build only a specific theme while in development via the APOS_THEME environment variable. In the following example only the demo theme will be automatically built at startup.
APOS_THEME=demo npm run dev
Make sure each theme contains all relevant modules at build time
There is one catch with per-site configuration: you can selectively enable modules based on the site piece, but every theme that might, in some configuration, require a module must have it enabled at asset build time. Otherwise code that was not included in the asset bundle will be missing for the sites that do expect it.
If you wish to selectively enable modules based on site piece properties other than theme, for instance via a hasForms boolean field added to the site module in the dashboard, you will need a small amount of extra logic to ensure the relevant modules are always enabled during an asset build:
// Typically in sites/index.js
module.exports = site => {
  return {
    // Pass the theme name in as a global option to the apos object. If you
    // add support for themes later in your project, make sure you provide
    // a default theme name for old sites
    theme: site.theme || 'default',
    modules: {
      ...(site.hasForms || site._id.includes('build-for-theme')) ? {
        '@apostrophecms/form': {},
        '@apostrophecms/form-widget': {},
        // other form modules here, as that extension requires
        // installing more than one
      } : {}
    }
  };
}
In particular, this is the officially supported way to check whether an asset build is in progress:
site._id.includes('build-for-theme')
If you are consistently including modules all the time, or including and excluding them only on the basis of site.theme, no extra logic is necessary.
Make sure breakpointPreviewMode.enabled is always configured at build time
Similarly, if you are conditionally enabling the breakpointPreviewMode.enabled option based on per-site settings, you should take care to always enable it at build time to ensure the asset build is done in a manner compatible with our mobile breakpoint preview feature:
// in sites/index.js

module.exports = (site) => {
  return {
    modules: {
      '@apostrophecms/asset': {
        options: {
          breakpointPreviewMode: {
            // Enable breakpoint preview mode based on a boolean field of the site
            enable: site.hasBreakpointPreview || site._id.includes('build-for-theme')
            screens: {
              // ... See the documentation for how to specify the device screen
              // sizes: https://docs.apostrophecms.org/guide/pages.html#device-breakpoint-previews
            }
          }
        }
      }
    }
  };
};
If you are enabing breakpoint preview for all sites, you do not need to take any special steps for this.
Websockets
This module optionally supports forwarding websocket connections correctly to each site. To take advantage of this feature you must provide an Apostrophe module named websocket within the sites and/or dashboard folder of your project. If there is such a module, new websocket connections with the appropriate hostname will automatically be passed to its connected method, which must exist. As with everything else it is possible to provide such a module in some themes and not others. If a particular site (or the dashboard) receives a websocket connection and has no websocket module, the connection will be immediately closed.
To activate this feature, the top-level websocket: true option must also be set in app.js.
For example:
// app.js

const multi = require('@apostrophecms-pro/multisite')({
  // ...among other options ...
  websocket: true
});

// sites/index.js
module.exports = {
  modules: {
    // Activate the websocket module
    websocket: {}
  }
};

// sites/modules/websocket/index.js
//
// Implement the websocket module
module.exports = {
  methods(self) {
    return {
      connected(ws, req) {
        ws.send(JSON.stringify({
          type: 'hello'
        }));
        ws.on('message', message => {
          // handle an incoming message
        });
        ws.on('close', {
          // handle closure
        });
      }
    }
  }
}
⚠️
req.sessionandreq.userdo not automatically carry over to websocket connections. Thereqobject is a raw Node.jshttp.ClientRequestobject, it does not have all of the features of an Expressreqobject. You can however accessreq.headersand other useful properties.
Using AWS (or Azure, etc.)
You can achieve this by passing uploadfs settings to the @apostrophecms/attachment module for both dashboard and sites, or just set these environment variables when running the application:
APOS_S3_BUCKET YOUR-bucket-name
APOS_S3_SECRET YOUR-s3-secret
APOS_S3_KEY YOUR-s3-key
APOS_S3_REGION YOUR-chosen-region
@apostrophecms-pro/multisite will automatically add a distinct prefix to the paths for each individual site's assets.
Serving static assets via AWS, Azure, etc.
In addition to the above environment variables, add:
NODE_ENV=production
APOS_UPLOADFS_ASSETS=1
All of these must be set both when running the asset build task and when running the actual sites. The asset build task will copy the assets to the appropriate bucket.
Using a CDN
If you are using a CDN such as Cloudfront or Cloudflare that automatically mirrors the contents of your S3 bucket or other uploadfs cloud storage, you can specify that CDN so that Apostrophe generates public URLs that reference it instead of pointing directly to the cloud storage:
CDN=https://myproject.my-cdn.com
Since the sites share a single cloud storage facility with a single URL, they also share a single CDN in front of that.
Deployment issues
If you are not using AWS S3 or similar, you will need to persist sites/public/uploads and dashboard/public/uploads between deployments.
Logging
By default, only warnings and errors are logged when NODE_ENV is production. In development, everything is logged by default.
To log everything in production, set the VERBOSE environment variable:
VERBOSE=1 node app
You can also select one or more of the four possible logging levels:
LOG_LEVEL=info,debug,warn,error node app
info and debug are written to standard output, while warn and error are written to standard error. When not running a command line task on behalf of a single site, the output is prefaced with the shortname of the site responsible. TODO: provide options to replace this simple logger.
Private dashboards
The dashboard configuration object accepts a top-level privateDashboards option. If set to true, non-admin dashboard users can only see sites they created in the dashboard, unless the new "All Sites" field is checked for that user. This allows multiple tenants to have the privilege of creating sites without having access to modify each other's sites.
When creating a user for this purpose, don't forget to also give the new dashboard user the "Editor" role. The "Guest" role is not sufficient to create sites.
This is unrelated to permissions within individual sites, which are separate from the dashboard as always.
Accessing the MongoDB utilities for a specific site
The database name for a site is the prefix, followed by the _id of the site piece. However this is awkward to look up on your own, so we have provided utility tasks to access the MongoDB utilities:
# Mongo shell for the dashboard site
node app mongo:mongo --site=dashboard
# Mongo shell for an individual site; use its hostname
# in the appropriate environment
node app mongo:mongo --site=test1.localhost
# mongodump
node app mongo:mongodump --site=test1.localhost
# mongorestore, with the --drop option to prevent
# doubled content
node app mongo:mongorestore --site=test1.localhost -- --drop
Note the use of -- by itself as an end marker for the options to Apostrophe, allowing the --drop option to be passed on to mongodump.
Resource leak mitigation
If you suspect your application is slowly leaking memory, HTTP sockets or some other resource that eventually renders it nonresponsive, you can set the maxRequestsBeforeShutdown option. The application will automatically exit after that number of requests. By default, this mechanism calls process.exit(0). You can change this behavior by passing a custom exit function to @apostrophecms-pro/multisite as an option.
10000 is a reasonable value for this option.
Of course this assumes you are using pm2, forever or another mechanism to restart the application when it exits, and that you are also running at least one other process concurrently, so that they can cover for each other during restarts.
To avoid 502 Bad Gateway errors when all the processes stop at the same time, for instance due to round-robin scheduling that delivers equal numbers of requests to them, a random number of additional requests between 0 and 1000 are accepted per process. This can be adjusted via the additionalRequestsBeforeShutdown option; set to 0 for no random factor at all.
Legacy features
Using the dashboardHostname option
The dashboardHostname option may be configured to specify the hostname of the dashboard, or an array of permissible hostnames for the dashboard. However, best practice is to let Apostrophe infer it from the baseUrlDomains option, to which dashboard. will be prepended automatically.
Project contribution
Run tests
Tests can be run locally if hosts are on your machine with sudo nano /etc/hosts on Linux or MacOS.
Add this line to the /etc/hosts file:
127.0.0.1 fr.site-assembly.test fr-site-assembly.test fr-assembly-test en-gb.site.test fr-site.test en-gb-site.test site-assembly.test dashboard.test dashboard-assembly.test site.test site2.test fr.site.test en-gb.site.test canada.site.test site.test.prod canada.site.test.prod fr.site.test.prod en-gb.site.test.prod example.com exemple.fr quebec-example.com admin.test admin-assembly.test
./hostnames.test.js: home = await rp(http://dashboard-assembly.test:${multisite.options.port});
./hostnames.test.js: home = await rp(http://admin-assembly.test:${multisite.options.port});
If modification of the hosts file is not an option, tests can be run through Docker by installing Docker and docker-compose. Then, run docker-compose up. By default, it will launch npm test. You can also add a TEST_CMD variable to launch another command. For example, TEST_CMD='npm run test:watch' docker-compose up to launch tests in watch mode and reload tests as you modify them.
Code linting
When contributing to this project, run npm run lint before pushing code in order to facilitate code review.
Localized domain names
It is possible to allow dashboard administrators to define the locales for each site.
To do that, you must set the flag localizedSites to true, in the site module options.
// in dashboard/modules/site/index.js

module.exports = {
  options: {
    localizedSites: true,
  }
}
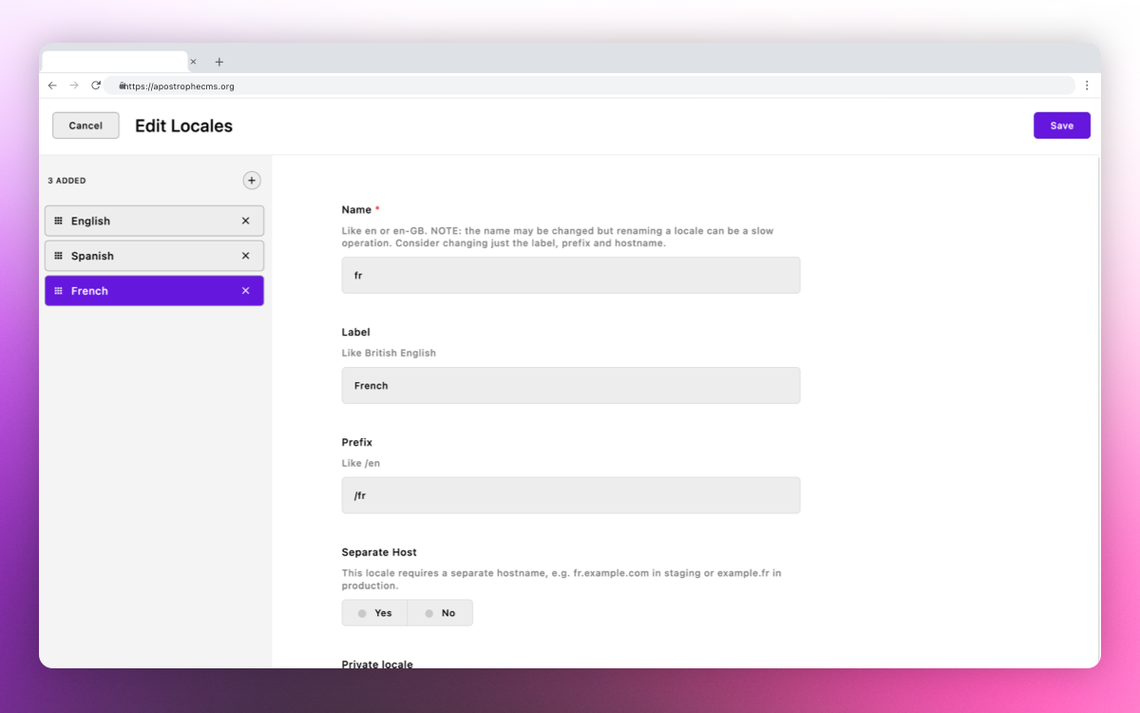
Once this has been done, you can access new fields in the locales tab when editing your site on the dashboard.
You can add as many locales as you want, and for each of them you can give it a name, label, prefix, choose if you want a separate host, and if so, set a separate production hostname.
If the separate host is set to true, the locale will be used as a subdomain of the domain name
in addition to the separate production hostname if that field has been filled out and DNS has been configured for it.
The prefix will always be used if it exists, allowing multiple locales to share the same separateProductionHostname.
Let's say we have a French locale with these options:
| Fields | Values |
|---|---|
| Label | French |
| Prefix | |
| Separate Host | true |
| Separate Production Hostname | my-french-site.com |
And our site piece shortName is set to site.
In this case, if the environment variable ENV is set to staging, we will have fr.site.staging.com as the hostname.
If we are in production, so ENV is set to prod, we will have fr.site.production.com and my-french-site.com (only in production) as hostnames.
If we set a prefix, such as /fr, then only URLs in which the path part begins with /fr will display content from that locale. This way some locales can share the same separateProductionHostname being differentiated by the prefix.
If separateHost is set to false and prefix is /fr, we simply use the latter to differentiate locales: site.localhost:3000/fr, site.staging.com/fr, site.production.com/fr.
Note that you can have only one locale with no prefix and no separate host, that would be the default one.
Private locales
You can make a locale private, meaning that this locale is only visible for logged-in users.
There is a new boolean field with the label Private Locale for each configured locale in your dashboard.
When adding the option localizedSites to the site module of your project, instead of true you can pass an object and specify the option privateByDefault.
If this sub-option is set to true, every new locale created will have its private property set to true by default, otherwise they will be public by default.
{
  options: {
    localizedSites: {
      privateByDefault: true
    }
  }
}
The private option will be editable from the dashboard when editing your site locales.
Staging subdomain
Adding a stagingSubdomain to locales gives the possibility to group multiple locales on a single subdomain, which can be useful for testing on a pre-production or staging environment.
For instance, two locales "EN" and "FR" configured with a canada subdomain would be accessible from canada.staging.url/fr, canada.staging.url/en unless the separateProductionHostname is set and in that case it will be used instead on production.
If left blank, the locale name will be used as the subdomain, outside of production: fr.staging.url, en.staging.url.
Renaming locales
It is possible to rename a locale via the interface. However, this is time-consuming and pauses access to the site, so it is best to address this early before the site is public.
Customizing paused sites
In the rare event that a site has been paused to perform a sensitive operation, such as renaming a locale, a maintenance page automatically appears, reassuring the user and refreshing every 10 seconds until the site is available.
The status code defaults to 503 but can be customized via the pausedStatus option to the multisite module.
It is also possible to completely customize this page by passing a pausedHandler function to the multisite module. This function receives the req, res (e.g. the Express request and response objects) and must send a response to res, as in this minimal example. Note that the status code becomes your responsibility if you pass a pausedHandler function.
pausedHandler(req, res) {
  res.status(self.options.pausedStatus || 503);
  return res.send(`
    <!DOCTYPE html>
    <html lang="en">
      <head>
        <meta charset="utf-8">
        <title>One Moment Please</title>
        <script>
          setTimeout(function() {
            window.location.reload();
          }, 10000);
        </script>
      </head>
      <body>
        <h1>One Moment Please</h1>
        <p>This page will refresh in 10 seconds.</p>
      </body>
    </html>
  `.trim());
}
The handler must be self-contained because of the risk that any operations within Apostrophe could trigger the race conditions that the pause mechanism is designed to avoid.
Unpausing sites
In the very unlikely event of an uncaught exception during an operation such as renaming a locale, a site could remain in the paused state. This can be cleared with the following command line task:
node app site:unpause shortname-of-site-goes-here --site=dashboard
The hostname of _id of the site can also be used. Note that --site is set to dashboard
because this task operates at the dashboard level.