
- Official Extension
-
-
 Maintainer: ApostropheCMS (opens in new tab)
 - Last updated 1 month ago
- v2.0.0
-
-
- Pro License
README

SEO Assistant


Generate compelling, keyword-optimized meta titles and descriptions with AI. Transform your SEO workflow by automatically creating professional metadata that drives clicks and improves search rankings—all based on your actual page content.
Why SEO Assistant?
- 🤖 AI-Generated Meta Titles: Compelling, keyword-optimized titles generated automatically
- 📝 Smart Meta Descriptions: AI-crafted descriptions that drive clicks
- 🎯 Content Analysis: Get suggestions based on your actual page content
- ⚡ One-Click Optimization: Generate, review, and apply SEO improvements instantly
- 🔄 Multiple Suggestions: Try different approaches with regeneration options
- ✏️ Custom Prompts: Fine-tune AI behavior for your brand voice
The SEO Assistant analyzes your page content and generates optimized meta titles and descriptions using advanced AI, making professional SEO accessible to content creators of all skill levels.
Installation
Note: This module requires an ApostropheCMS Pro license. Don't have Pro yet? Create an account on Apostrophe Workspaces or contact us and get started with ApostropheCMS Pro to access this and other Pro extensions.
To install the module, use the command line to run this command in an ApostropheCMS project's root directory:
The SEO extension is also required, if not already present, for the SEO Assistant module to work.
Requirements: the assistant generates through the Apostrophe AI engine (
apos.ai) and builds its page context with the core schema content extraction (apos.schema.extract) - updateapostropheto the latest version. The@apostrophecms-pro/automatic-translationextension is no longer required.
Upgrading from 1.x? The module no longer carries its own OpenAI client, and its AI configuration moved to the engine. See Migrating from 1.x.
Configuration
Initial Setup
The assistant generates through the Apostrophe AI engine, which is configured once and shared by every AI feature in the project. Set your provider's key as an environment variable:
Then configure the engine, the SEO module and the assistant in the app.js file:
Important: The
@apostrophecms/seomodule is required for the SEO Assistant module to work. If you already have it configured in your project, you can keep the existing configuration. However, register the@apostrophecms-pro/seo-assistantmodule after the@apostrophecms/seomodule in theapp.jsfile — the assistant enhances the SEO meta fields, and registering it first lets the plain fields win.
If the engine already has a provider configured for another feature, the assistant uses it and there is nothing more to do here.
Choosing a Provider
Every provider adapter ships with Apostrophe — there is no extra module to install. Name the one you want under providers and set its key in the environment:
| Provider | Environment variable |
|---|---|
openai |
APOS_OPENAI_KEY |
anthropic |
APOS_ANTHROPIC_KEY |
google |
APOS_GEMINI_KEY |
openai-compatible |
APOS_OPENAI_KEY |
To read a key from a variable you already use under another name, name that variable in the entry:
An apiKey may also be set directly on the entry, though an environment variable is preferable in production. Configuring more than one provider additionally requires naming the default with the engine's own provider option.
Generation Options
By default the assistant follows the engine's routing. Four optional settings steer it, all in the engine's own vocabulary:
| Option | Effect |
|---|---|
effort |
The routing level to resolve, such as low, medium or high |
provider and model |
Pin one model, bypassing the routing table. Required together |
reasoning |
Override the resolved reasoning level, in the provider's vocabulary |
Writing a meta title or description is a short, inexpensive task, so effort: 'low' is usually the right choice.
These options are checked when the site starts: an effort level or a model that resolves to nothing, or a provider given without a model, stops the boot with a message naming the problem.
Offline Development
Set APOS_AI_MOCK=1 to answer every AI call with a placeholder — no provider, no key and no network needed. Everything else runs unchanged, so the assistant works normally in the editor:
Content Length Restrictions
Set a minimum page context length to ensure quality suggestions:
When minContextLength is set, the module will not generate metadata for pages with text content shorter than the specified value. The default is no restriction.
Page Context
The assistant builds its page context with the Apostrophe core schema content extraction, which walks the document and collects the text of every field that participates — including text inside areas, widgets, arrays and objects. The SEO meta fields are left out, so the assistant never sees the metadata it is about to generate.
To keep a field out of the page context, tag it with the seo extraction tag, alongside the tags its field type already carries:
Use extractable: false instead to remove the field from extraction entirely — that hides it from every consumer, translation included.
Using the SEO Assistant
The SEO Assistant provides a field indicator UI for the SEO Title and Description fields in the page/piece editor. When you click the indicator, the module offers an action to generate metadata suggestions based on your current page content and pre-configured AI prompt.
Workflow:
- Click the SEO Assistant indicator next to title/description fields
- Review the AI-generated suggestion
- Accept the suggestion (and edit if needed), retry, or customize the prompt
SEO Assistant Interface
Context Menu:
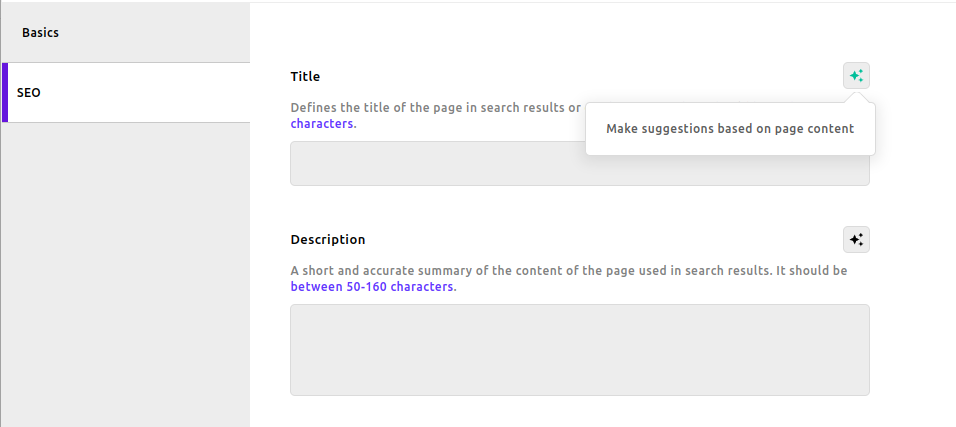
Generated Suggestion:
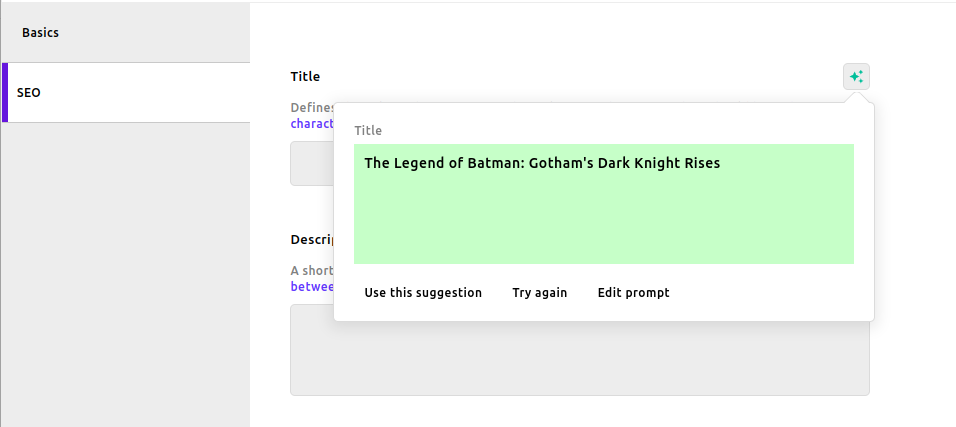
Custom Prompt Editing:
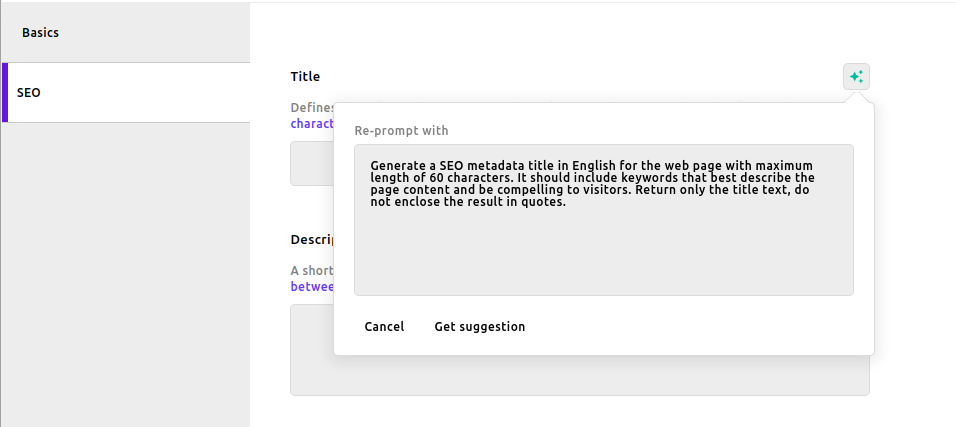
Applied Suggestion:
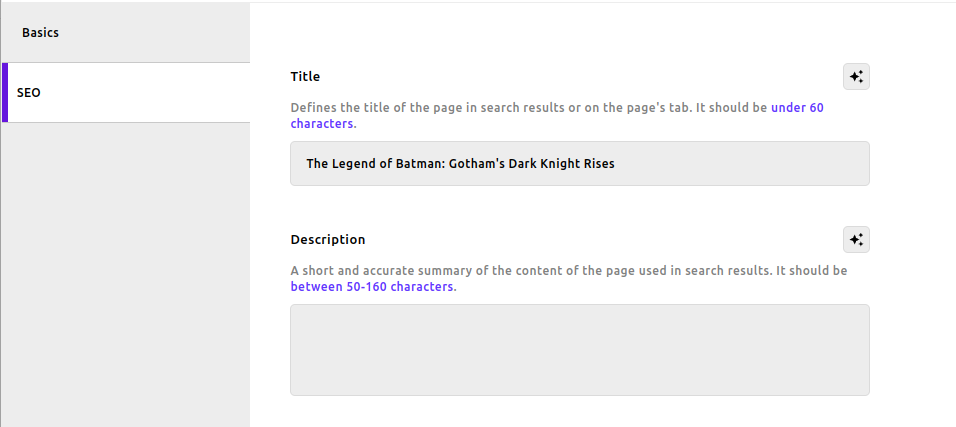
Customizing the Prompts
Three prompts shape what the assistant asks for. The simplest way to change them is to override the phrases themselves, which are ordinary i18n strings in the aposSeoAssistant namespace:
| Key | What it is |
|---|---|
promptSystem |
The system prompt, framing the model's role |
promptEditorSeoTitle |
The instruction for seoTitle, which editors see and may rewrite |
promptEditorSeoDescription |
The instruction for seoDescription |
promptContext |
The line introducing the page context |
For anything the wording alone cannot express, the prompts are module methods, so a project extends them like any other:
generatePrompt returns { system, messages } — the options apos.ai.generate is called with, alongside the generation options. Override generateSuggestion to take over the call itself.
Customizing the Interface
Custom Icons and Labels
You can customize the icon of the button used to trigger the assistant in the SEO Assistant module. The new icon and optional label and class properties are passed through the triggerAssistantButton option:
By using the class blue-yellow, you can add the following CSS selector to customize the trigger assistant button.
Add custom CSS for button styling:
Meta Label Position
You can position the meta label associated with the icon on the left (default) or right side.
The label text itself is the triggerAssistantButton label option, described in Custom Icons and Labels above.
Migrating from 1.x
Version 2 moves the assistant onto the Apostrophe AI engine (apos.ai), configured once and shared by every AI feature in the project. The OpenAI client this module used to carry is gone, along with its provider registry.
If the engine is already configured for another feature, only step 2 applies to you.
1. Configure the engine. Add a provider to app.js:
The openai entry reads APOS_OPENAI_KEY. To keep the OPENAI_API_KEY variable you already have, name it in the entry instead of renaming the variable:
2. Remove @apostrophecms-pro/seo-assistant-openai from app.js, and delete modules/@apostrophecms-pro/seo-assistant-openai/ if your project has a copy of it. The module still exists so that an existing entry does not fail the boot, but it does nothing beyond saying so.
3. Remove the provider option from @apostrophecms-pro/seo-assistant. It named a provider module, and no longer does anything. The name is now the engine's: set provider and model together to pin one model, as described in Generation Options.
4. Move the model option, if you set one. It lived on the OpenAI module; the equivalent is an effort level, or a provider and model pair, on @apostrophecms-pro/seo-assistant.
A misconfiguration left over from 1.x is reported when the site starts, with the configuration to paste — nothing fails silently or waits until an editor clicks.
Custom providers
The registerProvider registry is gone: the engine decides which service answers, and the assistant asks it. A custom provider module written against the 1.x interface has two paths forward, depending on what it did:
- A different AI service belongs in the engine, as a provider adapter — it then serves every AI feature, not just this one.
- Different prompts or a different call is now a method override on this module: see Customizing the Prompts.
Note that generatePrompt changed shape along the way. It returned an array of chat messages; it now returns { system, messages }, the options the engine is called with, and the page context and the editor's instruction travel as a single user message rather than two.
Made with ❤️ by the ApostropheCMS team. Ready to transform your SEO workflow? Upgrade to ApostropheCMS Pro today! ⚡