
Pages and page types
Every page in an Apostrophe website is assigned a "page type". The page type tells Apostrophe what template to use to render the page and what configuration to apply. Configurations will often at least include the field schema for the page type.
Creating a page type
Apostrophe core only includes a "Home page" type with some basic default content options. You will likely need your own page types, which you create by adding modules that extend @apostrophecms/page-type and instantiating them in app.js. You can read more about using extend in our section on module configuration.
module.exports = {
  extend: '@apostrophecms/page-type'
};require('apostrophe')({
shortName: 'my-website',
modules: {
'default-page': {}
}
});If we add a string field for the subtitle and an area field for rich text and images, the Default page type would look like:
module.exports = {
  extend: '@apostrophecms/page-type',
  fields: {
    add: {
      subtitle: {
        type: 'string'
      },
      main: {
        type: 'area',
        options: {
          widgets: {
            '@apostrophecms/rich-text': {},
            '@apostrophecms/image': {}
          }
        }
      }
    },
    group: {
      basics: {
        fields: ['title', 'subtitle', 'main']
      }
    }
  }
};See the field schema page for more on configuring fields.
TIP
We can add functionality to the default home page type by adding a configuration file for it at modules/@apostrophecms/home-page/index.js. Add new fields to it as in the example above and this core page type will be ready for additional content possibilities. Or it will be once we update its page template... See below.
Page template essentials
Each page type requires a template. The only exception to that rule is if a page type extends another page type that already has a template.
Standard Apostrophe page type setup applies here — the module and field schema above work the same regardless of template language. Two differences apply once you write the template: write it as .jsx instead of .html, and it extends the site layout by passing named slots as props to <Extend> instead of using {% block %}.
Page templates are added in a views directory for the page type as page.jsx. The template for the previous example's default page would be modules/default-page/views/page.jsx:
/* modules/default-page/views/page.jsx */
export default function({ page }, { Area, Extend }) {
  return (
    <Extend
      templateName="layout"
      main={
        <>
          <header>
            <h1>{page.title}</h1>
            {page.subtitle && <p>{page.subtitle}</p>}
          </header>
          <Area doc={page} name="main" />
        </>
      }
    />
  );
}
<Extend templateName="layout" main={...} /> extends layout.jsx (or layout.html in a project still on Nunjucks — the two are interchangeable targets for <Extend>), filling the layout's main slot the same way {% block main %}{% endblock %} would in Nunjucks. See Writing a layout in JSX for the layout side, including the transitional shape while a layout is still Nunjucks.
For the rest of the mechanics on display above — page data arriving as the template function's first argument (page.title instead of data.page.title), the Area component, conditionals like page.subtitle && <p>…</p>, and debugging with apos.log() — see JSX templates, which covers the full helper set once rather than page by page. We'll explore areas more in the areas guide.
TIP
To overwrite the home page type template, create a template file for it at modules/@apostrophecms/home-page/views/page.jsx and add template markup.
Activating page types
There is one more step to make a page type available to use: You'll need to add it to the core page module's type option. This configures the "Type" field for pages.
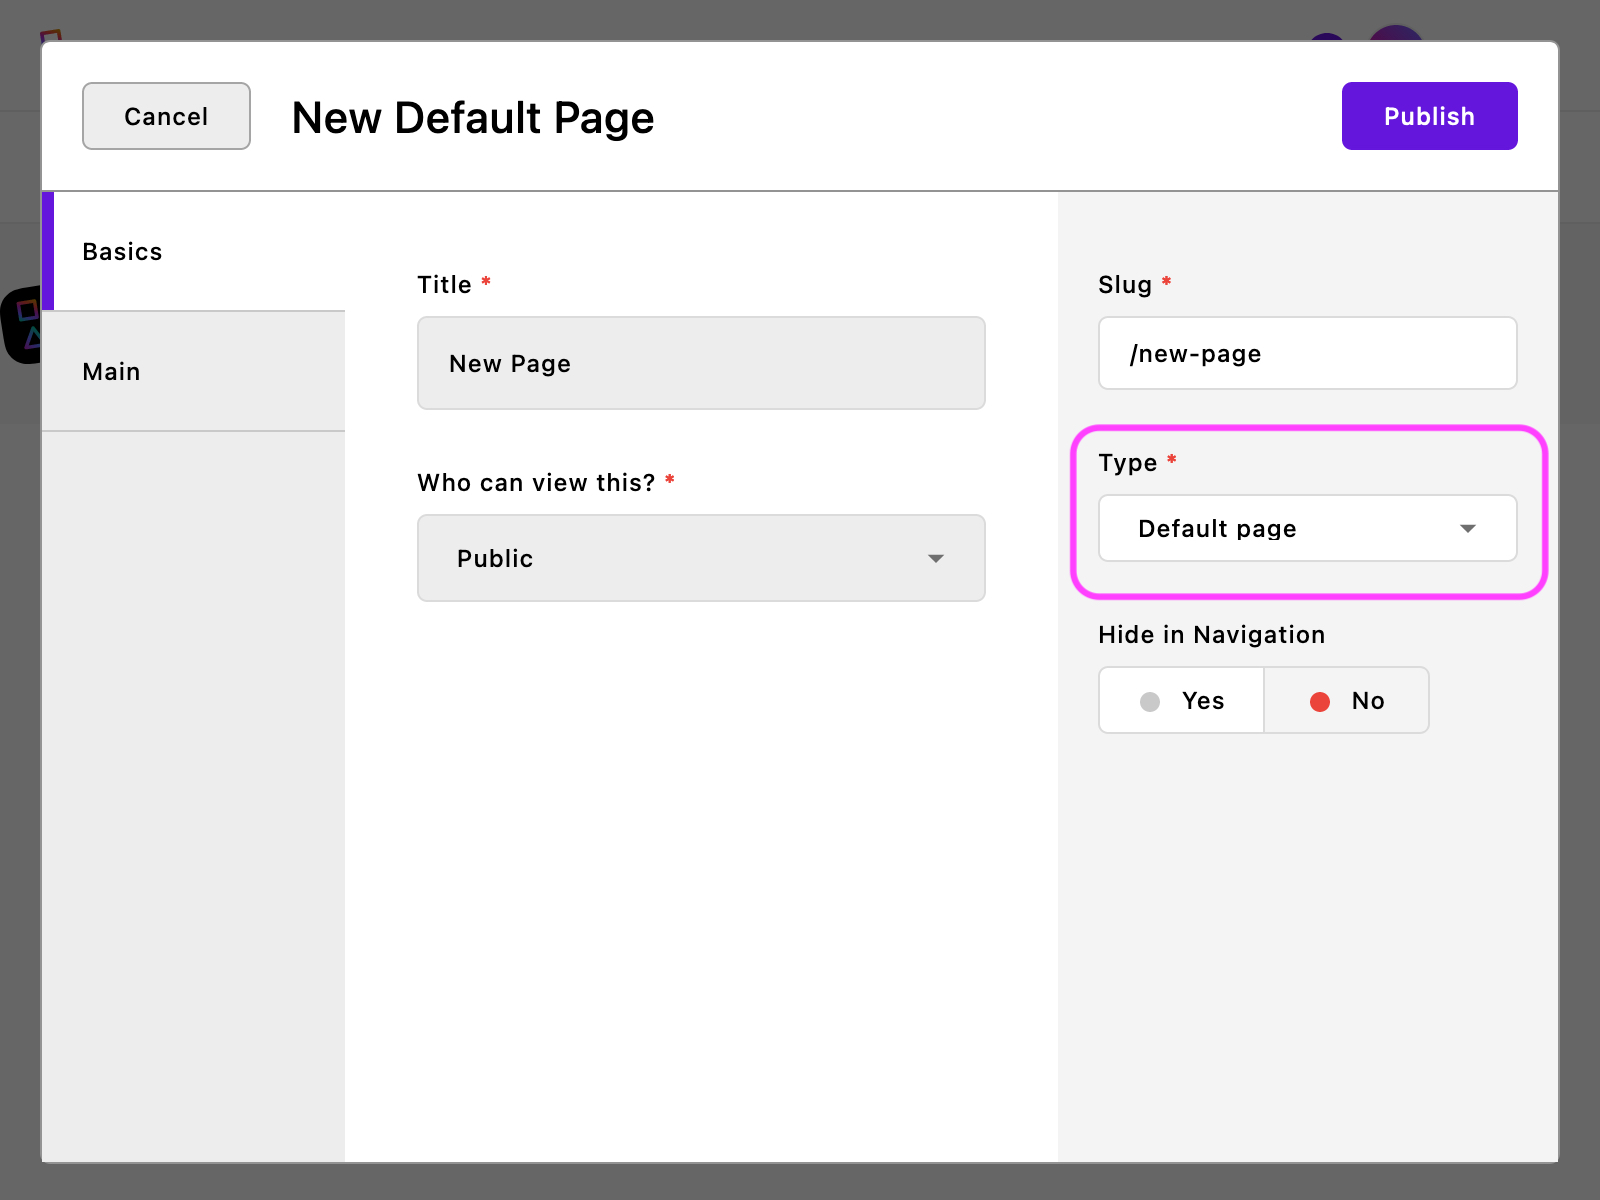
This is a core module option, but you can add your own configuration by giving it an index.js file in your project: modules/@apostrophecms/page/index.js. You'll then configure it's types option with all page types you want to allow.
module.exports = {
  options: {
    types: [
      // 👇 Adding our new page type
      {
        name: 'default-page',
        label: 'Default page'
      },
      // 👇 Optionally including the core "Home page" type
      {
        name: '@apostrophecms/home-page',
        label: 'Home page'
      }
    ]
  }
}Each type needs a name matching the module's name and a label for editors. See the reference section for other core page module options.
Connecting pages with page tree navigation
There are many ways to build navigation with Apostrophe. One is to base site navigation on the page tree. The "page tree" refers to the parent-child relationship between pages. For example, the home page is the parent of all top-level pages, which may have subpages of their own.
Pages can be organized into a page tree hierarchy while adding them or through the page manager interface.
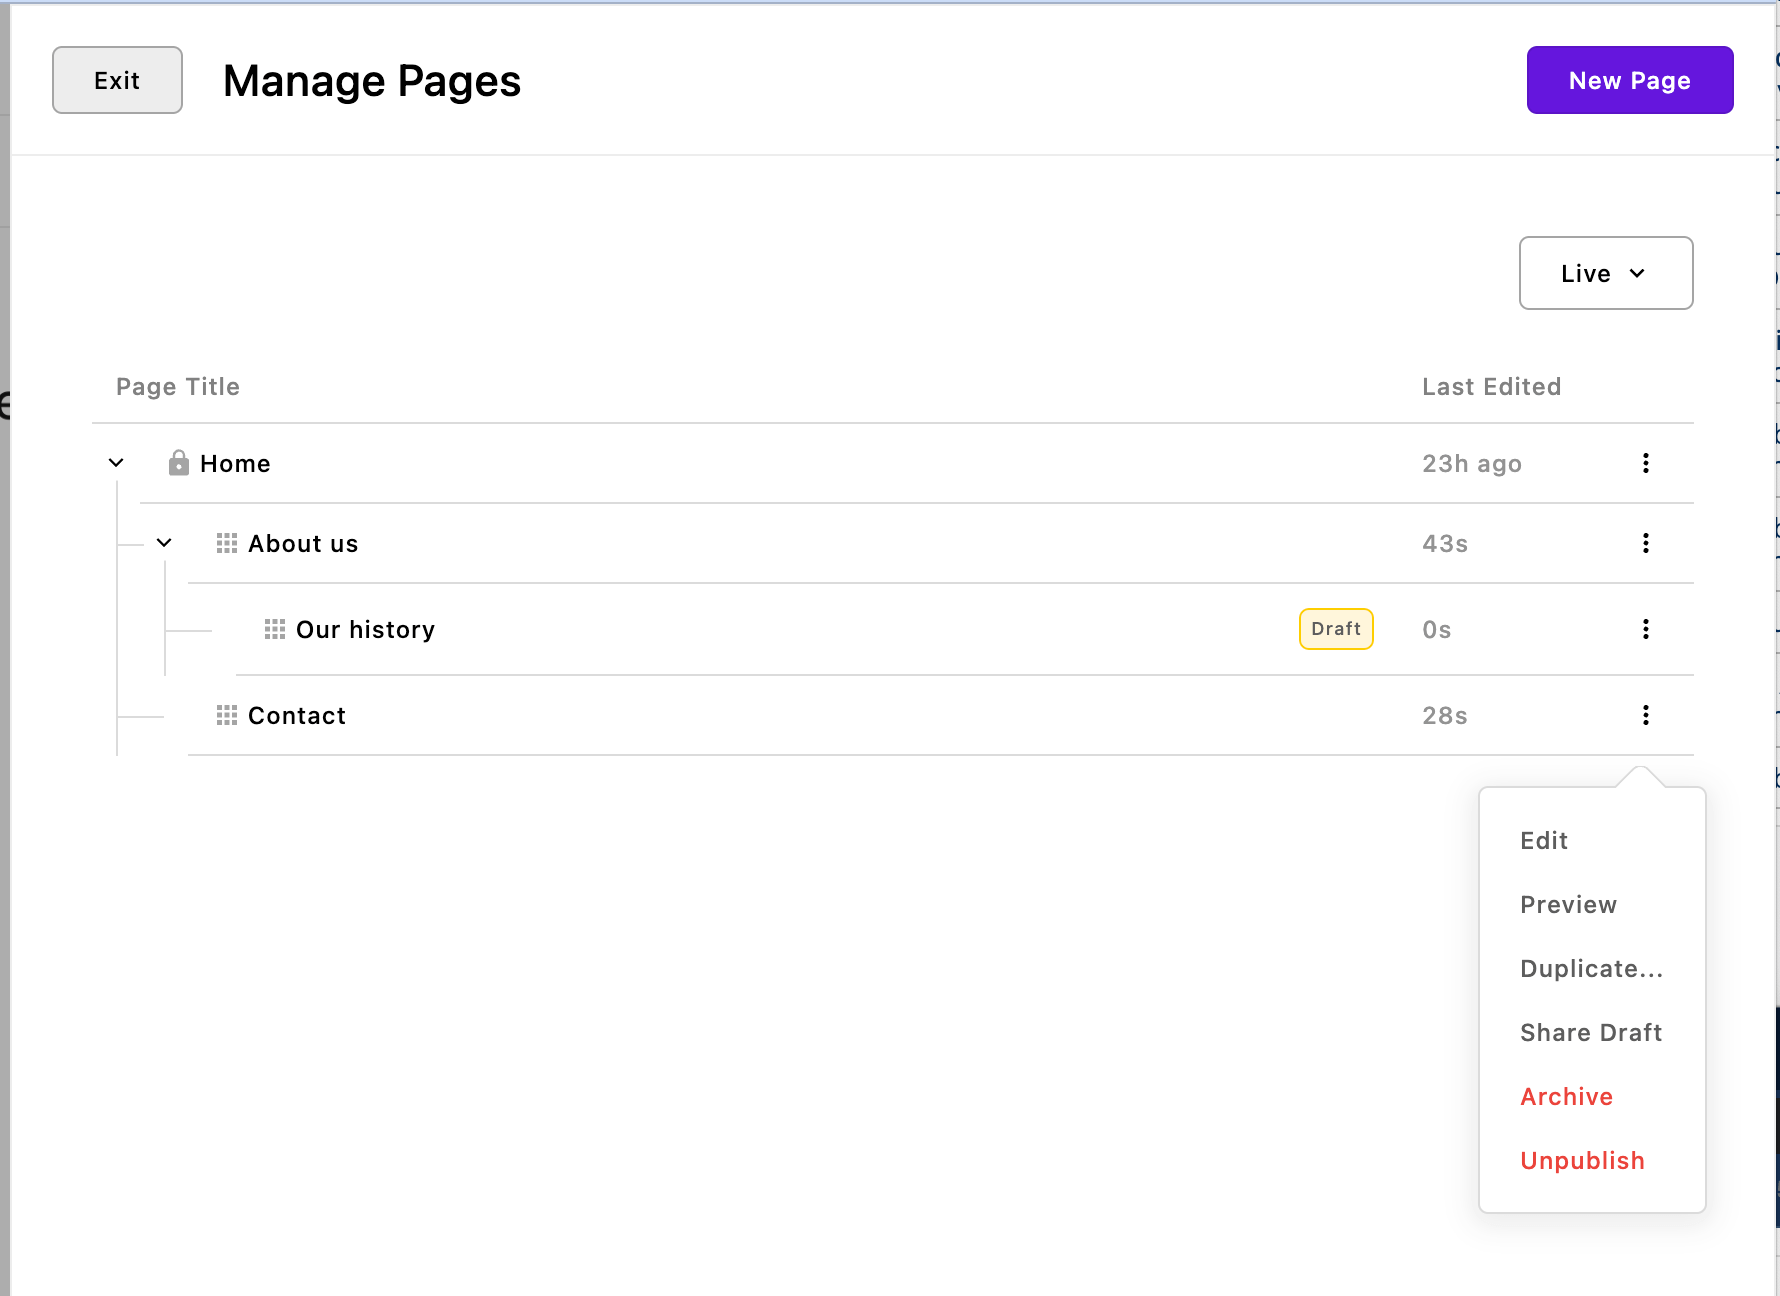
Apostrophe templates have data available to add navigation based on the page tree. This includes:
| Data property | Nunjucks | What is it? |
|---|---|---|
home | data.home | Home page data. It is similar to the data on page, but always references the home page. |
home._children | data.home._children | Page data for pages one level below the home page in the page tree. |
page._ancestors | data.page._ancestors | Page data for the ancestors of the active page, starting with the home page. |
page._children | data.page._children | Page data for pages one level below the active page. |
By default, one level of children are available on each ancestor, as well as on the home page and page.
With that available data, we could construct navigation for the website header. In JSX this is a .map() over the children — and home arrives the same way page does, as a property of the data object passed to every template, layout included:
export default function({ outerLayout, home, main }, { Extend }) {
  return (
    <Extend
      templateName={outerLayout}
      main={
        <div>
          <header>
            <nav>
              <ul>
                {home._children.map((child) => (
                  <li>
                    <a href={child._url}>{child.title}</a>
                  </li>
                ))}
              </ul>
            </nav>
          </header>
          <main>{main}</main>
        </div>
      }
    />
  );
}
In a Nunjucks layout, the same navigation uses a {% for %} loop inside the beforeMain block:
{# views/layout.html #}
{% block beforeMain %}
<div>
  <header>
    {# 👇 Adding our navigation wrapper. #}
    <nav>
      <ul>
        {# 👇 Referencing `data.home._children` and looping over them. #}
        {% for page in data.home._children %}
          <li>
            <a href="{{ page._url }}">{{ page.title }}</a>
          </li>
        {% endfor %}
      </ul>
    </nav>
  </header>
  <main>
{% endblock %}
This is looping over the home page's child pages, printing their URLs and titles into links. This is simply one way to add navigation using the page data in templates.